27
DESIGINING A STAMP (Stampcreator P-touch Editor)
Advanced Steps
Importing graphics from a scanner, digital camera, or other clip art source
1 Save the graphic image taken from the scanner, digital camera, etc., as
one of the file formats Stampcreator P-touch Editor supports.
Bitmap file (bmp, dib)
JPEG file (jpg, jpeg)
Uncompressed TIFF file (tif)
ICON file (ico)
Windows Meta file (wmf, emf)
PNG file (png)
GIF file (gif)
2 Click the Image icon.
The same dialog box can be displayed by selecting the From File com-
mand in the Picture sub-menu of the Insert menu.
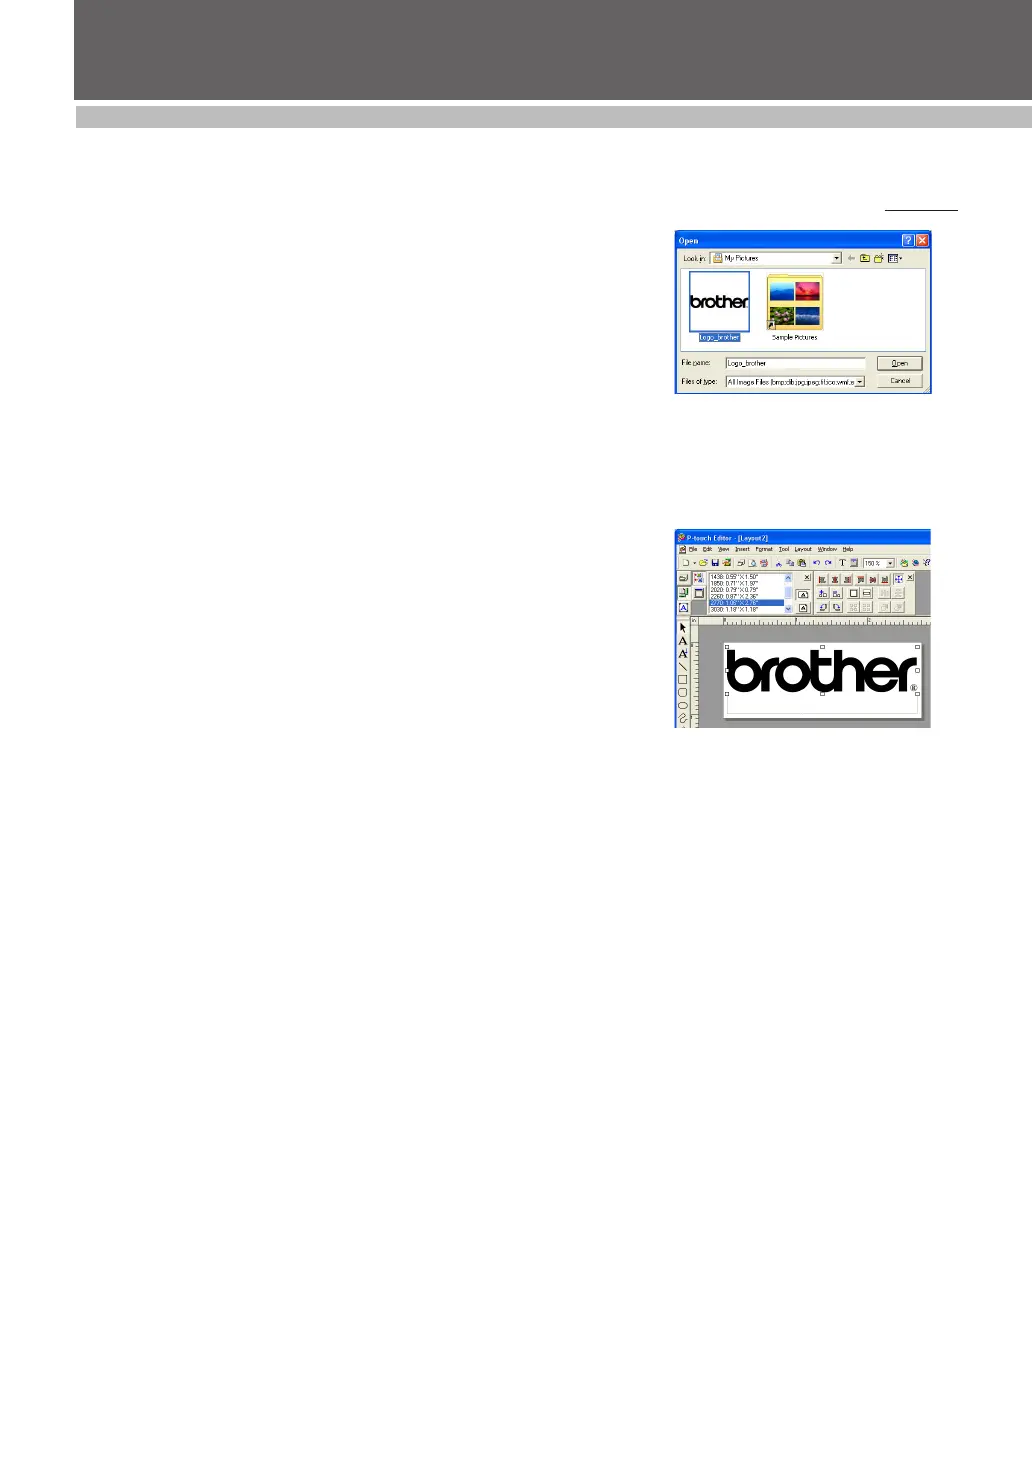
3
Select the folder and saved file, and then click the OK button (see figure 1).
• The selected image appears in the layout area (see figure 2).
• Images in supported formats can easily be imported by using the Copy
and Paste commands in addition to the method described above.
☞ NOTE: Saving photo images as JPG reduces the file
size.
You can import BMP, DIB, JPG, JPEG, TIF, ICO, WMF, EMF, PNG and
GIF files directly into the Stampcreator P-touch Editor. For other graphic
file formats, use a graphic file conversion software package to change
the file format before importing the file into the Stampcreator P-touch
Editor.
☞ NOTE: Stampcreater P-touch Editor can not import
images saved in unsupported file formats.
Enlarging/shrinking imported images
1 With the Select tool, click the image. Handles appear around the image.
2 Drag a corner handle to adjust the image to the desired size.
☞ NOTE: If the scanned image is unsatisfactory,
rescan with a resolution of 600 dpi and
import the image again.
Adding imported images to the Stampcreator P-touch Editor clip art list
1 After importing graphics and making the necessary corrections, use the
Select Tool to double-click the image to display the Image Properties
dialog box.
• The image is shown in the preview box of the dialog box.
2 Click the Add to Clip Art button.
3 Select the category where you would like to add the image, and then
click the OK button.
• The selected image is registered in the Stampcreator P-touch Editor clip
art list.
• To open an added image, refer to the section “Creating stamps with clip
art images” on page 26.
Moving imported images
1 With the Select tool, click the image.
2 Drag the image to the desired location.
Deleting imported images
1 With the Select tool, click the image.
2 Press the Delete key on the keyboard.
figure 1
figure 2
 Loading...