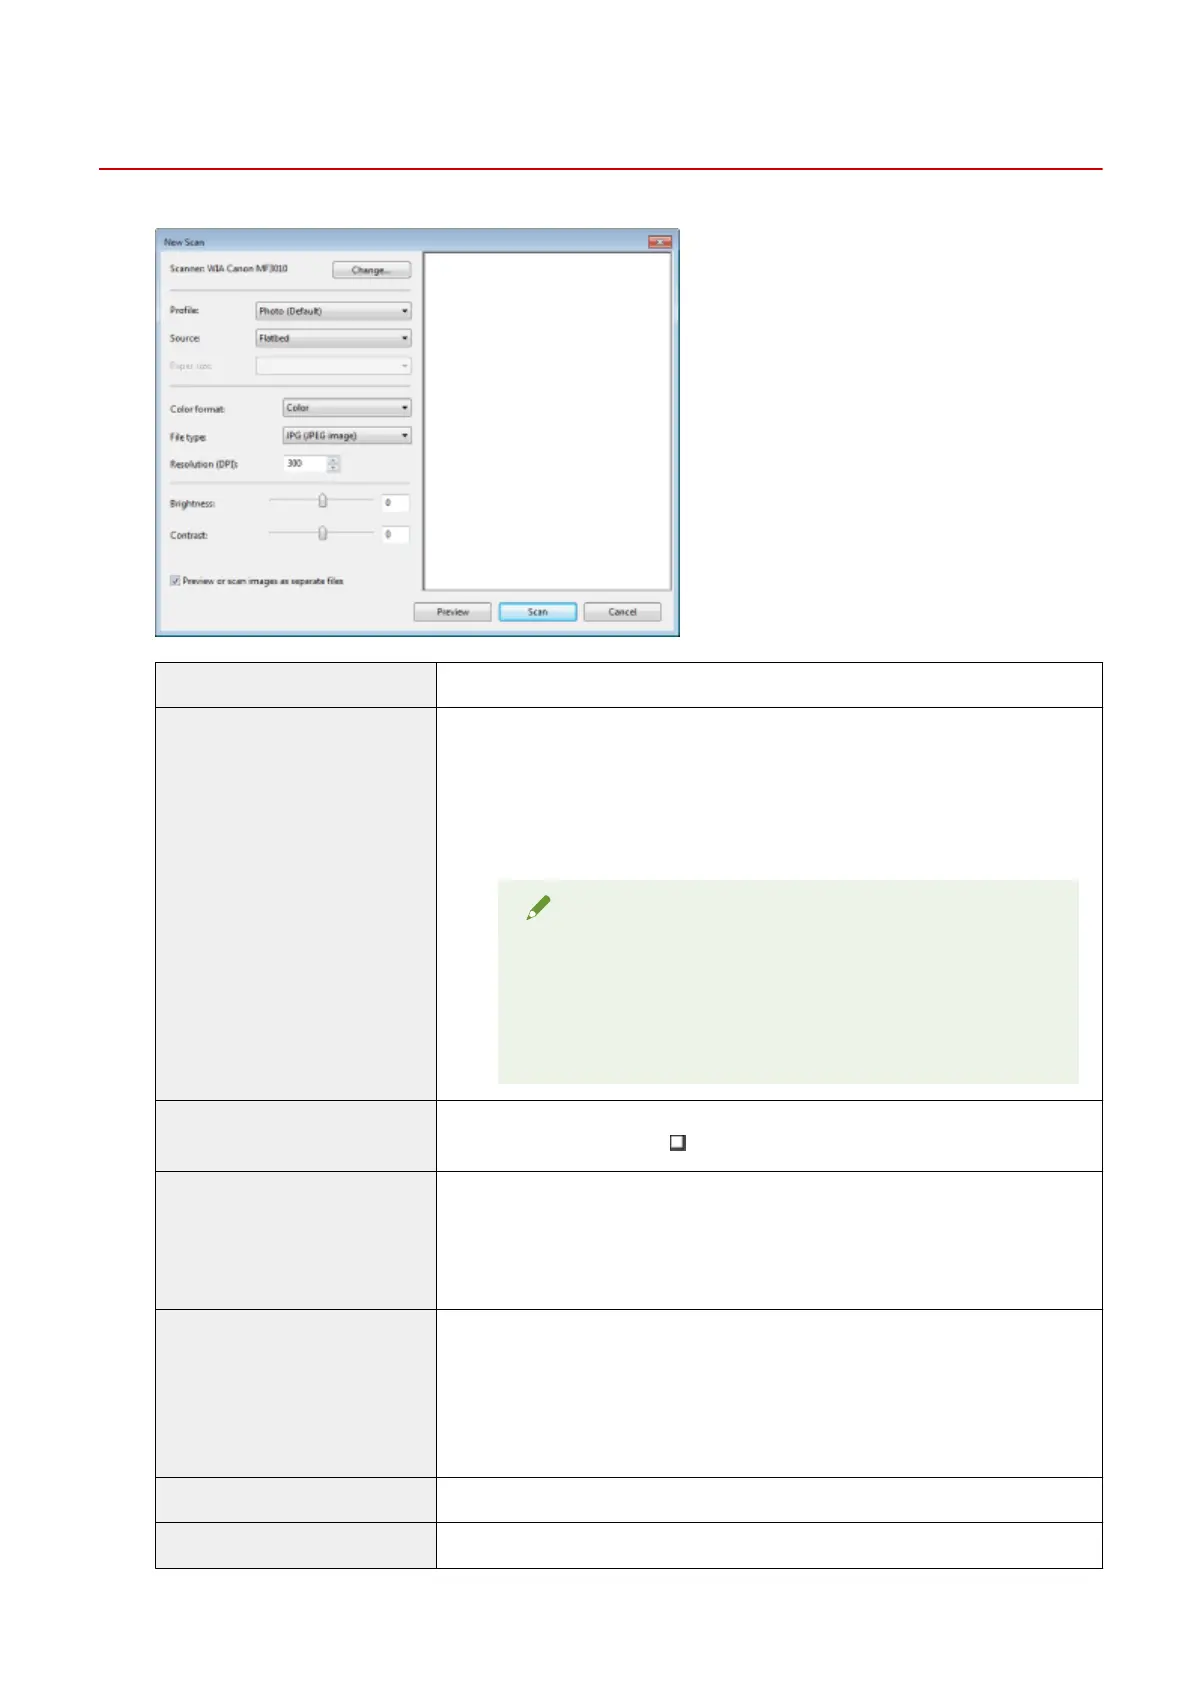
[New Scan] Dialog Box
85RS-034
[Scanner] Display a list of available scanners. Click [Change] and select the scanner.
[Prole]
Select one of the following document types.
● [Add pr
ole]
● [Documents]
● [Last used settings]
● [Photo (Default)]
NOTE
When [Add prole] is selected
Add new proles in the [Add New Prole] dialog box. Once these
proles have been added, you can delete or edit these proles
using [Scan Proles] in the [Scanners and Cameras] folder.
See the Windows documentation for more information.
[Source]
Select the location where documents are set.
Click [Pr
eview], and the drag [
] to specify the scanning area.
[Color format]
Select one of the following color types.
● [Color]
● [Gr
ayscale]
● [Black and white]
[File type]
Select one of the following le formats.
● [BMP (Bitmap image)]
● [JPG (JPEG image)]
● [PNG (PNG image)]
● [TIF (TIFF image)]
[Resolution (DPI)] Specify the scanning resolution in dpi (50 to 600 dpi).
[Brightness] Specify the brightness (-100 to 100).
Scan
121
 Loading...