10
The individual relays can be configured to be on (closed) or off (open) at weights under the preset
weight and switch at the preset weight from on-to-off or off-to-on by setting the under weight
condition to on or off during setup and calibration or setup review.
EXAMPLE: Undr1=on. . . PWC1 relay is on (closed) for weights under the preset weight and off
(open) for weights equal to or over the preset weight.
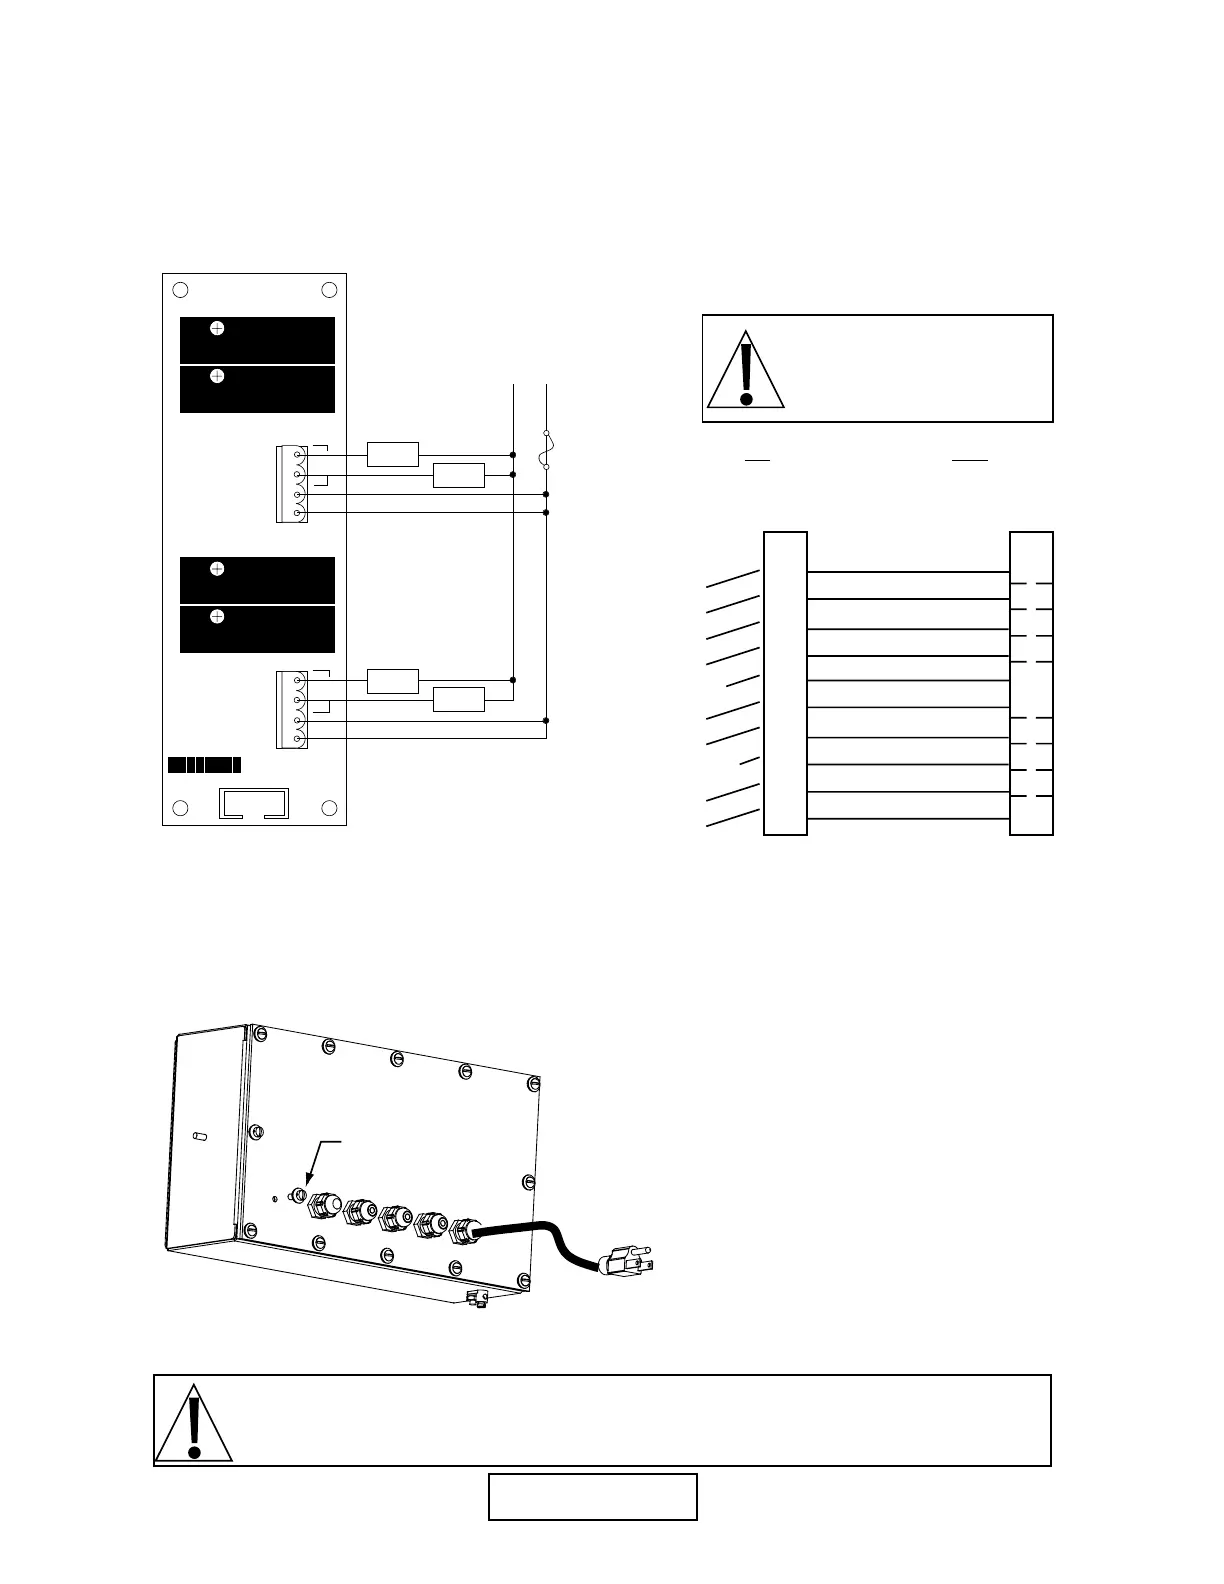
748P MAIN BOARD (P11) TO RELAY BOARD (WIRE) CONNECTION
Connect the PWC cable wires to the printed circuit board connector P11.
figure no. 6 -
PWC relay board
K4K3K2K1
L1 L1 3/7 4/8L1 L1 1/5 2/6
PWC1
PWC2
PWC3
PWC4
PWC5
PWC6
PWC7
PWC8
P1
1
PWC
PWC
L2 L1
LOAD
3.0A MAX
LOAD
3.0A MAX
LOAD
3.0A MAX
LOAD
3.0A MAX
8539-C062-0A
(28-240 VAC)
Fuse
3-12 Amp
User Supplied
PWC Number
3
4
2
1
OPEN
5
8
GROUND
7
6
1Brown
2 Red
3 Orange
4 Yellow
5 Green X
6 Blue
7 Violet
8 Green
9 White
10 Gray
3
4
2
1
5
8
9
7
6
P11
(Main Board)
Terminal
Number
P1
(Relay
Board)
SETUP AND CALIBRATION
Your 748P indicator has been thoroughly tested and calibrated before being shipped to you. If you
received the indicator attached to a scale, calibration is not necessary. If the 748P is being
connected to a scale for the first time or recalibration is necessary for other reasons, proceed as
indicated.
The calibration switch is located on the enclosure
rear panel. You may gain access to this switch simply
by removing the calibration switch access screw on
the rear panel. The screw location is identified in
figure no. 7.
Once you have located the calibration
switch proceed with the calibration
instructions. A summary of the calibration
process is shown in graphical form at the
end of this section.
CAUTION: The membrane keyboard is not to be operated with pointed objects (pencils,
pens, fingernails, etc). Damage to keyboard resulting from this practice will NOT be
covered under warranty.
0 = no 1 = yes
figure no. 7 -
calibration access screw
location
Access
Screw
NOTE! All relays are the
normally open type that will
open when power to the
indicator is lost.
 Loading...