8
NOTE: The Remote VFD Keypad is a field--installed
option. It is not included as part of the Factory installed
VFD option.
See “Variable Frequency Drive (VFD) Installation, Setup
and Troubl eshooting Supplement” for wiring schematics
and performance charts and configuration.
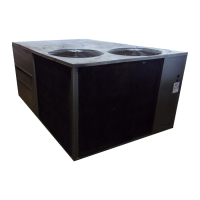
See Figs 10, 11 and 12 for locations of the Va riable
Frequency Drive (VFD) as mounted on the various 50HC
models.
VARIABLE
FREQUENCY
DRIVE (VFD)
C11528
Fig. 10 -- VFD Location for size 08--09
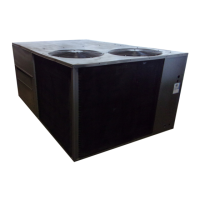
VARIABLE
FREQUENCY
DRIVE (VFD)
C11529
Fig. 11 -- VFD Location for size 12
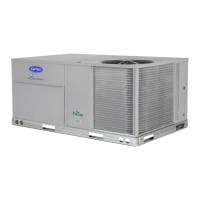
VARIABLE
FREQUENCY
DRIVE (VFD)
C11530
Fig. 12 -- VFD Location for size 14
ADDITIONAL VARIABLE FREQUENCY
DRIVE (VFD) INSTALLATION AND
TROUBLESHOOTING
Additional installat ion, wiring and troubleshooting
information for the Variable Frequency Drive c an be
found in the following ma nuals: “Variable Frequency
Drive (V FD) Installation, Setup and Troubleshooting
Supplement .”
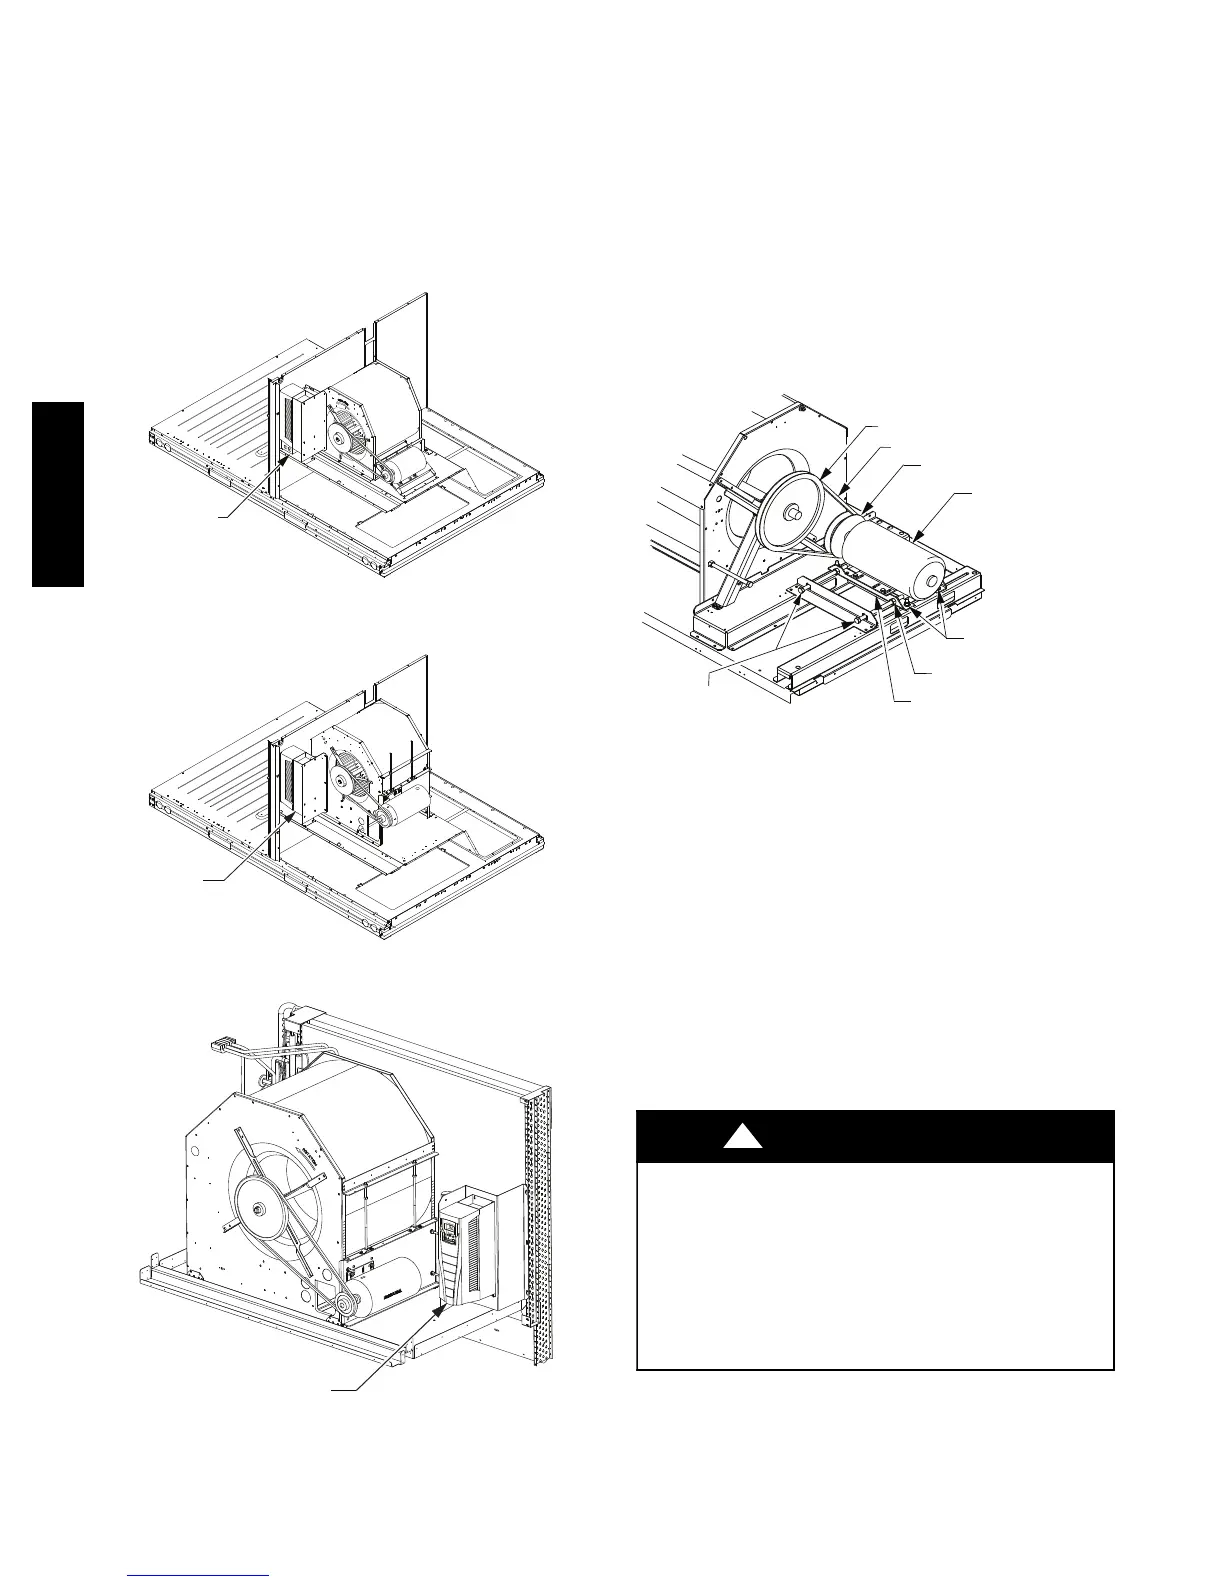
MOTOR
When replacing the motor, use the following steps. See
Fig. 13.
BLOWER PULLEY
V-BELT
MOTOR PULLEY
MOTOR
MOTOR MOUNTING
BRACKET BOLTS (4)
MOTOR MOUNTING
BRACKET (2)
JACK BOLT JAM NUT (2)
JACK BOLT (2)
C12034
Fig. 13 -- Replacing Belt Driven Motor
Replacing the Motor
Use the following steps to replace the belt--driven motor.
1. Turn off all electrical power to the unit. Use approved
lockout/tagout procedures on all electrical power
sources.
2. Remove cover on motor connection box.
3. Disconnect all electrical leads to the motor.
4. Loosen the two j ack bolt jamnuts on the motor
mounting bracket.
5. Turn two jack bolt s counterclockwise until motor
assembly moves closer to blower pulley.
6. Remove V--belt from blower pulley and motor pulley.
EQUIPMENT DAMAGE HAZARD
Failure to follow this CAUTION can result in
premature wear and damage to equipment.
Do not use a screwdriver or a pry bar to place the new
V--belt in the pulley groove. This ca n cause stress on
the V--belt and the pulley resulting in premature wear
on the V--belt and damage to the pulley.
CAUTION
!
7. Loosen the four mounting bracket bolts and lock
washers.
8. Remove four bolts, four flat washers, four lock
washers and four nuts atta ching the motor mounting
50HC
 Loading...