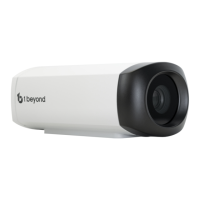
51 • IV-CAMA3-20-N-W-1B, IV-CAMA3-20-N-SLVR-1B, IV-CAMA3-20-W-1B, and IV-CAMA3-20-
SLVR-1B
Product Manual — Doc.
9323C
All 1Beyond cameras feature an integrated on-screen menu which can be accessed by pressing Menu in
the PTZ controller section of 1BeyondCameraManager. The menu is then displayed overlaid on the
camera’s video feed.
Here you can adjust various settings to tailor the camera’s performance to the setup.
Navigate the menu using the directional buttons in the software. In the software, press Enter to confirm
a menu selection, and use the left and right directional buttons to adjust the selected parameter.
To return to a previous menu page, press Return.
Pressing the Menu button on any control device while anywhere in the menus will close the menu
entirely.
CAUTION: Always stop tracking before entering the OSD menu as it may cause random changes in
system settings that can severely impact image quality.
NOTE: Restoring the settings to factory default will not reset Address, Protocol, Baud Rate, Video
Format and Mount settings. Likewise, tracking settings will remain unaffected.
OSD Menu Tree
VIDEO SHARPNESS 0 - 15 Increase / decrease video sharpening.
BRIGHTNESS 0 - 14 Adjust video brightness.
CONTRAST 0 - 14 Adjust video contrast
GAMMA MODE 0 - 4 Adjust video gamma correction.
2DNR LEVEL OFF, 1 - 5 2D Noise Reduction level.
3DNR LEVEL OFF, 1 - 5 3D Noise Reduction level.
WIDE DYNAMIC OFF, 1-5 Adjust intensity of dynamic range extension.
FV BRIGHTNESS 0 - 14 Adjust Wide-Angle Brightness.
FV LDC LEVEL OFF, 1 - 10 Set level of fisheye correction for wide-angle
camera.
 Loading...