H-Class 91
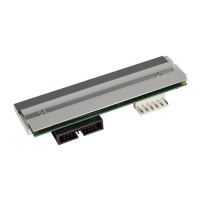
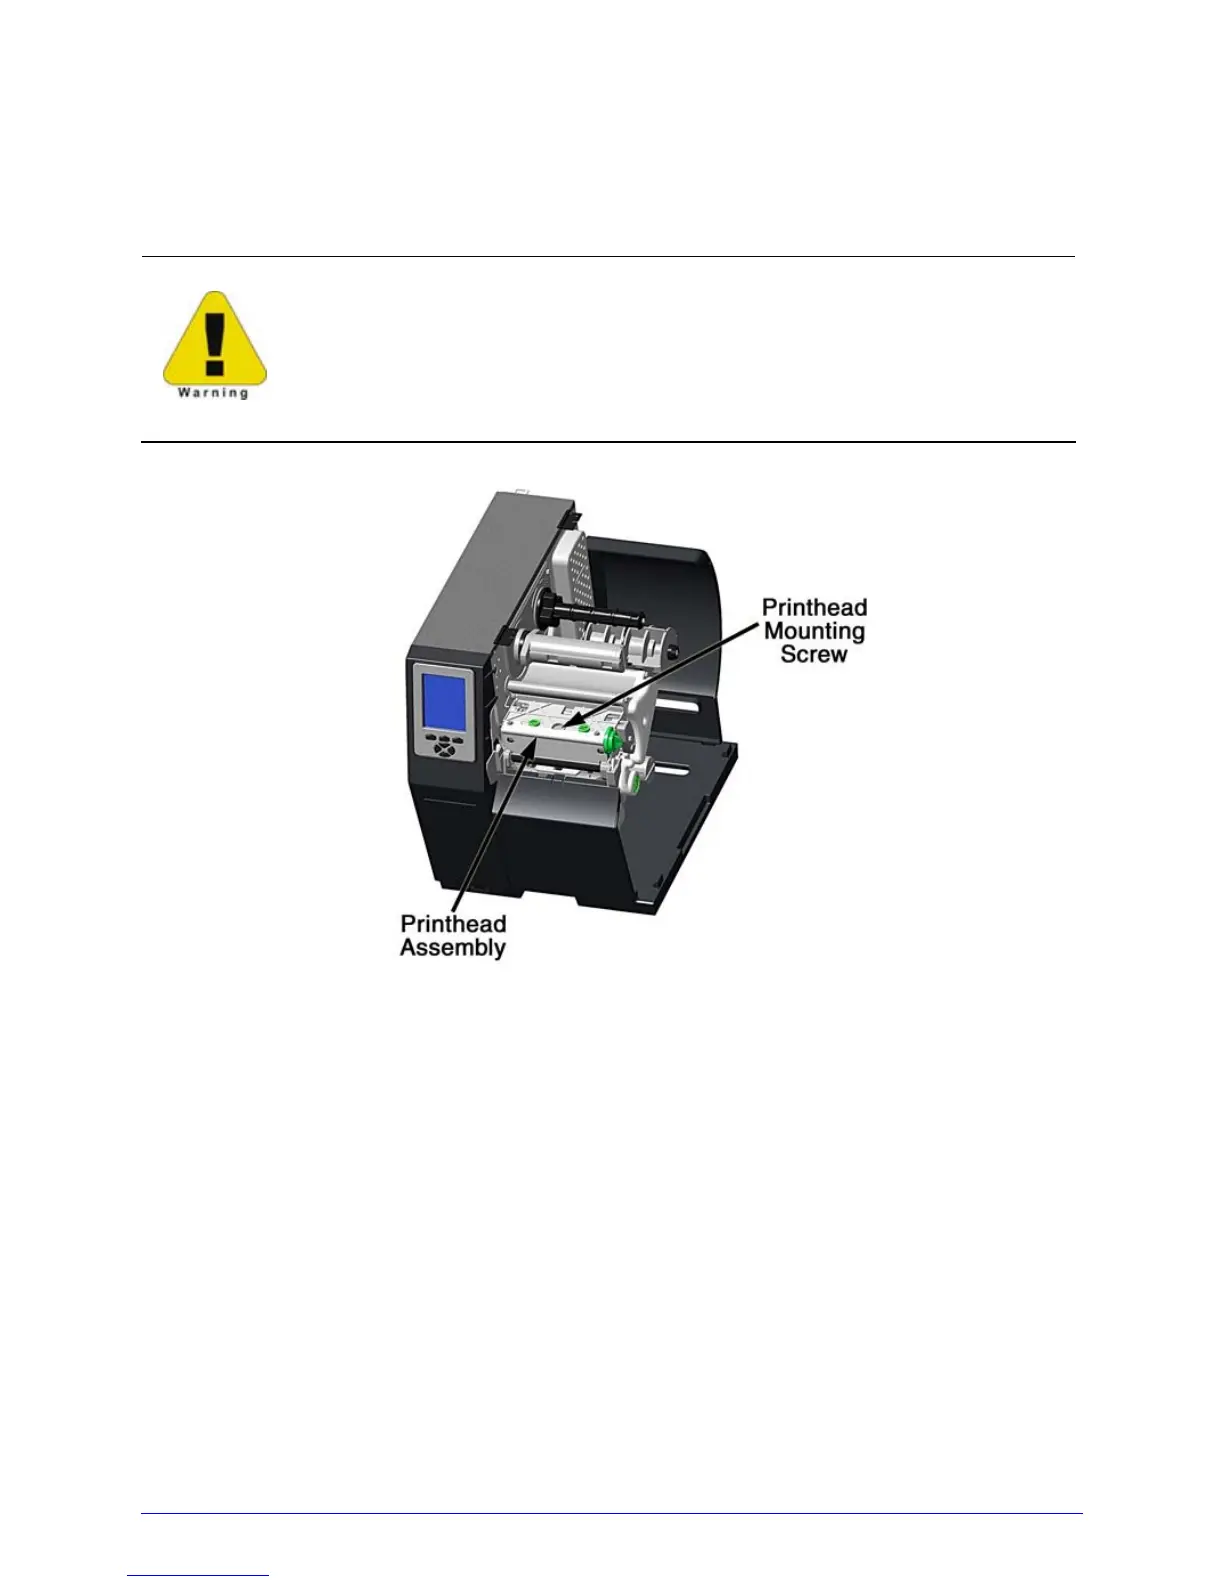
5.5 Printhead Removal and Replacement
If the printhead needs to be replaced, follow the procedure below:
• Only use Datamax IntelliSEAQ™ printheads.
• Printheads are fragile devices; handle with extreme care and never use
sharp objects on the surface.
• If you have questions, contact a qualified technician or Datamax
Technical Support before proceeding.
A. Turn OFF the power switch then touch a bare metal printer surface (e.g., the frame) to
discharge any static electricity present on your body.
B. Unplug the printer and open the access cover. If ribbon is installed, remove it.
C. Lower the Printhead Assembly and loosen the Printhead Mounting Screw. ( H-8308X
models feature two Printhead Mounting Screws; loosen both.)
D. Carefully raise the Printhead Assembly. Grasp the printhead then disconnect the two
cables and remove the printhead.
E. Position a new printhead under the Printhead Assembly and connect the previously
removed cables.
F. After ensuring that the printhead cables are not pinched, place the printhead onto the
locating pins under the Printhead Assembly and secure it by tightening the Printhead
Mounting Screw(s). [Do not over-tighten the screw(s)].
 Loading...