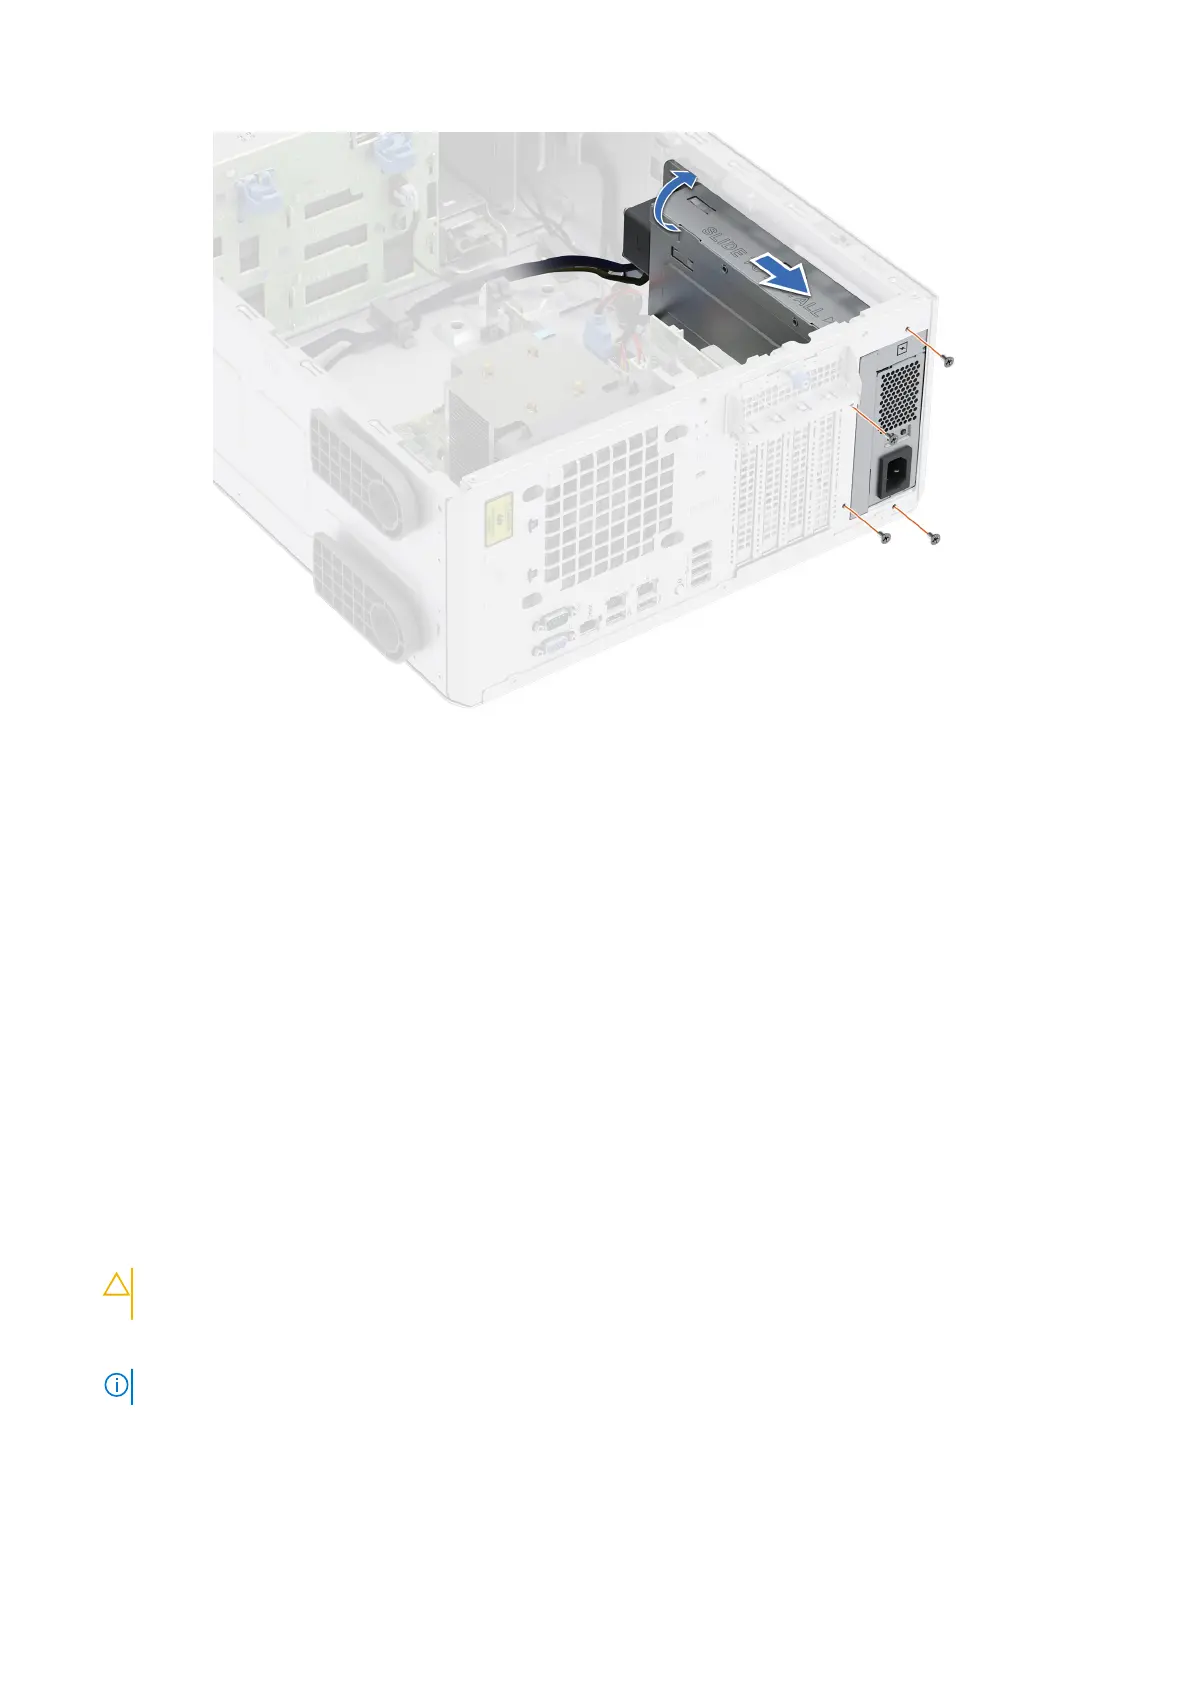
Figure 84. Installing the PSU cage
Next steps
1. Connect all the power cables from the PSU to the system board and the drive backplane.
2. Route the power cables properly and secure them with cable clips.
3. Connect all the power cables from the PSU to the system board and the drive backplane.
4. Follow the procedure listed in After working inside your system.
Power interposer board
This is a service technician replaceable part only.
Removing the power interposer board
Prerequisites
1. Follow the safety guidelines listed in Safety instructions.
2. Follow the procedure listed in Before working inside your system.
3. Remove the power supply units.
CAUTION:
To prevent damage to the power interposer board, you must remove the power supply units from
the system.
4. Remove the air shroud.
5. Disconnect the power cables from the power interposer board (PIB).
NOTE: Observe the cable routing while removing from PIB.
Steps
To remove the power interposer board (PIB), holding the plunger slide the PIB towards the rear of the system to disengage PIB
from the hooks on the system.
94
Installing and removing system components
 Loading...