6
S-102
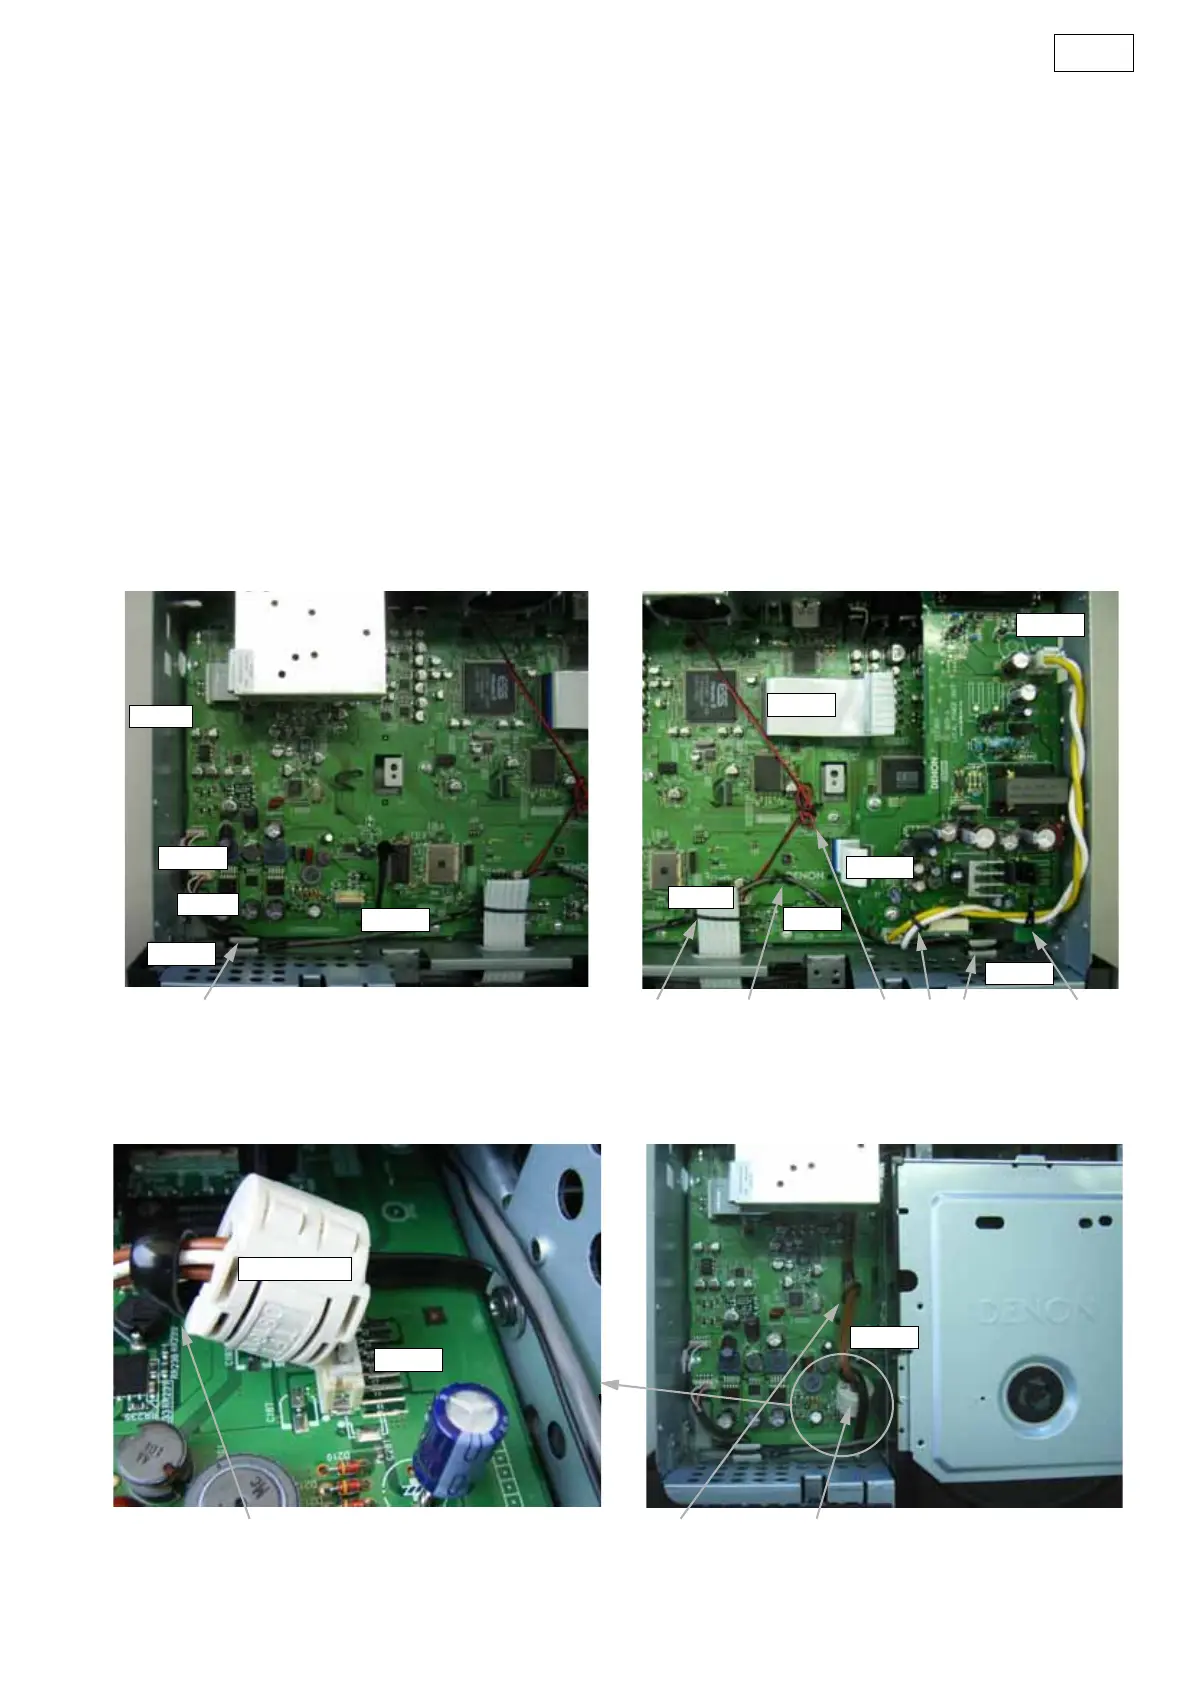
ワイヤー整形図
調整や部品の交換等により、ワイヤー類の結束をはずしたり移
動させた場合には、それらの作業が完了した時点でワイヤーの
整形をおこなってください。正しく整形されてないとノイズ発
生の原因となることがあります。
1. ADV-S102
① CW051 5P コネクターコードをフロントシャーシにクラン
プバンドで結束する。
② CW052 5P コネクターコードをフロントシャーシにクラン
プバンドで結束する。
③ CX031 3P コネクターコードをスタイルピンで基板に固定
する。
④ CW052 5P コネクターコードをスタイルピンで基板に固定
する。
⑤ CX211 の FFC をスタイルピンで押さえこむ。
⑥ CX021 2P コネクターコードを数回捩ってスタイルピンで
2 箇所を固定する。
⑥ CX061 6P コネクターコードをコードホルダーで固定す
る。
⑦ CX061 6P コネクターコードをスタイルピンで基板より浮
かせて固定する。
WIRE ARRANGEMENT
If wire bundles are untied or moved to perform adjustment or
parts replacement etc., be sure to rearrange them neatly as
they were originally bundled or placed afterward.
Otherwise, incorrect arrangement can be a cause of noise
generation.
1. ADV-S102
① Fasten the CW051 5P connector cord to the front chassis
with a clamp band.
② Fasten the CW052 5P connector cord to the front chassis
with a clamp band.
③ Fasten the CX31 3P connector cord to the circuit board with
a style pin.
④ Fasten the CW52 5P connector cord to the circuit board with
a style pin.
⑤ Press the CX211 FFC in with a style pin.
⑥ Twist the CX021 2P connector cord several times and
fasten it twice with a style pin.
⑥ Fasten the CX061 6P connector with a cord holder.
⑦ Float the CX061 6P connector code to the circuit board with
a style pin and fasten.
CX151
CX052
CX051
CX061
CX051
CX301
CX021
CX171
CX211
CX031
CW052
①⑤④③②
⑥
⑥
CX061
Ferrite Cramp
CX061
⑦⑦⑧
 Loading...