Page 37
Connecting the Receiver to the Phone Line
1.
Tip: It’s easier to
set the output
channel from the
opposite TV. For
example, if you are
changing the out-
put on TV1 (nearby
TV), use TV2
(remote TV) to
make the change.
When you save the
changes, simply
remember to
change the chan-
nel on the nearby
TV.
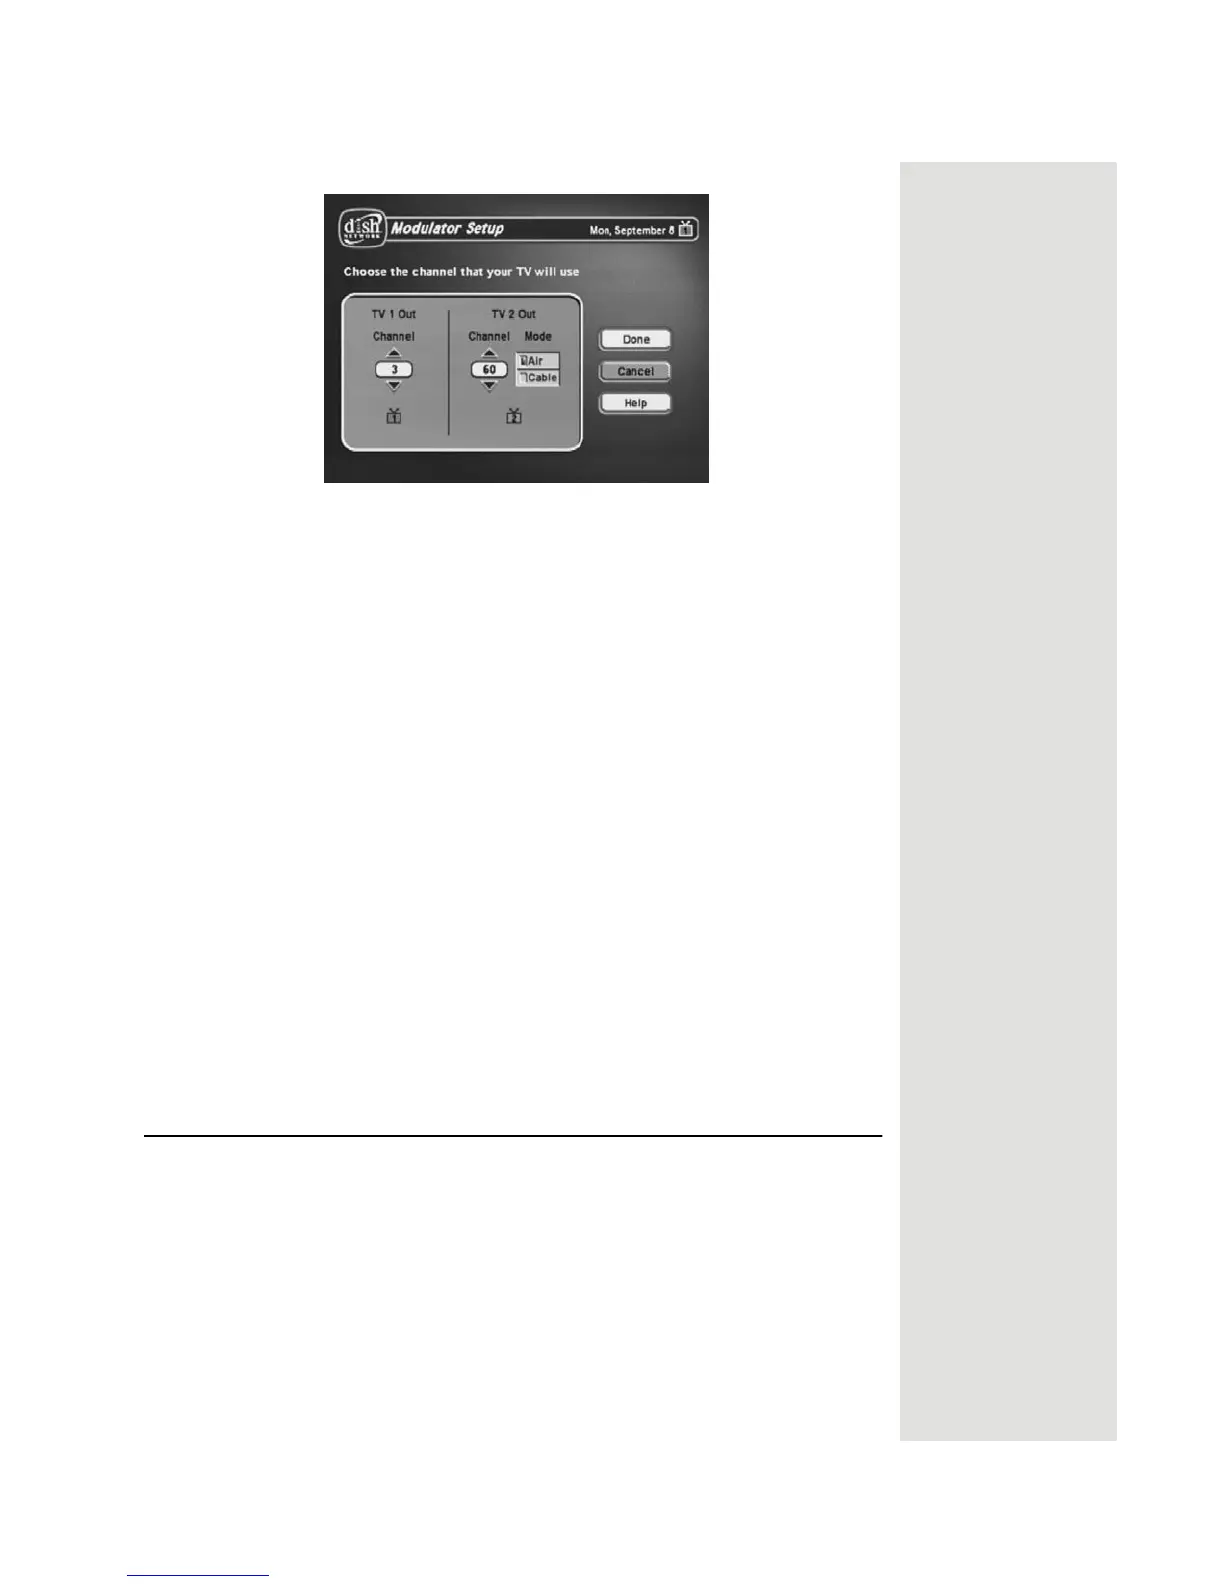
Press MENU-6-1-5 to open the Modulator Setup screen.
2. For TV 1 Out, highlight the number under TV 1 Out. For TV 2 Out, skip to
step 4.
3. Use the UP and DOWN ARROW buttons to change the modulator channel
either
3 or 4. Continue to the next step to set TV 2 Out or skip to step 7 if
you are finished making changes.
4. For
TV 2 Out, select either Air (for off-air channel numbers) or Cable (for
cable channel numbers).
5. Highlight the number under
TV 2 Out.
6. Use the UP and DOWN ARROW buttons to change the modulator channel
to one of the following:
•
Air Mode—Select a channel between 21 and 69.
•
Cable Mode—Select a channel between 73 and 125.
7. Select
Done to save the changes.
8. Change the channel on your TV(s) to match the channel(s) you selected.
9. If desired to remind you of which TV channel to tune to get satellite
Tip: The channel
stickers are located
inside the front
cover of this guide.
programming, place a channel sticker near or on your TV to indicate the
correct channel.
10. If you changed your
TV 2 Out channel, repeat the steps for Programming
the Recover Button for a Remote TV on page 35.
Connecting the Receiver to the Phone Line
You must keep the receiver connected to an active telephone line. Otherwise,
you may not be able to order pay-per-view programs, use all of the DISH Home
Interactive features, or access other services from DISH.
Note: You may be able to use a wireless modem jack. However,
this may not support all the features of this receiver, such as Caller ID.
See www.dish.com for compatible modem products.
Note: If you have a Digital Subscriber Line (DSL), you may have to install a
DSL filter between the receiver’s back panel PHONE JACK and the telephone
wall jack to successfully connect with DISH. You can obtain a filter from your
DSL provider or local electronic parts store.
 Loading...