66 4–20kVA Users Guide P-164000669 4–20kVA Users Guide P-164000669—Rev 09
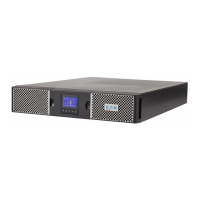
15. The UPS front panel display automatically turns on whenever input power is present and at least one
power module is installed. Set up the initial operating parameters through the front panel display (see “
6.5 Initial Startup Parameters ” ).
16. If applicable, test proper operation of optional external control signals and computer communication before
connecting the load.
17. If there are receptacles on the UPS rear panel, plug the equipment to be protected into the UPS output
receptacles.
NOTE DO NOT protect laser printers with the UPS because of the exceptionally high power
requirements of the heating elements.
18. Turn on the equipment that is connected to the UPS.
19. If there is an external bypass switch, turn it to UPS. Otherwise, close the load distribution circuit breaker
(s).
66..44 SSttaarrttuupp ffoorr UUnniittss iinnssttaalllleedd wwiitthh aa BBPPEE TTyyppee SSwwiittcchh
1. If your unit is wired to an external bypass switch, you must perform a voltage and phase check (Steps 2
through 13). Otherwise, skip to Step 14.
CAUTION
Before operating the bypass switch, use the following procedure to check the wiring for correct installation. To
prevent damage to the load, turn off the main circuit breaker in the load service panel or verify that the load
cannot receive power from the UPS.
2. At the bypass switch, press the red button and turn the switch to UPS.
3. Remove the six screws in the bypass switch front cover and remove the cover to gain access to the
terminal block for voltage measurements.
4. If external battery cabinets are installed, close the DC emergency disconnect switch button on the back of
each external battery cabinet. Insert the switch key supplied with the cabinet into the button and turn
clockwise 1/2-turn. Pull the button out to close the switch. Turn the key back counter-clockwise, and
remove the key.
5. The UPS front panel display automatically turns on whenever input power is present and at least one
power module is installed. Set up the initial operating parameters through the front panel display (see “
6.5 Initial Startup Parameters ” ).
6. Use an AC voltmeter to measure voltages on the terminal block inside the bypass switch cabinet. See
Figure 19 , which shows the terminal numbering for input and output UPS connections.
7. Record your measurements in the following chart. The voltages in the first column should be nearly equal
to the voltages in the second column. If the values differ by more than a few volts, check the terminal
block connections and correct any wiring problems.
AC Line input Measurement AC from UPS Output Measurement
L1 to L2 (11 to 12*) 7 to 8*
N to L1 (10 to 11*) 6 to 7*
N to L2 (10 to 12*) 6 to 8*
* For some installations, there is no connection at terminals 6, 8, 10, or 12.
Startup for Units installed with a BPE Type Switch
 Loading...