5 – 57
Section 5 • Maintenance/Service
VSS/VSM/VSH/VSSH • Installation, Operation and Maintenance Manual • Emerson • 35391SD
CAUTION
Ensure the mating ring (219C) is fully seated against
the shoulder of the compressor shaft. If the mating
ring is not fully seated against the shoulder, the
carbon component of the cup assembly (219B) will
be damaged when the shaft seal housing (218) is
installed. See Figure 5-59.
16. Align slot in mating ring (219C) with drive pin on
compressor shaft. Carefully push mating ring on
while holding onto outside area of mating ring until
mating ring is fully seated against shoulder on com-
pressor shaft. See Figure 5-61.
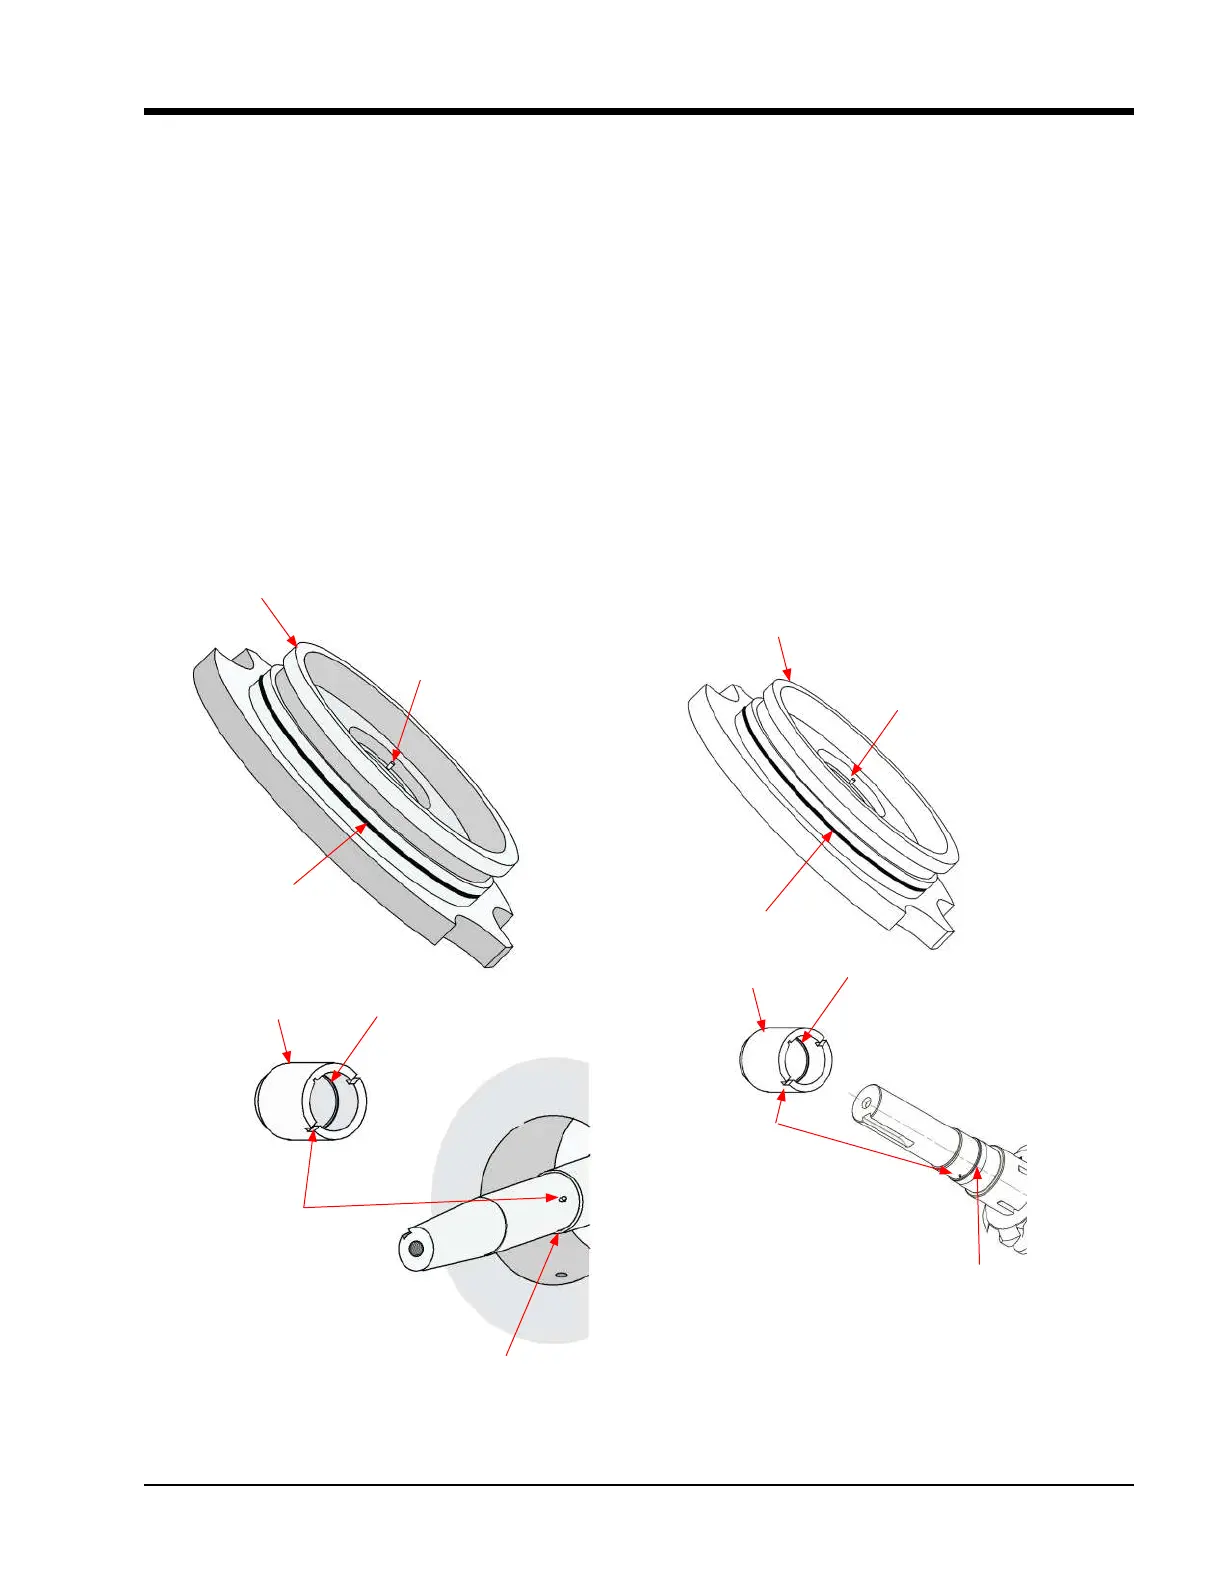
Figure 5-61. Compressor Shaft Seal Installation: Tapered and Straight Shafts
17. Install a new O-ring (260) on the seal housing
(218), making sure the O-ring is placed in the
O-ring groove and not the oil gallery groove. See
Figure 5-61.
18. Lubricate both seal faces with clean compressor lu-
bricating oil.
19. Carefully install the seal housing (218) on the com-
pressor shaft, evenly tightening the bolts (281) to
the recommended torque values (36 ft-lbs).
20. Install the coupling and coupling guard. The unit
can then be evacuated and leak checked.
O-ring (260)
Remove Anti-rotation Pin
(If Installed)
Align slot in mating
ring (219C) with drive
pin on compressor
shaft.
O-ring219C
Shoulder on
Compressor Shaft
Remove Anti-rotation Pin
(if installed)
Shoulder on
Compressor Shaft
Align slot in mating
ring (219C) with drive
pin on compressor
shaft
219C
O-ring
218
O-ring (260)
218
 Loading...