Replacing the Lens
Whether you are replacing an old lens with a new one, or switching from a 2-inch lens to a 4-inch lens,
the process is quick and easy. The lens always comes contained within the lens tube, so replacing it is as
simple as removing one tube, then placing the new one in and securing it properly.
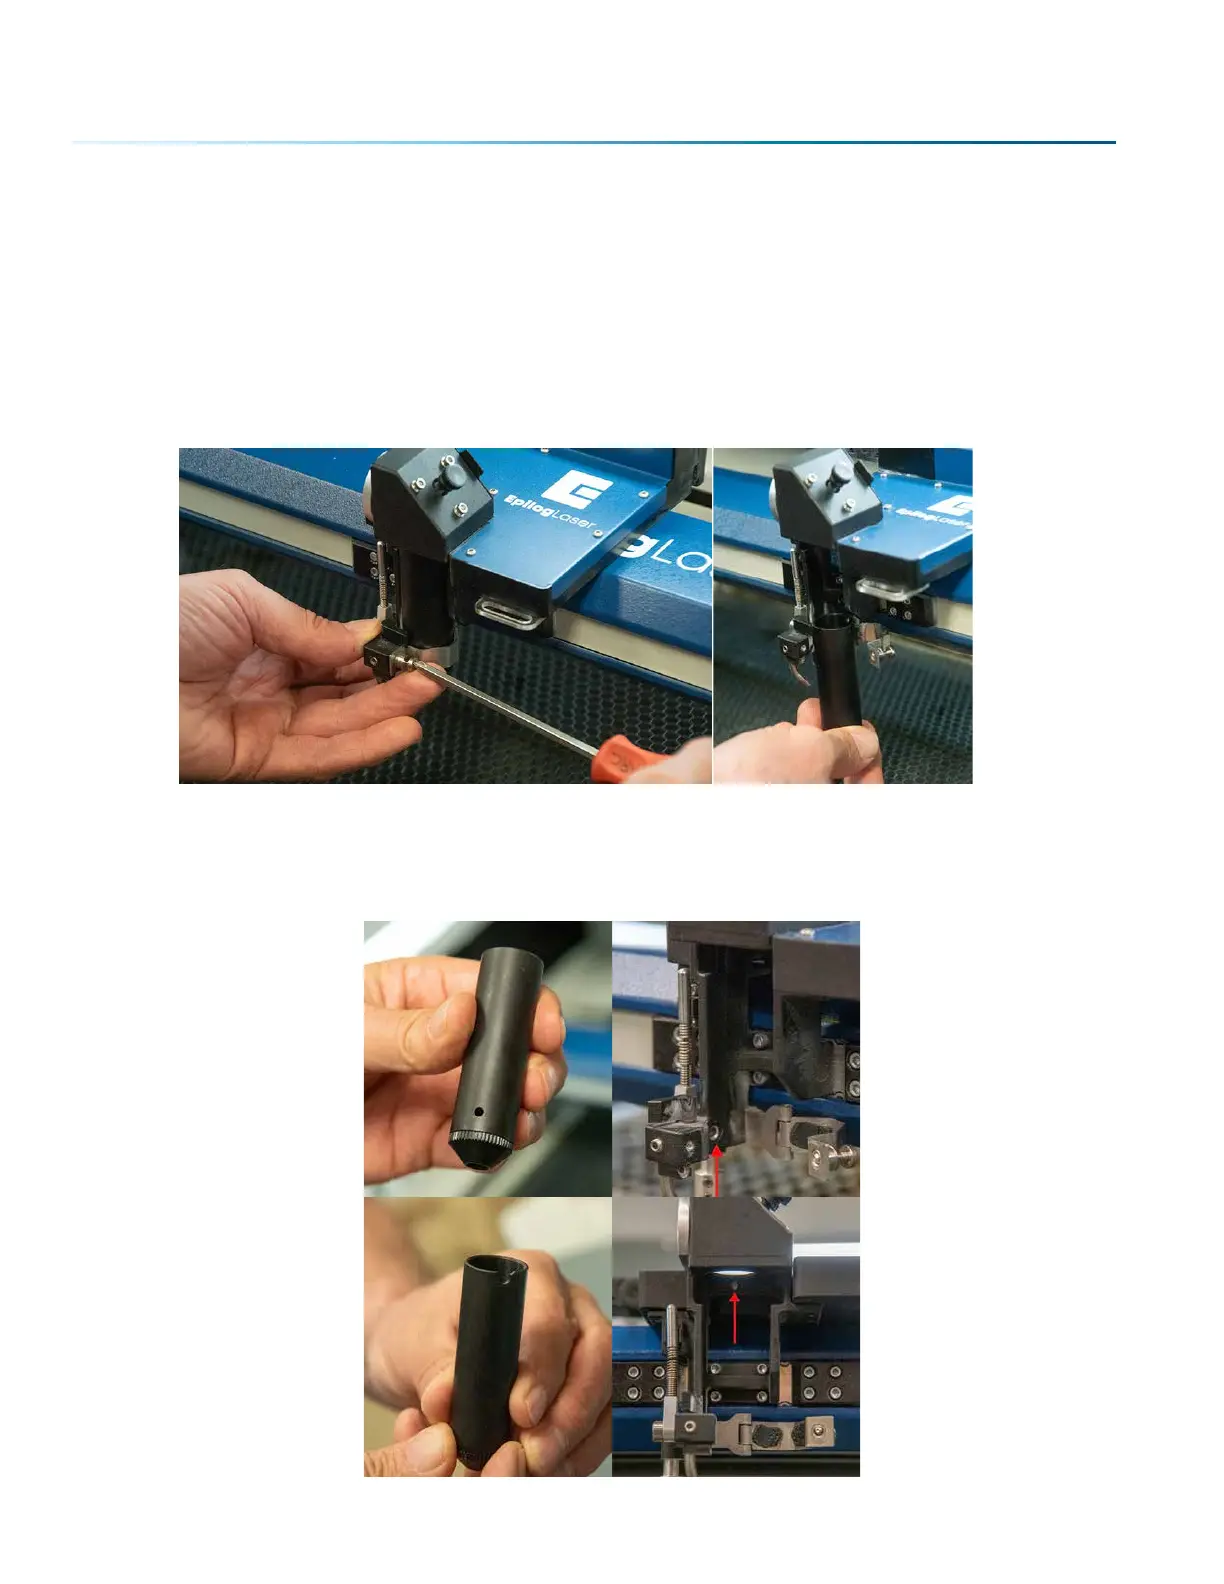
Remove the lens tube from the machine by unscrewing the captive screw on the front lens clamp using
a #1 Philips screwdriver. Hold the lens tube from the bottom while unscrewing the captive screw, as the
tube may come out easily.
Place the new tube into the assembly, making sure that the hole near the bottom of the tube lines up with
the air assist hole on the assembly. Make sure the notch at the top of the lens tube lines up with the insert
on the assembly as well. When the tube is in place it should only shi slightly when twisted side to side.
Wrap the clamp back around the tube and tighten the captive screw.
- 164 -
SECTION 10: SYSTEM MAINTENANCE
 Loading...


