5-1
5. NAVIGATION
This chapter shows you how to get to a desired destination by using “quick points,”
saved points, and routes.
Before you go to a point or follow a route, make sure the path to the points is clear.
Zoom your chart to check for hazards which appear on a smaller scale.
5.1 How to Navigate to a Quick Point
The advantage of navigating to a quick point, the cursor position, is that you do not
need to save the point to the memory. However, the point is erased when a new quick
point is entered.
Put the cursor on the position to mark as a quick point then long-push the POINTS/
GO TO key. Then,
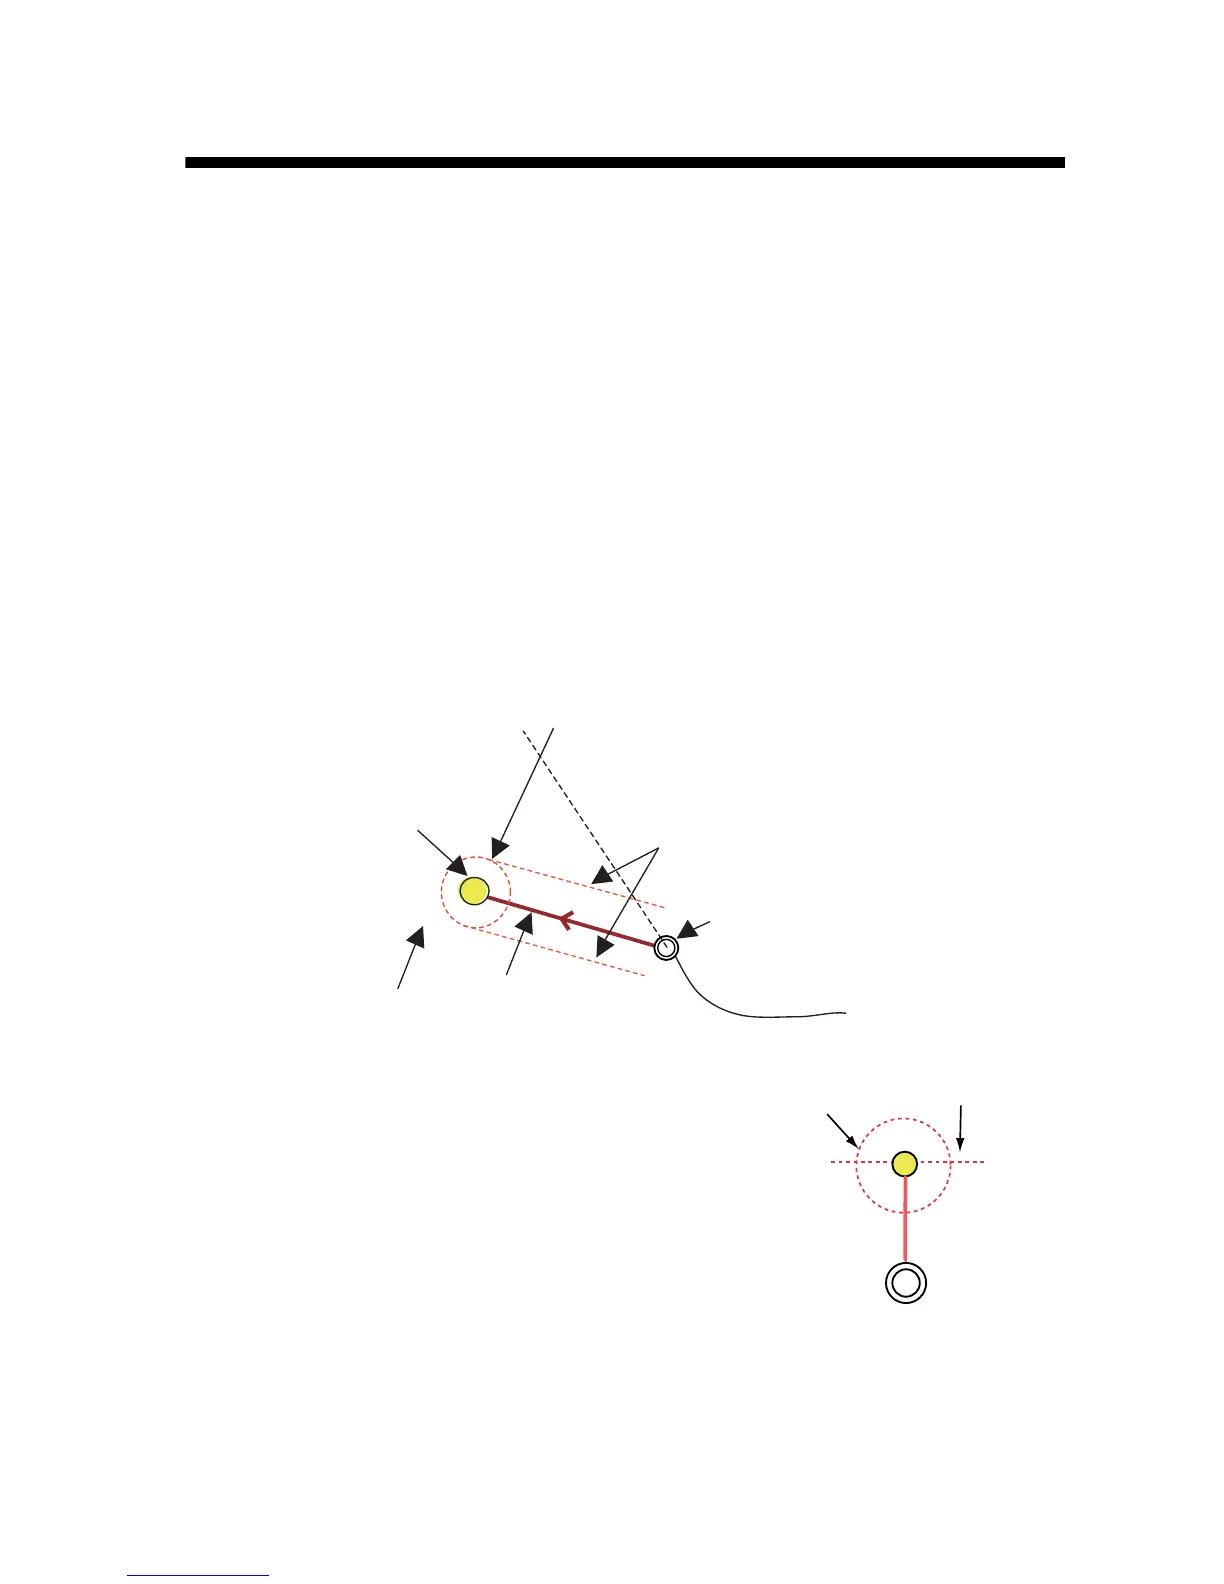
• A yellow circle appears at the location, with the youngest empty quick point number
below it. The navigation line (red) connects between own ship and the quick point,
your destination. The line shows the shortest path to the destination and the direc-
tion to go.
• The arrival area, the radius of which is set with the
ar-rival alarm, is shown with a red dashed circle.
When your boat comes within the circle or your
boat moves through an imaginary perpendicular
line that crosses through the center of the destina-
tion point, the audio alarm sounds and the arrival
alarm icon appears at the top of the screen to alert
you.
• The arrival area and XTE alarm lines are shown
when the related alarms are active.
• The XTE alarm lines (red dashed lines), show the XTE alarm range, set with the
XTE alarm. When your boat crosses an XTE line, audible and visual alarms are re-
leased to alert you.
Arrival area (red)
XTE alarm line
(red)
Navigation line
(red)
QP00001
Quick Point
(yellow by
default)
Quick point
name
Ship icon
Perpendicular line
(Not shown on display.)
Circle
 Loading...