6. MAP SETTINGS, 2D PERSPECTIVE/3D DISPLAYS AND SATELLITE OVERLAY
6-7
6.3.2 How to tilt and rotate the 3D display
To tilt and rotate the 3D display, first select [Mode] and [Manual] from the RotoKey
menu. [Manual] appears in the orientation mode box. Long-push the ENT key to en-
able adjustment. The appearance of the 3D icon changes as shown in the illustration
below.
Tilt the chart: Operate the up and down arrow pads on the CursorPad.
Rotate the chart: Operate the right and left arrow pads on the CursorPad.
After you complete the adjustment, long-push the ENT key to confirm settings. To es-
cape from the manual adjustment mode, select an orientation mode from the RotoKey
menu.
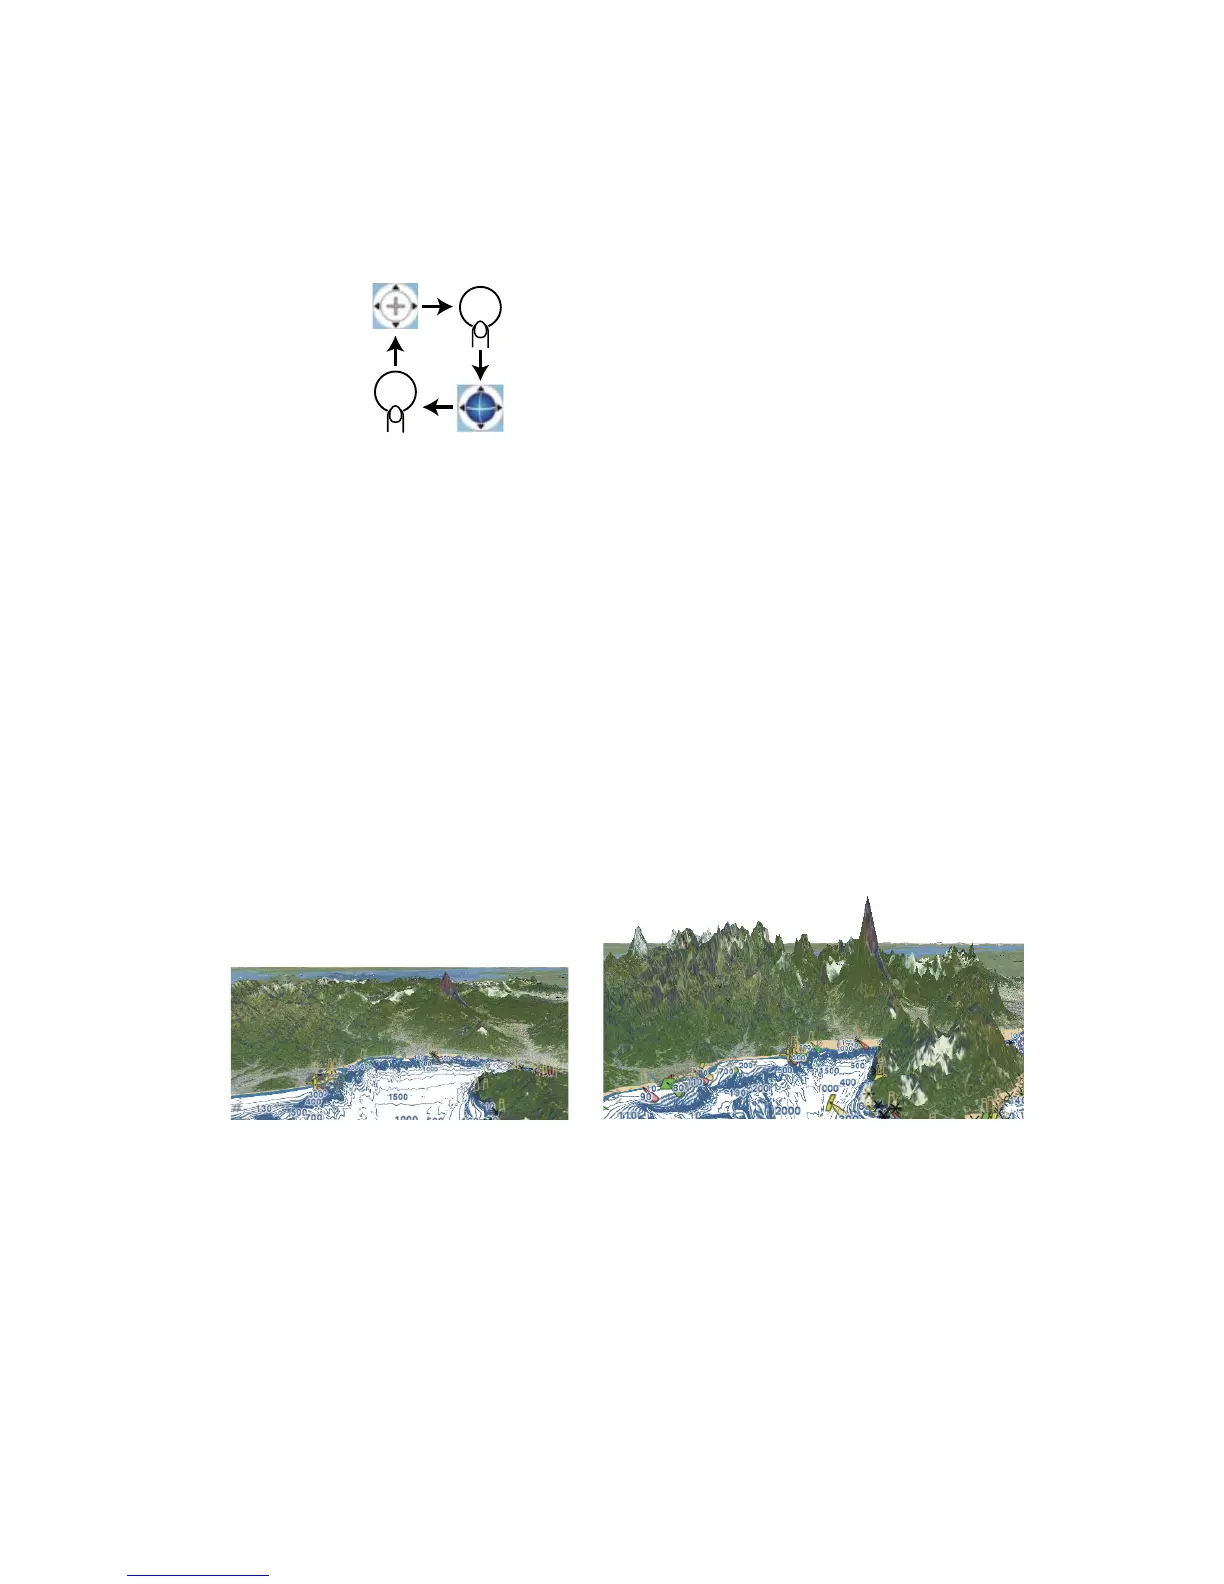
6.3.3 How to make the 3D view clearer
In the 3D display, some topographical features are easier to see if you use the [3D
Exaggeration Factor]. This feature expands both objects on the chart and the under-
water vertically so that you can easily see the shape of the objects and position. To
adjust the exaggeration feature, open the [MAP] menu, select the [CHART DISPLAY]
menu and set the level with [3D EXAGGERATION FACTOR]. Five levels are avail-
able. The higher the level the greater the degree of exaggeration. The example below
compares the same picture in Level 1 and Level 5 exaggerations.
ENT
ENT
3D adj.
disabled
3D adj.
enabled
Level 1 exaggeration Level 5 exaggeration
 Loading...