4.5 Alignment and Fixing of
Mounting Rails
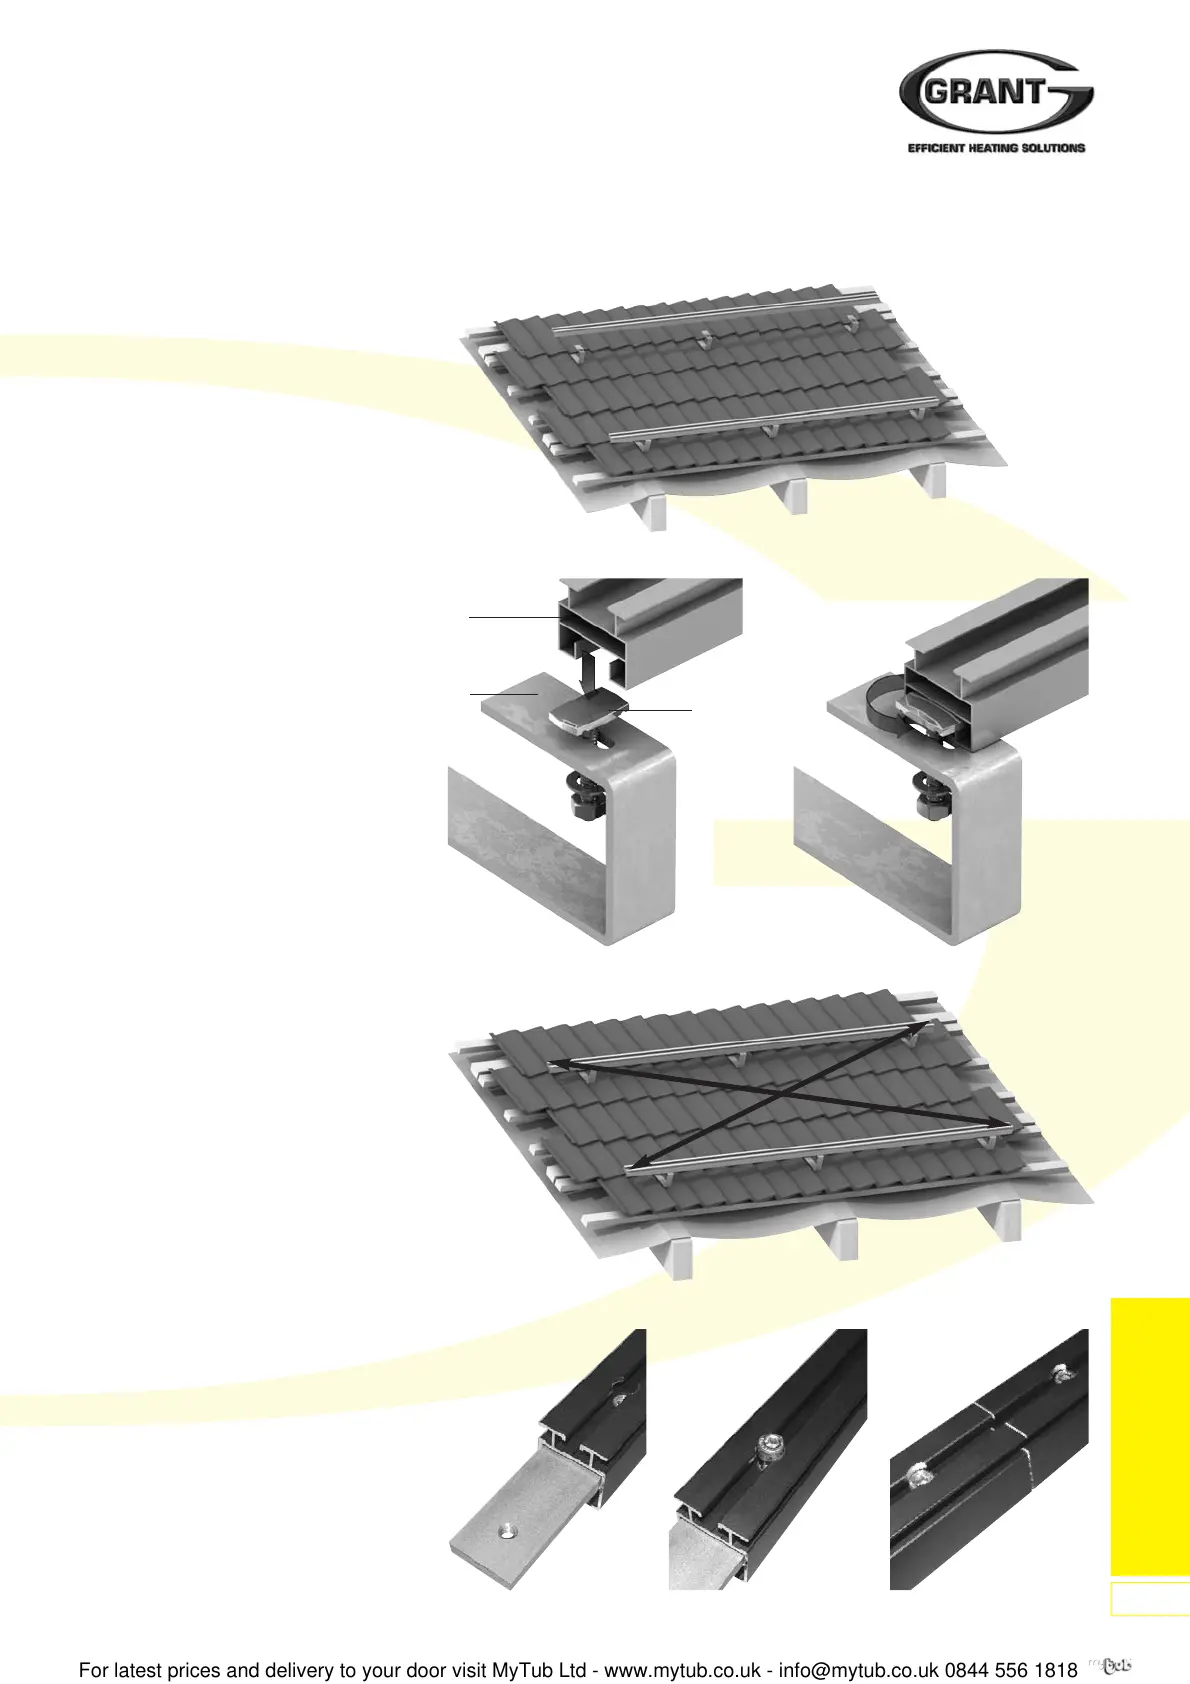
1. Close the roof covering at the top
and bottom.
2. Fix top mounting rail (04) to the roof
anchor (03).
Position the heads of interlocking
bolts (10) parallel to the mounting
rail (04) and place them on the
mounting rail, push the interlocking
bolts to the top in the roof anchor
(03) and secure with a 90° turn.
Tighten the nuts of the interlocking
bolts (hand tight). Use serrated
washers to secure the nuts.
Install all further mounting rails in
the same way.
3. Align the mounting rails horizontally
and vertically so that the rails and
the roof tiles are parallel. Diagonal
dimensions between mounting rails
must be equal:
D1 = D2
Tighten the nuts on the interlocking
bolts.
Installation of solar collectors:
See pages 33 to 35.
4.6 Joining Mounting Rails
1. On some installations it may be
necessary to join two or more
sections of mounting rail to create a
longer length of rail.
2. Join the sections of rail using the
screws and fishplates (supplied in
the fixing kit provided), as follows:
Fit the fishplate into the rectangular
opening at the end of the one
section of mounting rail. Refer to
Figure 36.
Align the threaded hole in the
fishplate with the hole in the rail
(50mm from the rail end), fit the
cylinder bolt provided and tighten to
secure. Refer to Figure 37.
Fit the exposed end of the fishplate
into the rectangular opening of the
second mounting rail. As before,
align the threaded hole of the fish
plate with the hole in the rail, fit the
cylinder bolt and tighten to secure
the second rail section to the first.
Refer to Figure 38.
Repeat this process for all other
connections between mounting rail
sections.
Figure 33: Roof Covering with Roof Anchors
10
04
03
Figure 34: Fixing the Mounting Rail
Figure 35: Aligning the Mounting Rail
Figure 36: Installing the
Fishplate
Figure 37: Fixing the
Fishplate
Figure 38: Joining
Mounting Rails
Now go to Section 7.
D1
D2
On-Roof System
Installation
17
 Loading...