Flat Roof System
Installation
21
08
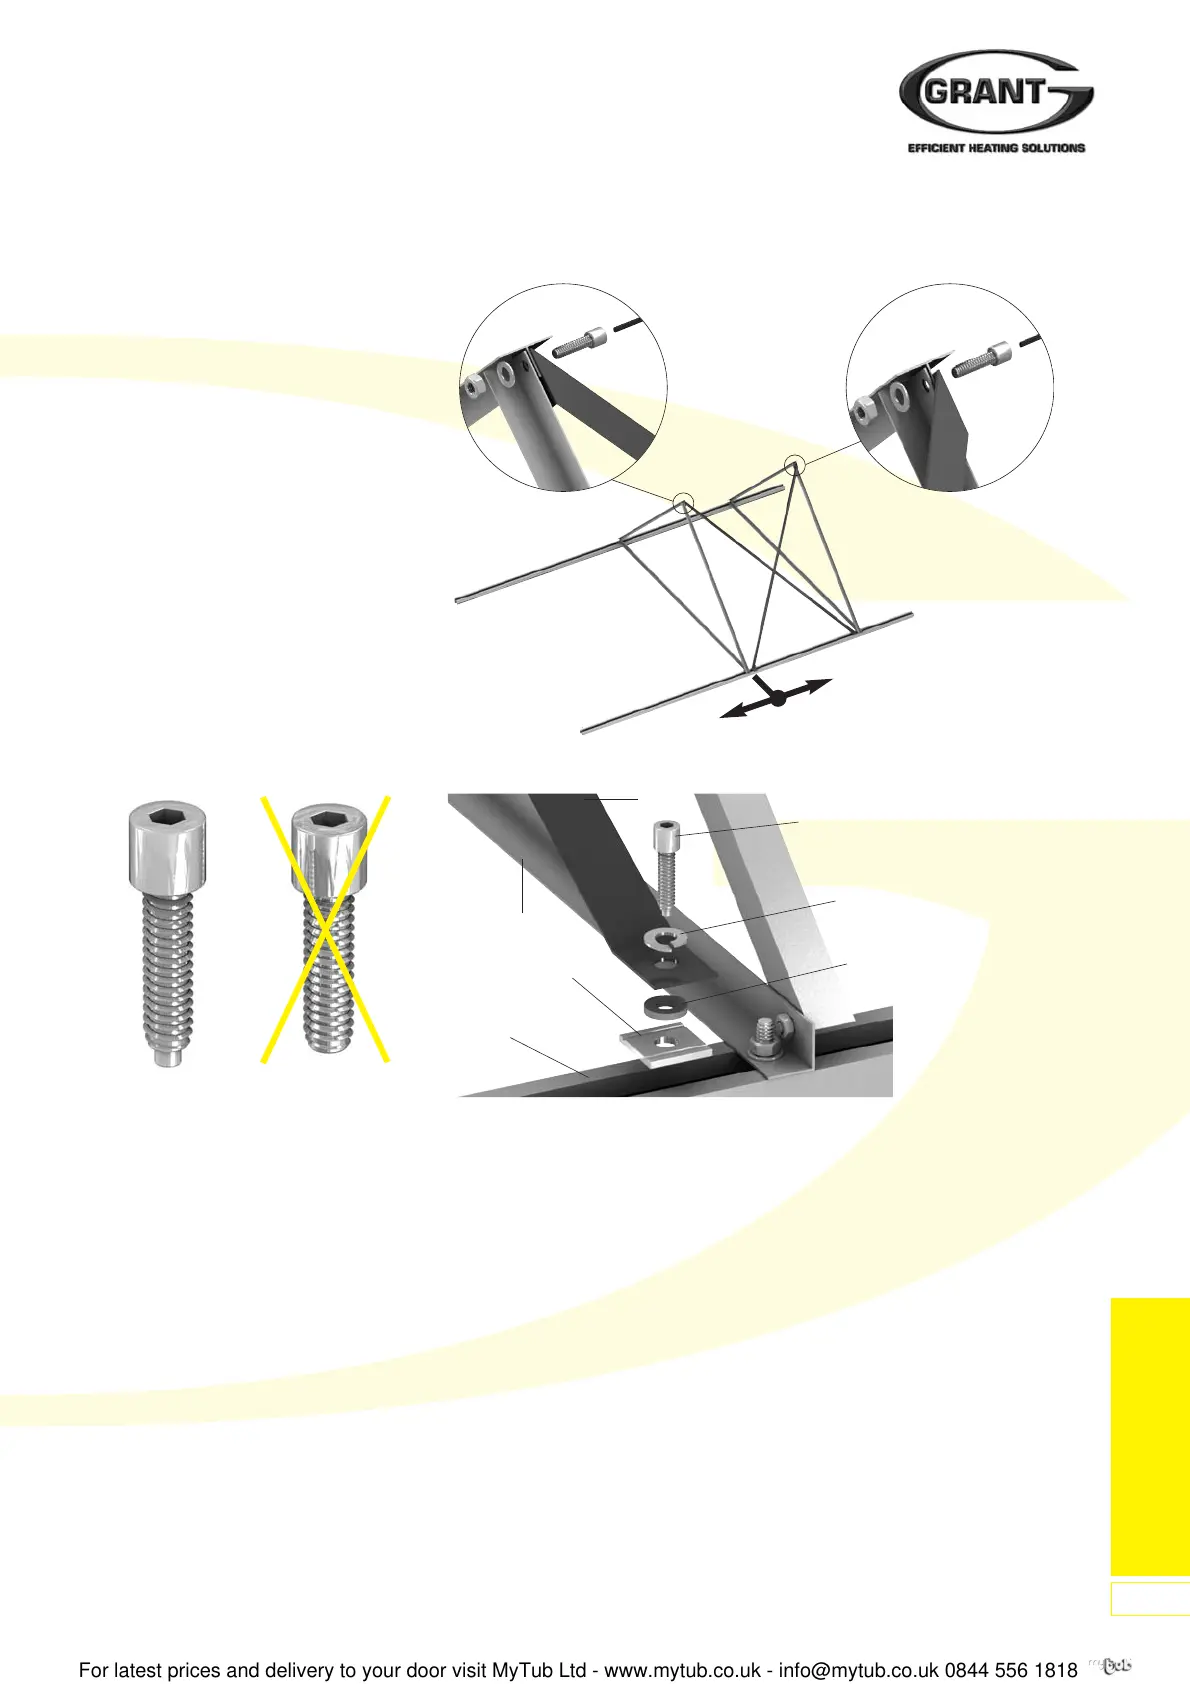
7. Place an interlocking nut (23) in
mounting rail (04) and secure it in
the mounting rail by turning it 90°.
Place a spacer sleeve (22) on the
interlocking nut and fix the stays of
the securing cruciform (24) using
locking washer (21) and punching
bolt (15).
Tighten the punching bolt until a
clear snap is heard. Continue to
turn and tighten normally.
Caution:
Turning the punching screw fixes
the securing cruciform into its final
position; check distances and
correct seating of the interlocking
nuts beforehand.
Figure 44: Installation of the Second Flat Roof Mounting Bracket
Figure 43: Punch bolt/cylinder bolt
Figure 45: Fixing the Securing Cruciform and Mounting Rail
15
A
B
24
15
21
22
22
04
03-C
24
5. Unscrew securing cruciform (24). It
is fixed to the legs of the flat roof
mounting bracket and the mounting
rail.
Place the angled long ends of the
securing cruciform between the flat
roof mounting bracket and fix with
bolts (M8x18), washers and nuts.
Note:
Always fit the stays of the securing
cruciform to the right hand side of
the flat roof mounting angles. See
detail views (A and B).
6. Tighten the nuts on the interlocking
bolts If necessary, modify the
position of the second flat roof
mounting bracket.
Note:
Use punching bolt (15) with offset
screw tip for fixing to the mounting
rail. Do not confuse with cylinder
bolt (08)!
5.3 Joining Mounting Rails
1. On some installations it may be
necessary to join two or more
sections of mounting rail to create
a longer length of rail.
2. Join the sections of rail using the
screws and fishplates (supplied in
the fixing kit provided). Refer to the
procedure given in section 4.6
(on page 17).
 Loading...