6 In-Roof System Installation
28
In-Roof System
Installation
6.3 Installation of In-Roof Kit
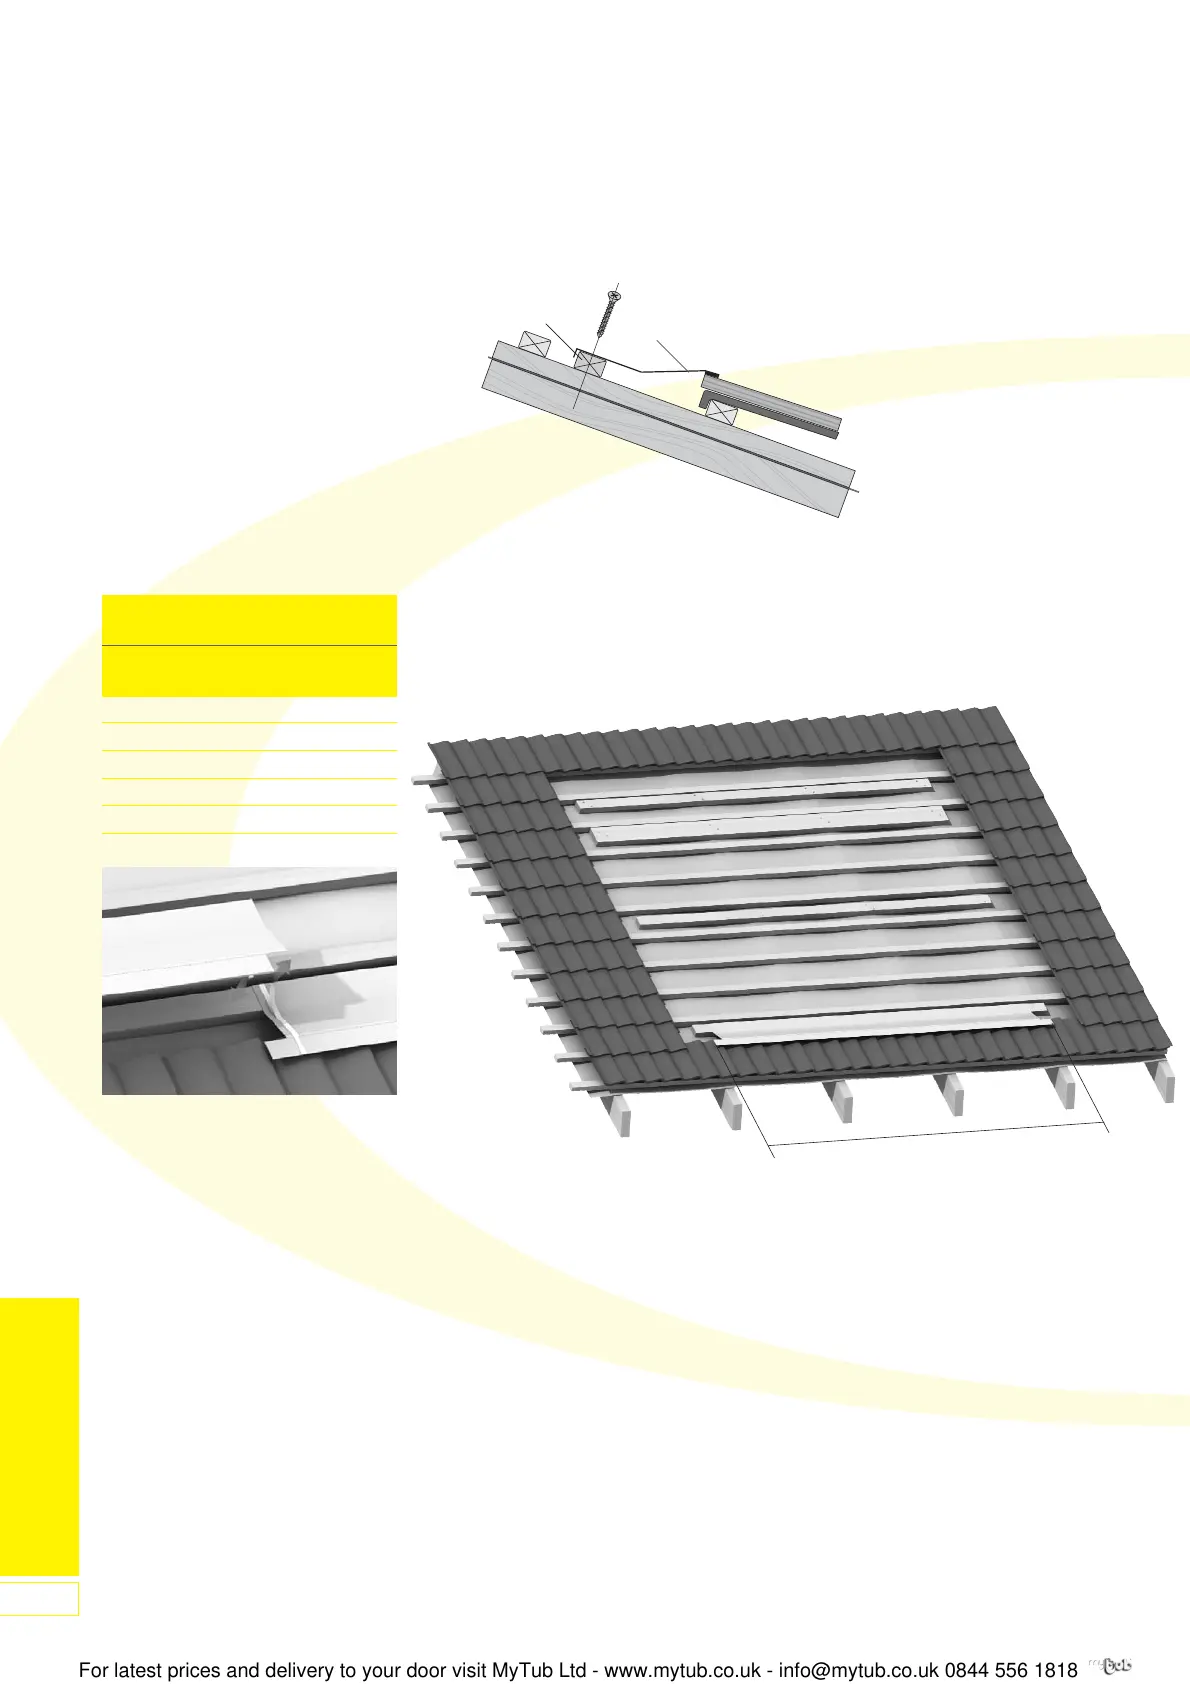
1. Fit the bottom flashings.
Note:
The lead aprons on the bottom
apron flashings (16-A & 16-B) for
use with tiles are supplied folded
back. Carefully fold out the lead
aprons before installation. Do not
modify the flashings or lead
aprons. Leave the protective film in
place on the butyl tape at this stage.
Note:
butyl tape has strong adhesive
properties and mistakes cannot be
rectified after application!
Overall width dimensions (mm) for
In-roof installation
portrait landscape
Qty (side by side) (side by side)
1 1460 2355
2 2645 4440
3 3835 6525
4 5025 8615
5 6215 10700
06-A and 06-B
01
Figure 54: Installation of Bottom
Flashing
Figure 55: Installation of Additional
Bottom Flashings
For bottom flashing width refer to Table 5
2. Position the bottom flashings on the
bottom batten - with the left
flashing overlapping the right in the
centre. Adjust width of the bottom
flashing to suit - see Table 5. Adjust
the position of the bottom flashing
as required to centre it in the
opening in the roof tiles/slates or to
avoid the need to cut tiles on one
(or both) sides.
Mark position of both ends of
bottom flashing on batten. Remove
left hand flashing and fix right hand
flashing to batten using suitable
small screws (not supplied).
Remove the protective film from the
butyl tape on the right hand
flashing. Ensure left hand flashing is
correctly located, re-position on
batten, pressing firmly on overlap to
seal. Fix left hand flashing to batten
using suitable screws (not supplied).
Repeat procedure for any further
bottom flashing sections, as
required.
Note:
For slates, use the mastic bead
supplied in the kit to seal the
bottom flashing (15-A and 15-B) to
the roof. Place the bead on the
underside of the flashing, along the
entire length, remove backing strip
and press down to seal two slates.
Table 5: Overall Width Dimensions
 Loading...