42
Roof Penetrations
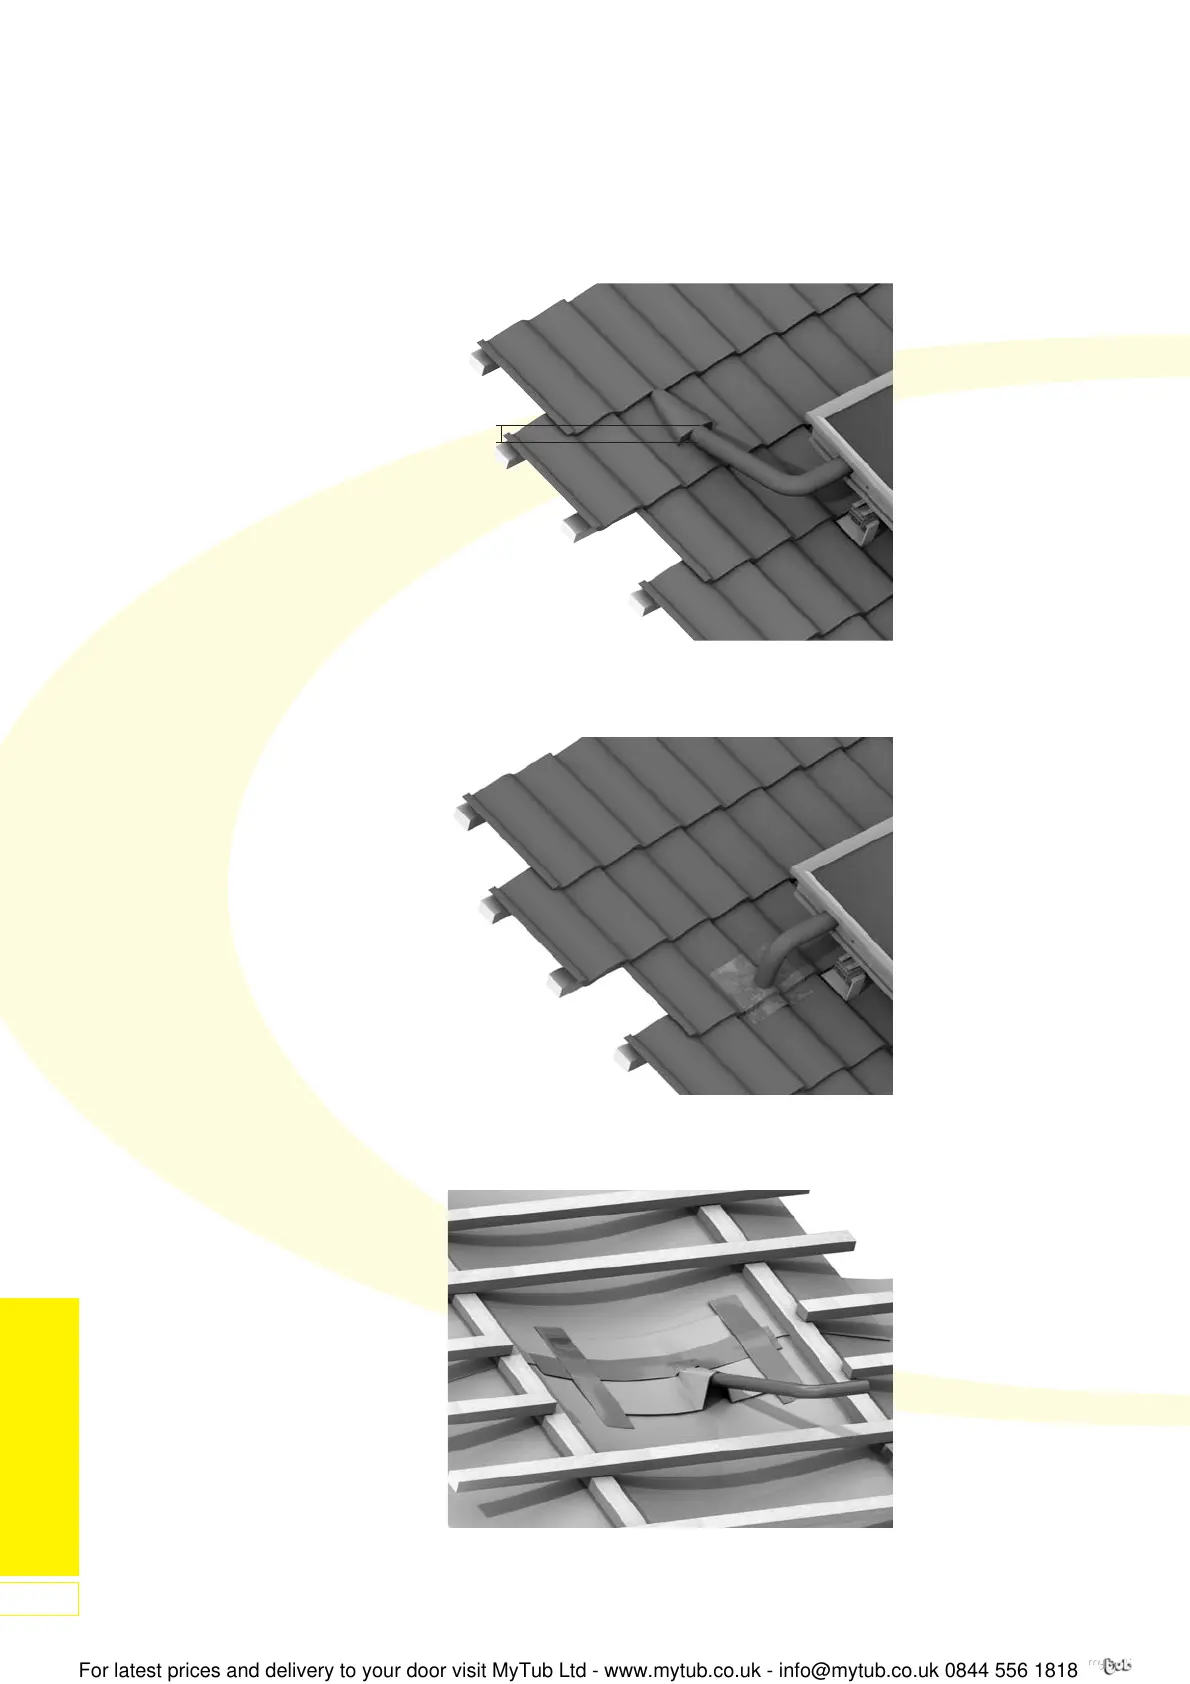
Figure 98: Detail View of Solar Collector Field Connection
- On-Roof Systems
Figure 97: Detail View of Solar Collector Field Connection
- On-Roof Systems
~60mm
Figure 99: An Example of Passing Through the Waterproof
Membrane
2. Push the thermal insulation for the
solar collector connection kits (06)
up to the solar collector.
For Ventilation Tiles
Pass the insulated pipes through
the opening in the ventilation tile for
connection inside the roof space.
For Lead Flashings
Cut the insulation and fit over the
copper pipe on the flashing. Pass
the flexible connection pipe through
the copper pipe/flashing for
connection inside the roof space.
For ‘SolarDek’ Flashings
Cut the insulation to fit on to the
silicone seal. Cut the silicone seal to
give the required diameter hole for
the pipe. Pass the pipe through the
silicone seal for connection inside
the roof space.
3. If the substructure is punctured, the
roof covering must be re-sealed
afterwards! Guide the connection
pipes into the correct position
through the waterproof membrane.
The seal can be restored by
attaching overlapping strips of
waterproof membrane, for example.
Overlap must be a minimum of
100mm!
For In-Roof Systems Only
4. The flow and return connection
pipes can be located beneath the
top flashing where they can pass
through the waterproof membrane.
9 Roof Penetrations
 Loading...