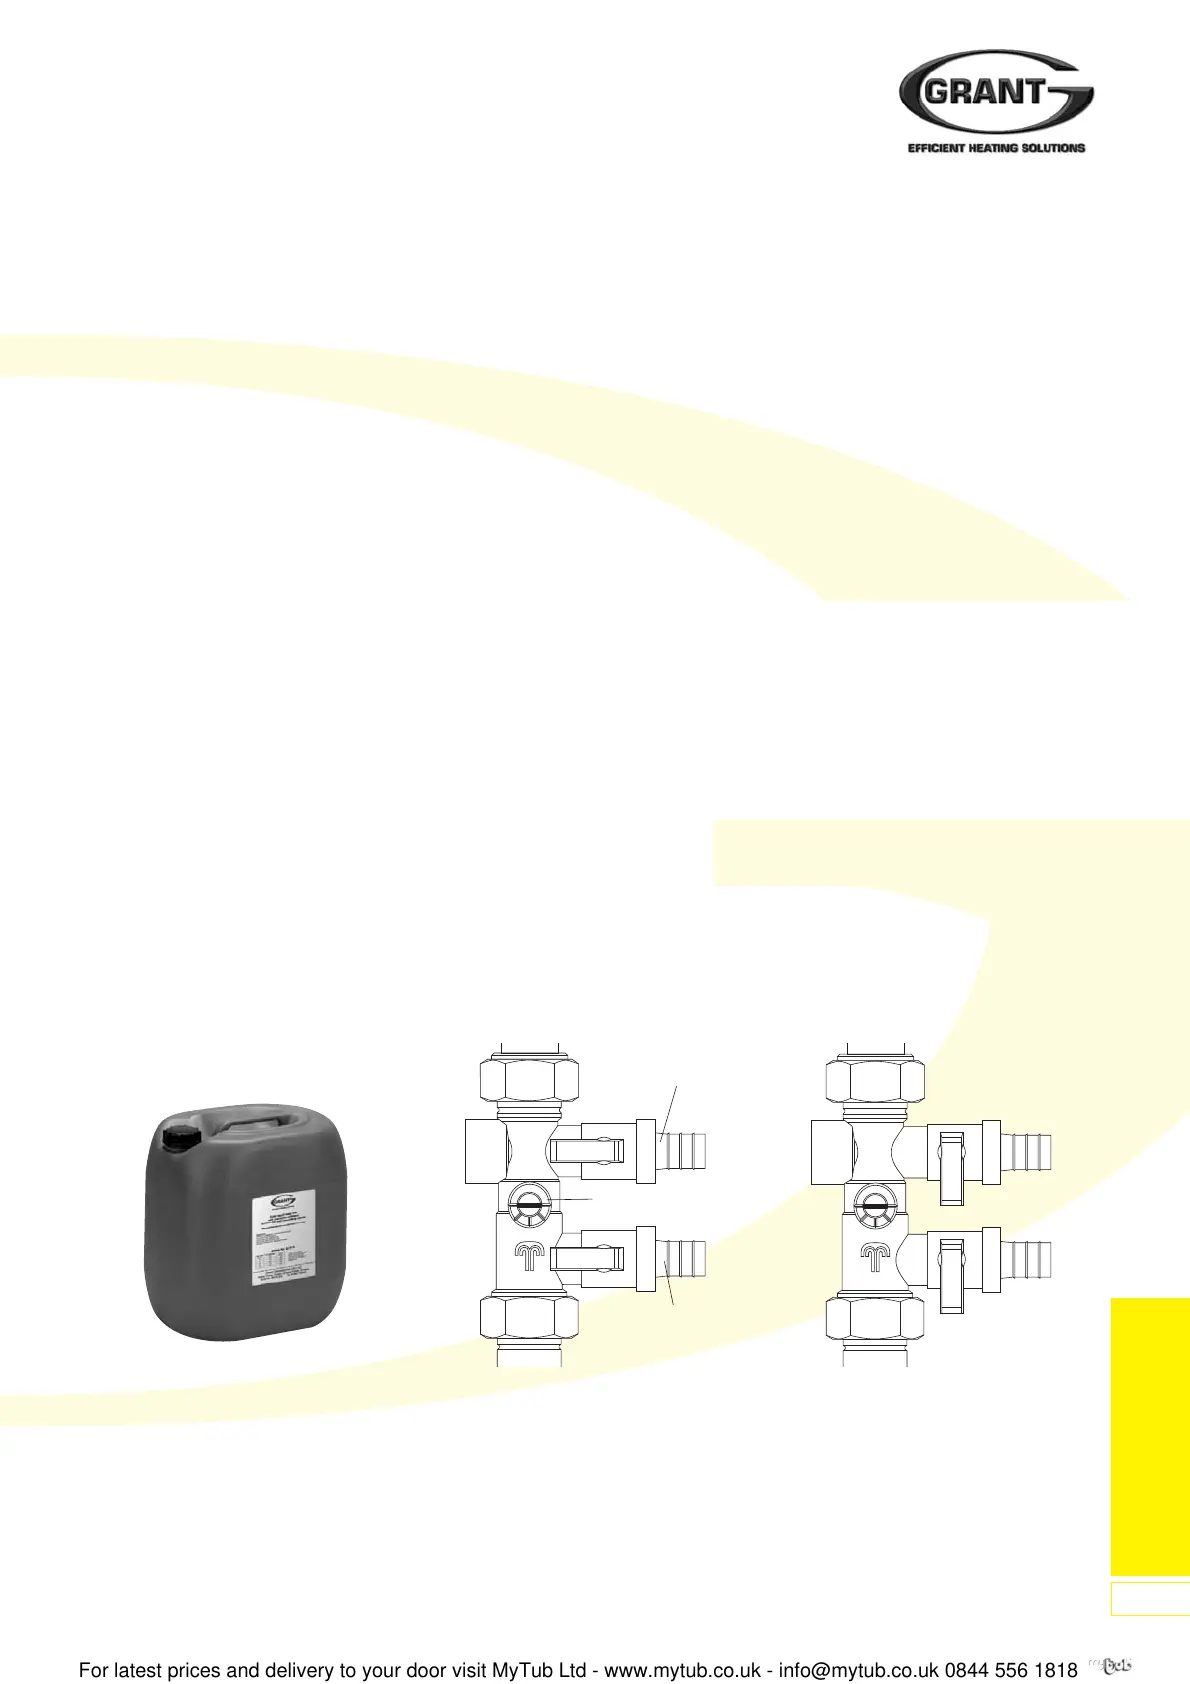
Figure 120: Flush/Fill Valve Closed -
For Filling
14.3 Filling and Flushing the
System
Heat Transfer Fluid
• Blue non-toxic heat transfer fluid
• Practically odourless based on 1.2
propylene glycol
• Good corrosion inhibitor
• Remains stable over long period of
time
• Nitrate, phosphate and ammonia free
• 40% solution of propylene glycol in
water
• Supplied ready mixed in 10 or
20 litres containers
Filling and Flushing Valves
The stop valves on the flush/fill
valve assembly are used for filling
and flushing the solar thermal
installation.
To enable filling/flushing, the slot in
the flush/fill valve spindle must be in
the horizontal position. See Figure
120.
Important:
The collectors must be cool
before filling the system can
commence. The collectors must
be covered, to stop solar
radiation reaching them, until
completion of the filling and
commissioning procedure.
Filling the System
Before filling the system, check the
expansion vessel charge pressure and
adjust as required. Refer to Table 10.
• Connect pressure hose to the filling
valve connection and open the
valve
• Connect the flushing hose to the
flushing valve connection and open
the valve
• Using a slotted head screwdriver,
close the flush/fill valve. Refer to
Figure 120
• Fill the filling station tank with
sufficient solar fluid for the system
• Check that Flow and Return ball
valves are set half open. Refer to
Figure 114
• Using filling station, fill the solar
circuit and then flush for approx.
15 minutes
• When the filling pump is running,
close the flushing valve and set the
system pressure to around 4 - 5 bar
• When the pressure is reached, close
the filling valve and immediately
switch off the filling pump
• Check that the device is leak-free.
If the pressure gauge shows a
significant drop in pressure, this
points to a leakage in the system
• Re-open the flush/fill valve
• Switch on the circulating pump
(control position “manual”) to the
highest pumping level (III) and allow
it to circulate for at least 15 minutes
• Set the controller to “stand by”
(pump = OFF) and then bleed the
system using the hand ventilator on
the air jet until the heat transfer fluid
begins to escape
• Set the operating pressure (as in
Table 10) by carefully opening the
flushing valve and releasing the fluid
into the catchment tank of the filling
pump
•
Switch on the circulating pump
(controller set to manual)
• Set the flow rate on the flow
indicator (as in Table 11) by
selecting the appropriate pump
speed (I, II or III) and by using the
flush/fill valve
• Remove the hoses from the filling
connections and screw the caps on
the filling and flushing valves.
Release the flushing valve first and
then the filling valve
• Note:
Now switch the controller to
automatic operation
Figure 121: Flush/Fill Valve Open -
For Normal Operation
Figure 119: Heat Transfer Fluid
Filling Connection
Flush/Fill Valve
Flushing Connection
Commissioning
the System
57
 Loading...