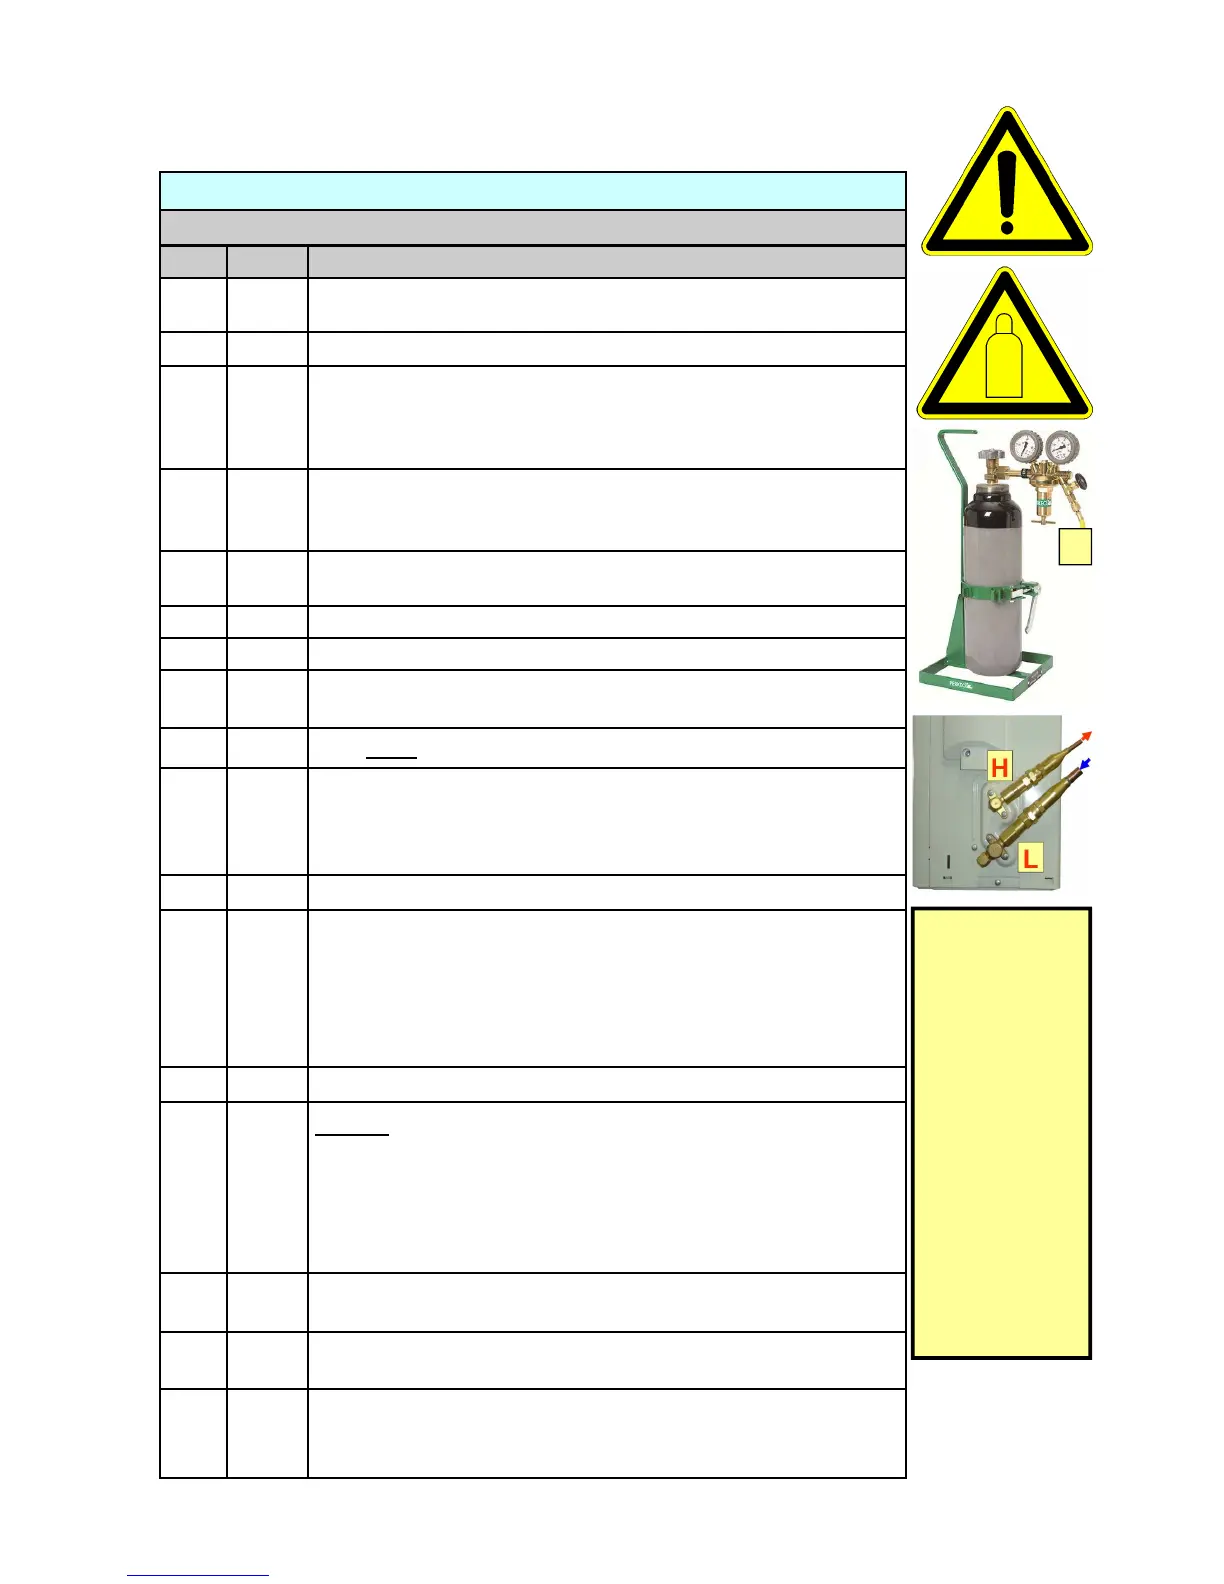
Section – Leak Test with OFDN and Bubble Test
Steps recommended
No
Where Activities
1
Carry out all intended works without hurry and
THINK BEFORE ACTING!
2
AC system “OFF“ (unplugged) and emptied from HC refrigerant.
3
Arrange your tools and equipment connections as indicated on page
89. The pressure adjusting handle (screw) of the pressure regulator
is back-seated. The cylinder valve and the pressure regulators outlet-
valve to the OFDN transfer hose (N) is closed!
4
N, L
Ensure that the Nitrogen transfer hose with the connection at the suc-
tion line service port “L” consists of a core depressor to open the ser-
vice port inner core valve during connection.
5
N, L
Connect the OFDN cylinder with transfer hose N to the service port of
the outdoor units low-side stop valve L
6
H, L
Open the outdoor units low-side and high-side stop valves.
7
Open the OFDN cylinder valve
8
Adjust the pressure regulators pressure adjusting handle (screw) to
about 10 bar (150 PSI) shown at the delivery pressure gauge
9
Open slowly the pressure regulators outlet-valve
10
OFDN is now transferred into the complete AC system. Continue the
transfer of Nitrogen until there is no further flow audible (pressure
equalisation) and 10 bar (150 PSI) is indicated.
Watch the gauge for
pressure loss!
11
Close the pressure regulators outlet-valve
12
Carry out the Leak Test by covering potential brazed joints, mechani-
cal unions or piping, with the weak soapy water solution and carefully
search for bubbles. Additionally, the amount of discharging Nitrogen
will indicate a leak with creating a venting noise. Repeat the Bubble
Test until you are confident that no leaks exist. Use a small mirror for
places that are difficult for assessment.
13
N, L
Remove the OFDN transfer hose from the service port
14
Carefully open the service ports Schrader valve using a valve “pin”
depressor (e.g. a small screw-driver) and blow-out the Nitrogen
charge. If necessary hold a piece of old cloth (or paper) into the flow
stream to keep eventually escaping oil from the system. Do not in-
hale the escaping gas. Ensure ventilation of the work space during
gas venting. Leave a slight overpressure in the system.
15
If a leak was found in step 12, repair the leak or replace the leaky
component and continue with steps 5 and 7 to 14.
16
H, L
Close the outdoor units low-side and high-side stop valves (front-
seated position)
17
Close the OFDN cylinder valve. Return the pressure regulators adjust-
ing handle (screw) in its back-seated position. Purge the pressure
regulator from the outlet-valve (pressure regulator is now discharged).
 Loading...