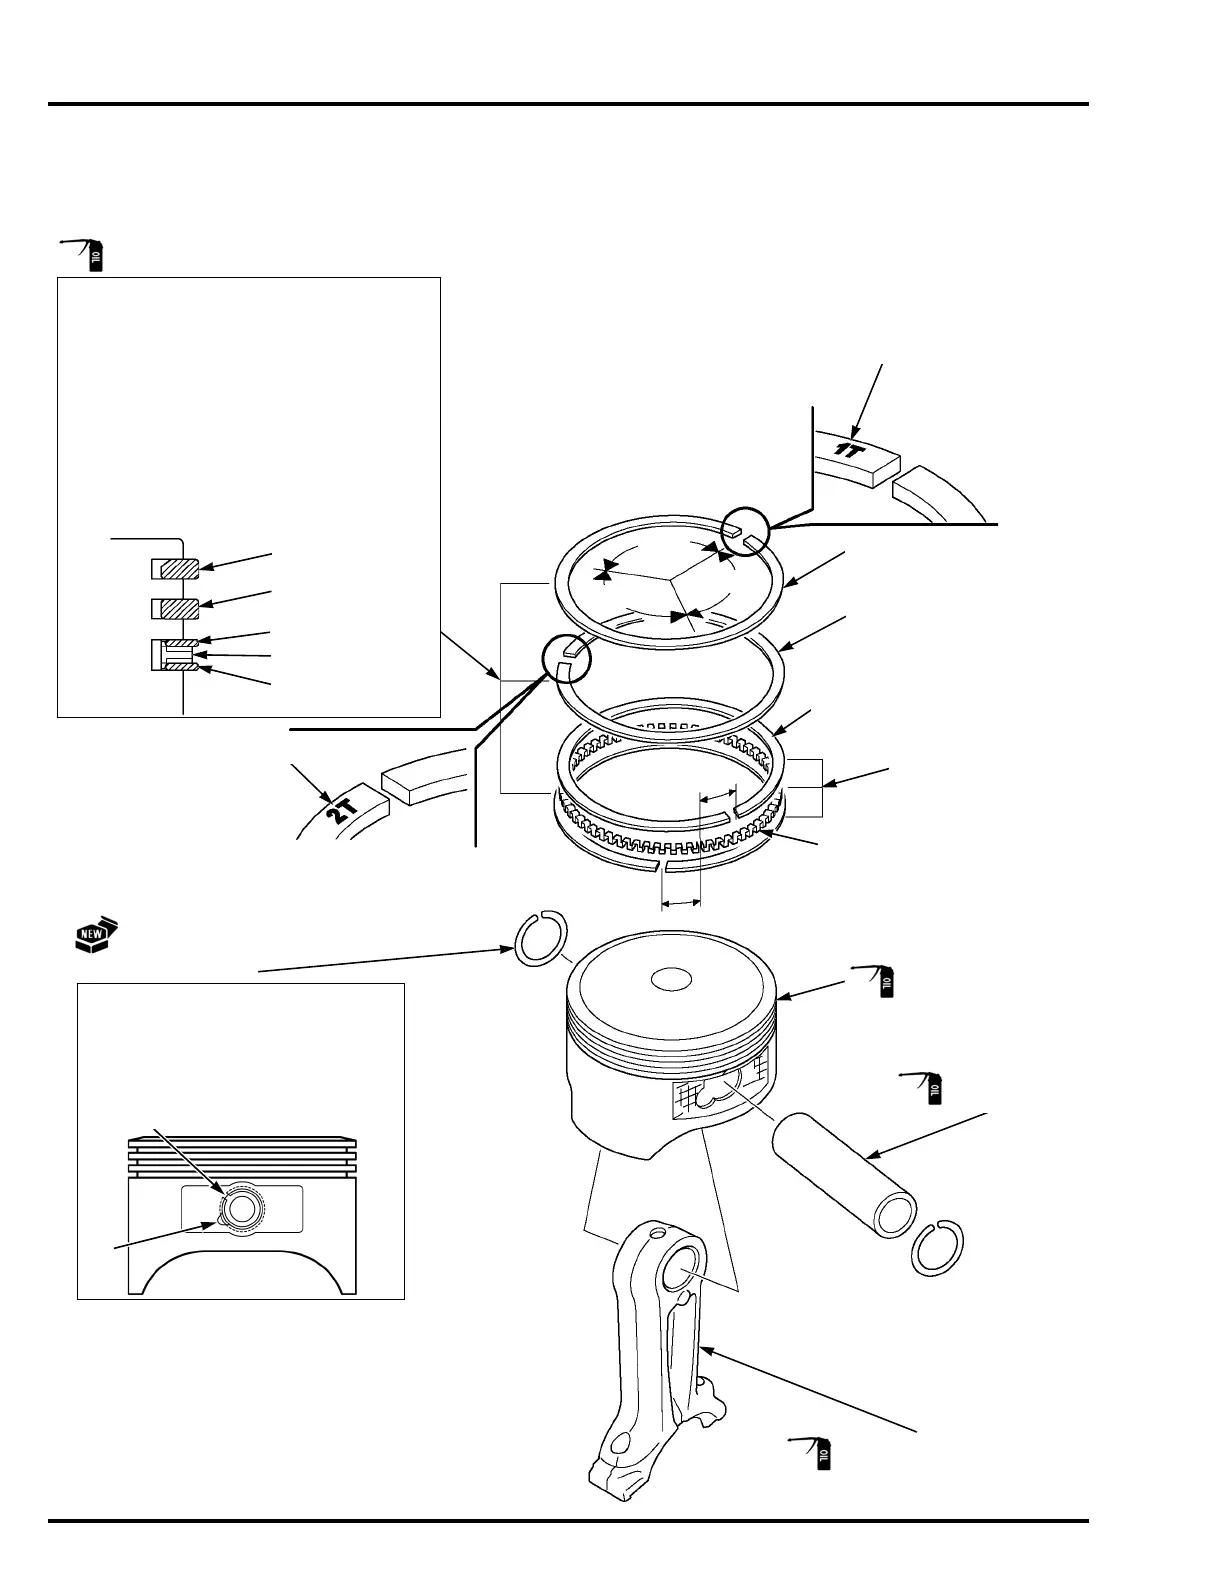
TOP RING
PISTON RINGS
120 °
120 °
120 °
SECOND RING
OIL RING
(COMBINATION RING)
10 mm (0.4 in)
10 mm (0.4 in)
SIDE RAIL (2)
ASSEMBLY:
To install the oil ring, install the spacer [1] first,
and then install the side rails [2].
Be sure that the top ring [3] and second ring [4]
are not interchanged.
Install the top ring and second ring into the
piston with the maker mark side facing up.
Check that the piston rings rotate smoothly after
installing them.
Space the piston ring end gaps 120° apart, and
do not align the ring end gaps with the piston
pin bore as shown.
[3]
[2]
[4]
PISTON PIN CLIP (2)
Install by setting one end of the clip in
the piston groove, holding the other end
with long-nosed pliers, and rotating the
clip in.
Do not align the end gap [1] of the clip
with the cutout [2] in the piston pin bore.
CONNECTING ROD
PISTON PIN
PISTON
Maker Mark
[2]
[1]
(Entire surface)
Maker Mark
SPACER
[2]
[1]
(Small end bearing area)
(Pin hole)
(Outer surface)
 Loading...