EasyManua.ls Logo

Honeywell FUSION User Manual

Honeywell FUSION
168 pages
To Next Page IconTo Next Page
To Previous Page IconTo Previous Page
Page #11 background image
IMPORTANT SAFEGUARDS, CONTINUED
NOTES ON CLEANING
Use a soft dry cloth for cleaning.
For stubborn dirt, soak the cloth in a weak detergent solution, wring well and wipe. Use a dry cloth
to wipe it dry. Do not use any type of solvent, such as thinner and benzene, as they may damage
the surface of the DVR unit.
If you use a chemical saturated cloth to clean the unit, follow that product’s instructions.
NOTES ON MAINTENANCE
This DVR unit is designed to last for long periods of time. To keep your DVR unit always operational we
recommend regular inspection maintenance (cleaning parts or replacement). For details contact your
nearest dealer.
NOTES ON MOISTURE CONDENSATION
Moisture condensation damages the DVR unit. Read the following information carefully.
Moisture condensation occurs during the following cases:
When you bring the DVR unit directly from a cold place to a warm place.
When you use the DVR unit in a room where you just turned on the heater, or a place where the
cold wind from the air conditioner directly hits the unit.
In the summer, when you use the DVR unit in a hot and humid place just after you move the unit
from an air conditioned room.
When you use the DVR unit in a humid place.
Do not use the DVR unit when moisture condensation may occur.
If you use the DVR unit in such a situation, it may damage discs and internal parts. Remove any CD
discs, connect the power cord of the DVR unit to the wall outlet, turn on the DVR unit, and leave it for
two to three hours. After two to three hours, the DVR unit will have warmed up and evaporated any
moisture. Keep the DVR unit connected to the wall and moisture will seldom occur.

Table of Contents

Question and Answer IconNeed help?

Do you have a question about the Honeywell FUSION and is the answer not in the manual?

Honeywell FUSION Specifications

General IconGeneral
Recording ResolutionUp to 1080p
Operating SystemEmbedded Linux
CompressionH.264
Video Inputs4, 8, 16
Video OutputHDMI, VGA
Network Interface10/100 Mbps
Channels4, 8, 16
Remote ViewingYes
Alarm Inputs4
Operating Temperature0°C to 40°C (32°F to 104°F)
Audio Inputs/Outputs1/1 (RCA)

Summary

Important Safeguards

General Safety Precautions

Comprehensive list of safety guidelines for product operation and handling.

Important Safeguards, Continued

Damage Requiring Service and Servicing Procedures

Conditions requiring service and general servicing safety advice.

Section 1: Introduction

Section 2: Controls and Connections

Section 4: DVR Basics

Powering the DVR On and Off

Procedure for safely turning the DVR unit on and off.

Section 5: Setup Options

Camera Setup Configuration

Adjusting camera settings like name, brightness, contrast, and hue.

Motion Detection Setup

Configuring motion detection regions, sensitivity, and recording.

General Setup Options

Configuring voice warnings, network display, alarms, and OSD settings.

Frame Setup and Recording Resolution

Adjusting frame rates, resolution, and quality for each camera.

Recording Schedule Configuration

Creating and managing custom recording schedules.

Sensor Setup Configuration

Enabling, disabling, and configuring sensor inputs.

Network Setup Configuration

Setting up network connections and remote access to the DVR.

Administration and User Management

Managing system logs, user accounts, and administrator settings.

PTZ and Instant Recording Setup

Configuring PTZ cameras and initiating instant video recording.

Central User Management Setup

Utilizing a central system for managing user accounts across multiple DVRs.

Section 6: Search Options

Performing a Basic Search

Step-by-step guide to conducting a fundamental video search.

Index Search Functionality

Performing searches based on motion, sensor, or instant record events.

Object Search Functionality

Searching video for motion changes within a user-defined region.

Section 7: Pan/Tilt/Zoom

Setting Up a PTZ Camera

Step-by-step guide to connecting and configuring PTZ cameras.

Creating and Viewing Preset Positions

Defining and accessing user-defined camera locations.

Section 8: Backing Up to a CD-R Drive

Scheduled Backup Options

Creating scheduled daily backups of selected times and locations.

Specifying and Creating Scheduled Backups

Steps to label drives for backup and set up scheduled backups.

Backing Up to CD-RW Drive or Hard Drive

Process for initiating backup to various storage media.

Section 9: LAN/ISDN/PSTN Connections

Section 10: Digital Signature Verifier

Section 12: Alarm Monitor

Configuring the DVR for Alarm Monitoring

Steps to enable and configure the DVR to send alarm events.

Configuring the Client PC for Alarm Monitor

Setting up the client PC to receive and display alarm events.

Section 13: Remote Software

Setting Up Server for Incoming Connections

Configuring the DVR server to accept remote client connections.

Creating a New Remote Connection

Procedure for establishing a new connection to the DVR server.

Section 14: The Web Viewer

Configuring DVR Server for Remote Connections

Enabling web viewer access and adjusting network settings.

Connecting to DVR with Web Viewer

Steps to access the DVR video feed using Internet Explorer.

Section 15: Technical Specifications

HFDVR Fusion 8-Channel Specifications

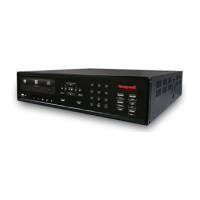
Technical details for the 8-channel Fusion DVR model.

HFDVR Fusion 16-Channel Specifications

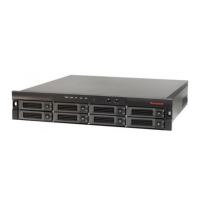
Technical details for the 16-channel Fusion DVR model.

HFDVR Fusion 32-Channel Specifications

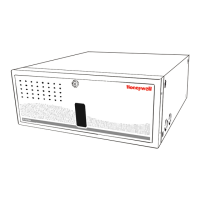
Technical details for the 32-channel Fusion DVR model.

Related product manuals