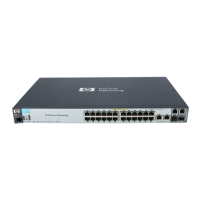
4-1
Troubleshooting
4
Troubleshooting
This chapter describes how to troubleshoot the Series 2510 Switch. This
document describes troubleshooting mostly from a hardware perspective.
You can perform more in-depth troubleshooting on the Series 2510 Switch
using the software tools available with the switch, including the full-featured
console interface, the built-in web browser interface. For more information,
see the chapter “Troubleshooting” in the Management and Configuration
Guide, which is available on the ProCurve Networking Web site,
www.procurve.com.
This chapter describes the following:
■ basic troubleshooting tips (page 4-1)
■ diagnosing with the LEDs (page 4-4)
■ Proactive Networking tools (page 4-8)
■ hardware diagnostic tests (page 4-9)
■ restoring the factory default configuration (page 4-11)
■ downloading new software to the Series 2510 Switch (page 4-12)
■ ProCurve Customer Support Services (page 4-12)
Basic Troubleshooting Tips
Most problems are caused by the following situations. Check for these items
first when starting your troubleshooting:
■ Connecting to devices that have a fixed full-duplex configuration.
The RJ-45 ports are configured as “Auto”. That is, when connecting to
attached devices, the switch will operate in one of two ways to determine
the link speed and the communication mode (half duplex or full duplex):
• If the connected device is also configured to Auto, the switch will
automatically negotiate both link speed and communication mode.
• If the connected device has a fixed configuration, for example
100 Mbps,
at half or full duplex, the switch will automatically sense
the link speed, but will default to a communication mode of half
duplex.
 Loading...