HP Omnibook 500 Removal and Replacement 2-11
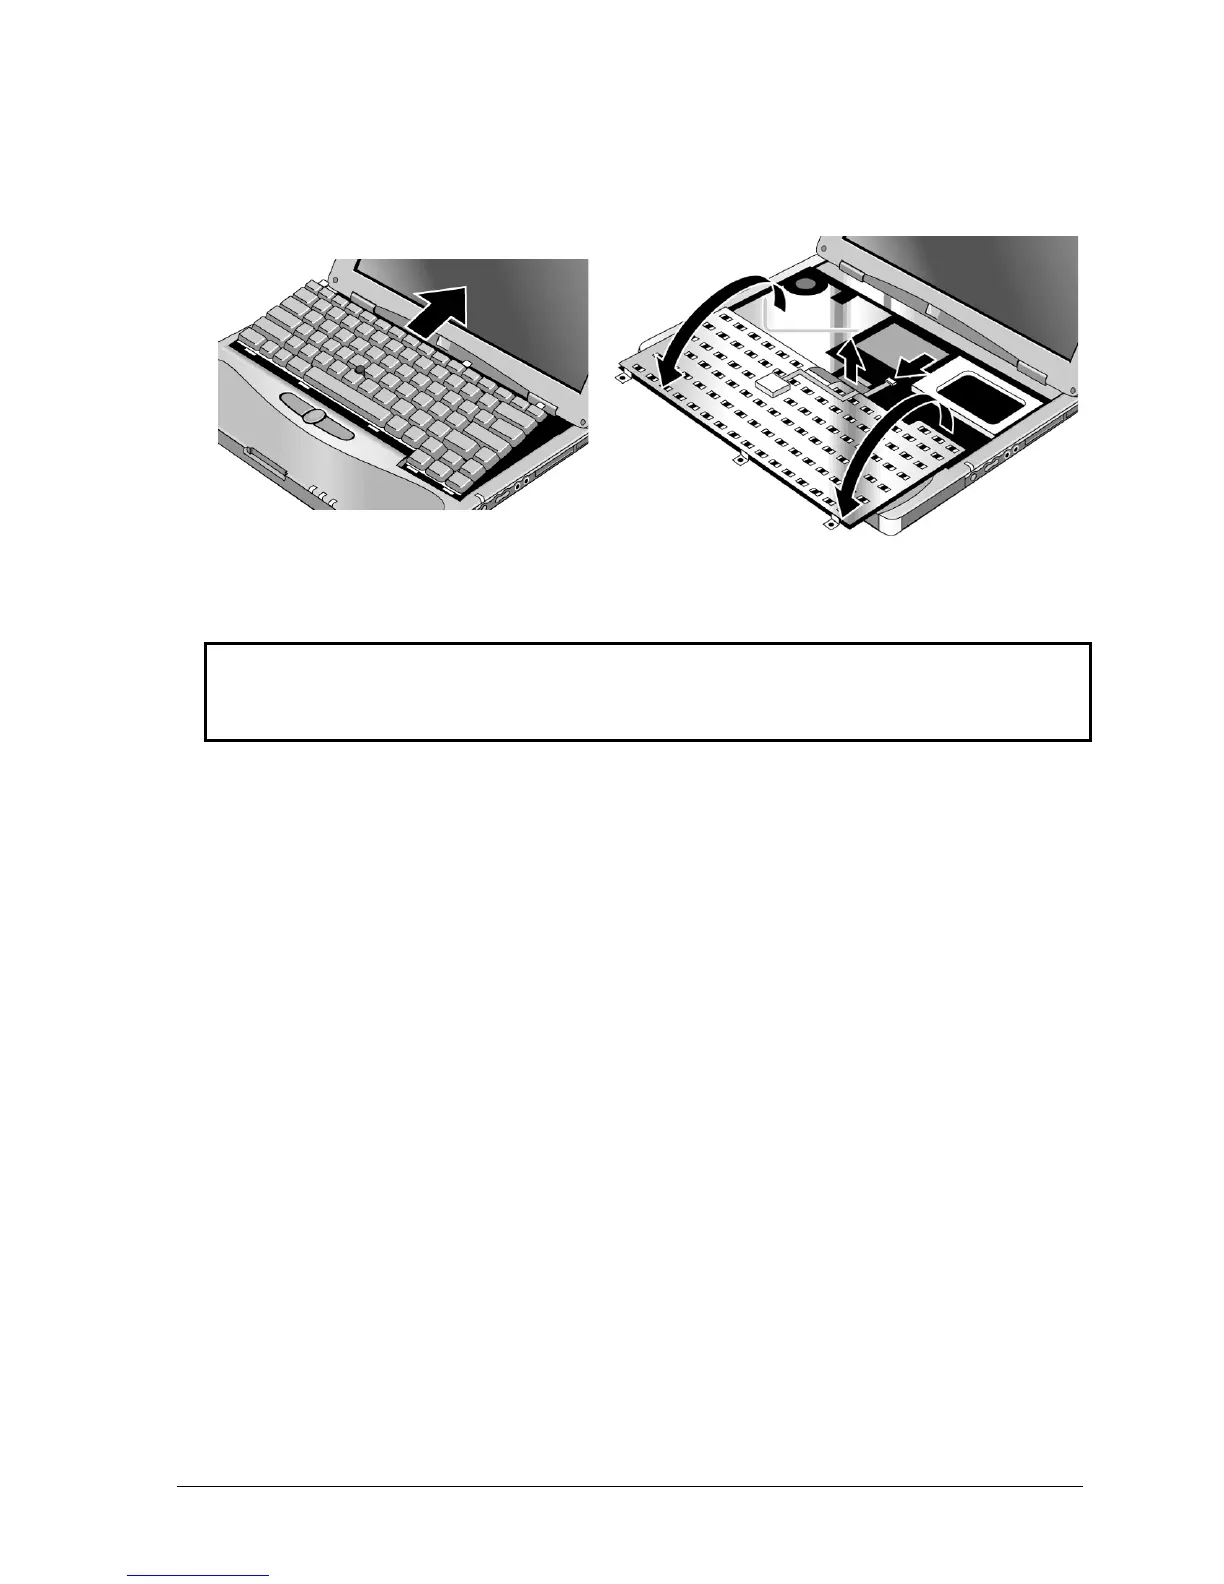
4.
Raise the top edge of the keyboard slightly, then slide it back about 1 cm (1/2 in) and fold it onto
the front of the case.
Figure 2-8. Removing the Keyboard
Warning
Do not touch the metal surfaces inside the computer until they have cooled off. They could
be very hot if the computer was running recently.
5.
Disconnect the pointing stick flex cable, and lift the keyboard flex cable off of its connector. You
may need to move the mini-PCI cables for best access to the keyboard and pointing stick cables.
6.
Remove the keyboard from the computer.
Reassembly Notes
•
Lay the keyboard face down on the top case slightly forward of its normal position, then
reconnect the keyboard and pointing stick flex cables. Make sure the keyboard cable connector is
firmly seated, and that the pointing stick flex cable is not pinched.
•
Make sure all cables under the keyboard are routed so as not to interfere with other components,
or with reinstalling the keyboard.
•
Make sure the cables from the mini-PCI card lie as flat as possible.
•
Slide the front edge of the keyboard into the computer case, then press the top of the keyboard
into place.
 Loading...