HP Omnibook 500 Removal and Replacement 2-7
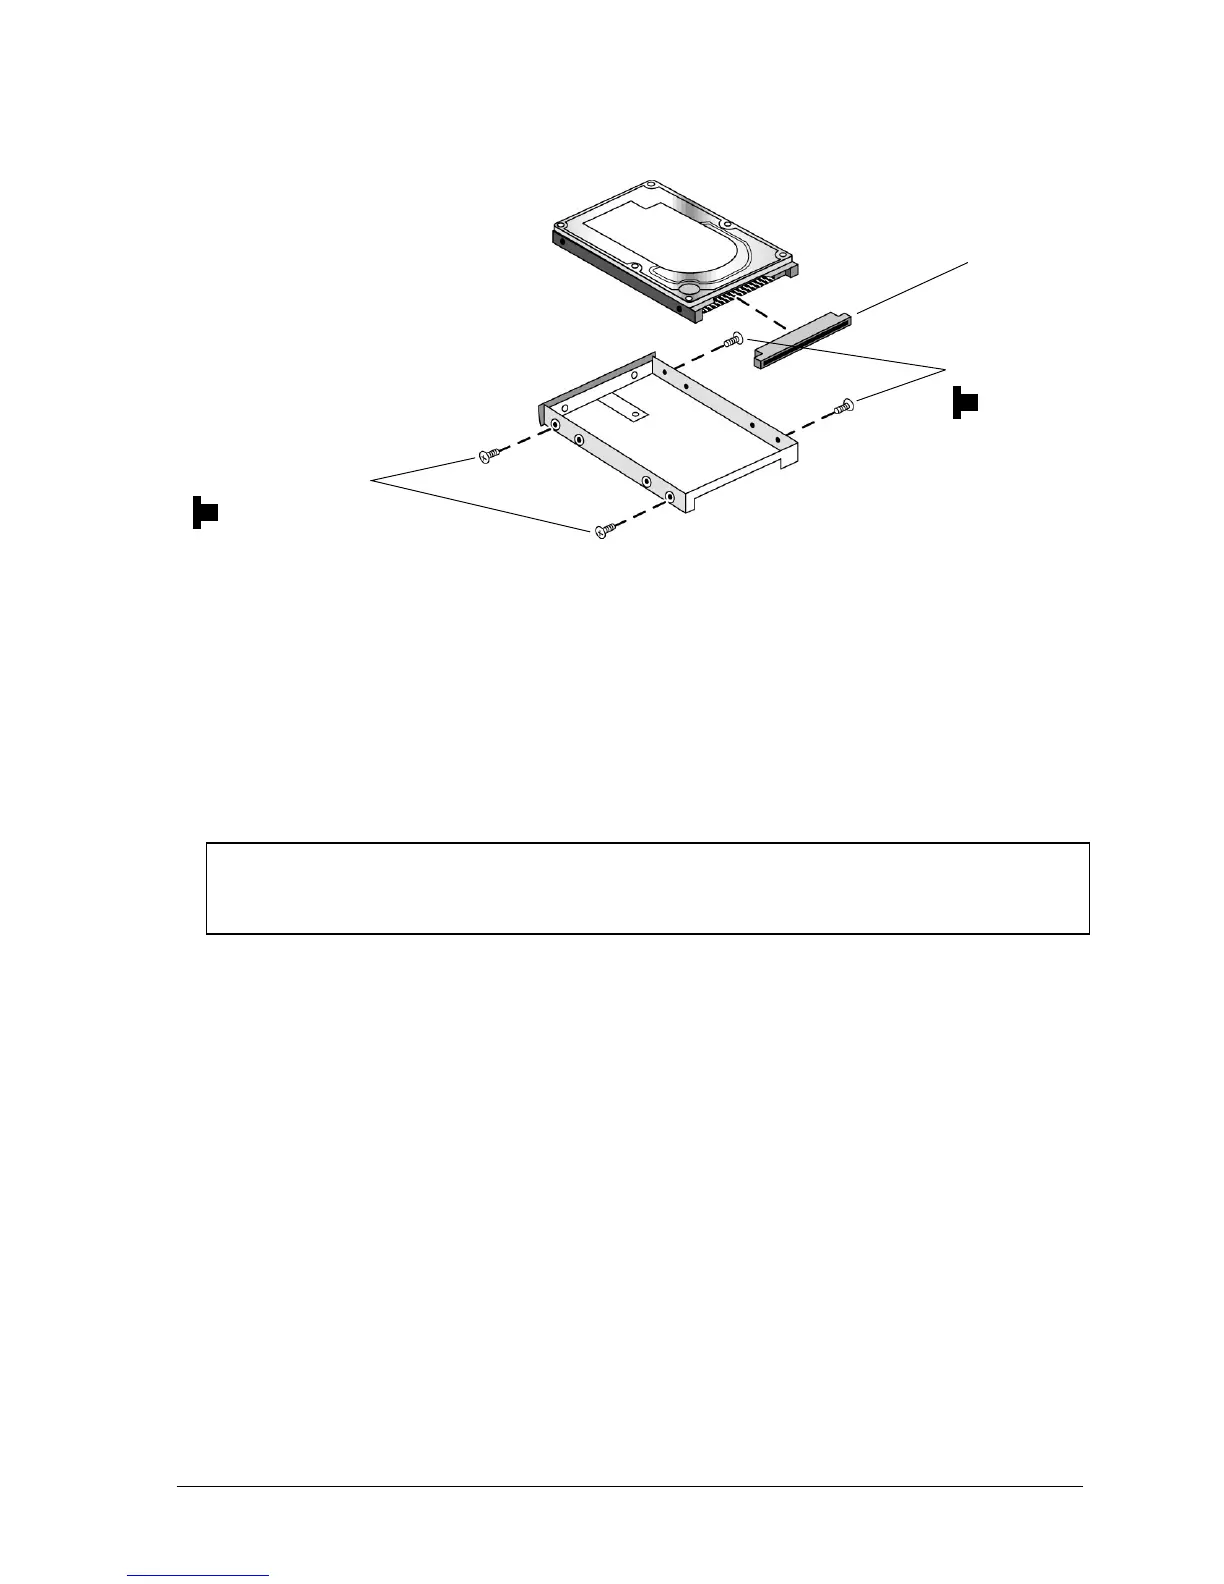
Figure 2-5. Removing the Hard Disk Tray
Reassembly Notes
•
Carefully put the pin connector back onto the pins on the end of the new hard drive. Work at each
end alternately so that the connector slides on evenly without bending the connector pins.
•
Insert the connector through the end of the tray, and lower the drive into place.
•
Slide the drive into the hard drive compartment. Press firmly to make sure the connector seats
properly.
Important
If you are installing a new hard disk drive, create a Utility partition on the drive before loading any
software — see “Creating a Utility Partition,” below.
Screws, M3×3mm (2)
Screws, M3×3mm (2)
Pin connector
 Loading...