2-18 Removal and Replacement HP Omnibook 500
Removing the Display Assembly
(HP Authorized Service Providers Only)
Required Equipment
•
#0 Phillips screwdriver.
•
Small flat-blade screwdriver.
Removal Procedure
1.
Unplug the AC adapter, if present, and remove the battery.
2.
Remove both screws from the back of the computer.
3.
Remove the power button panel (page 2-9).
4.
Wireless models only:
remove the switchboard PCA (page 2-16).
5.
Open the display so that it lays flat, and use a flat-blade screwdriver to remove the display hinge
covers.
6.
Remove the screw from the display cable, then use a flat-blade screwdriver to lift the display
cable off of its connector.
7.
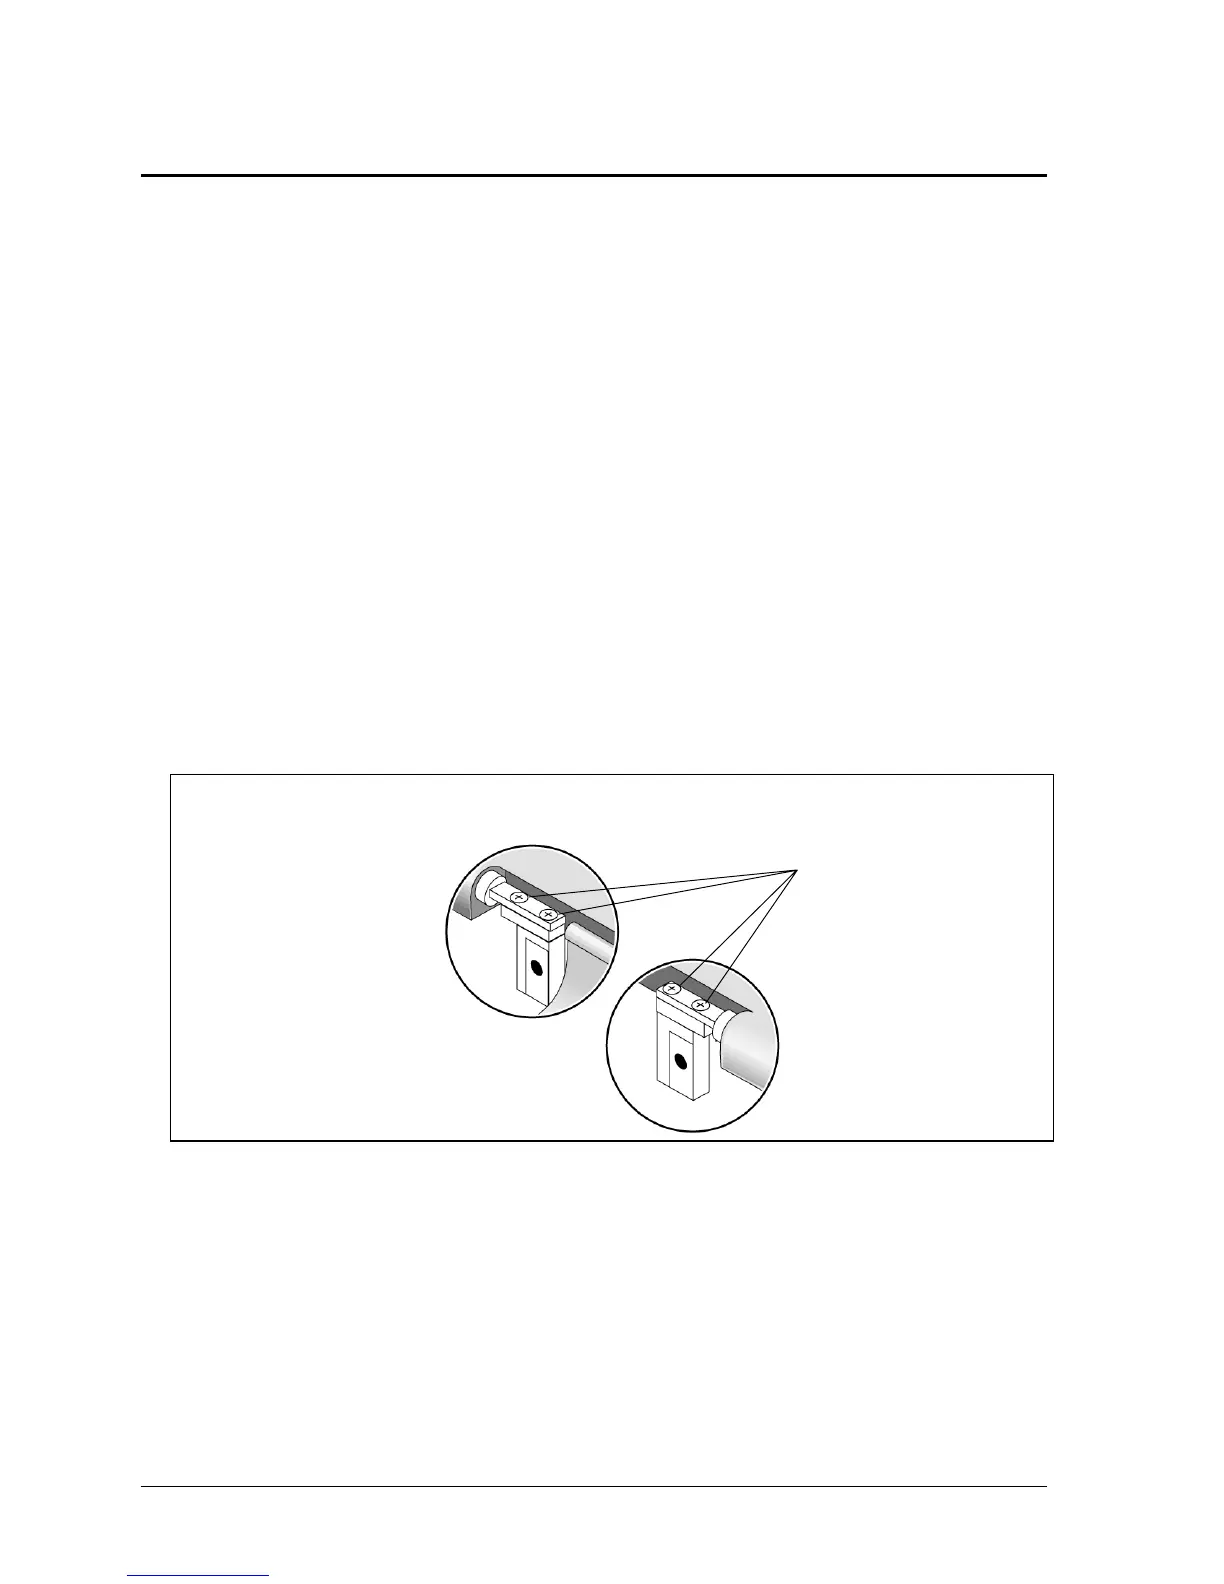
From the bottom of the computer, remove both screws from the display hinges.
Note
Do not remove the screws from the tops of the display hinges:
8.
Lift the display off of the computer.
Do NOT remove!
 Loading...