Removal and Replacement Procedures
HP ProLiant ML150 Generation 2 Server Maintenance and Service Guide 2-29
HP CONFIDENTIAL Codename: Stone Soup 2 Part Number: 368148-003 Last Saved On: 6/10/05 4:28 PM
SCSI Non-Hot-Plug Hard Drive Cage
To remove the SCSI non-hot-plug hard drive cage:
1. Complete the preparation procedures. Refer to “Preparation Procedures” earlier in this
chapter.
2. Remove the bezel door. Refer to “Bezel Door” earlier in this chapter.
3. Remove the access panel. Refer to “Access Panel” earlier in this chapter.
4. Remove all hard drives. Refer to “SCSI Non-Hot-Plug Hard Drive” earlier in this
chapter.
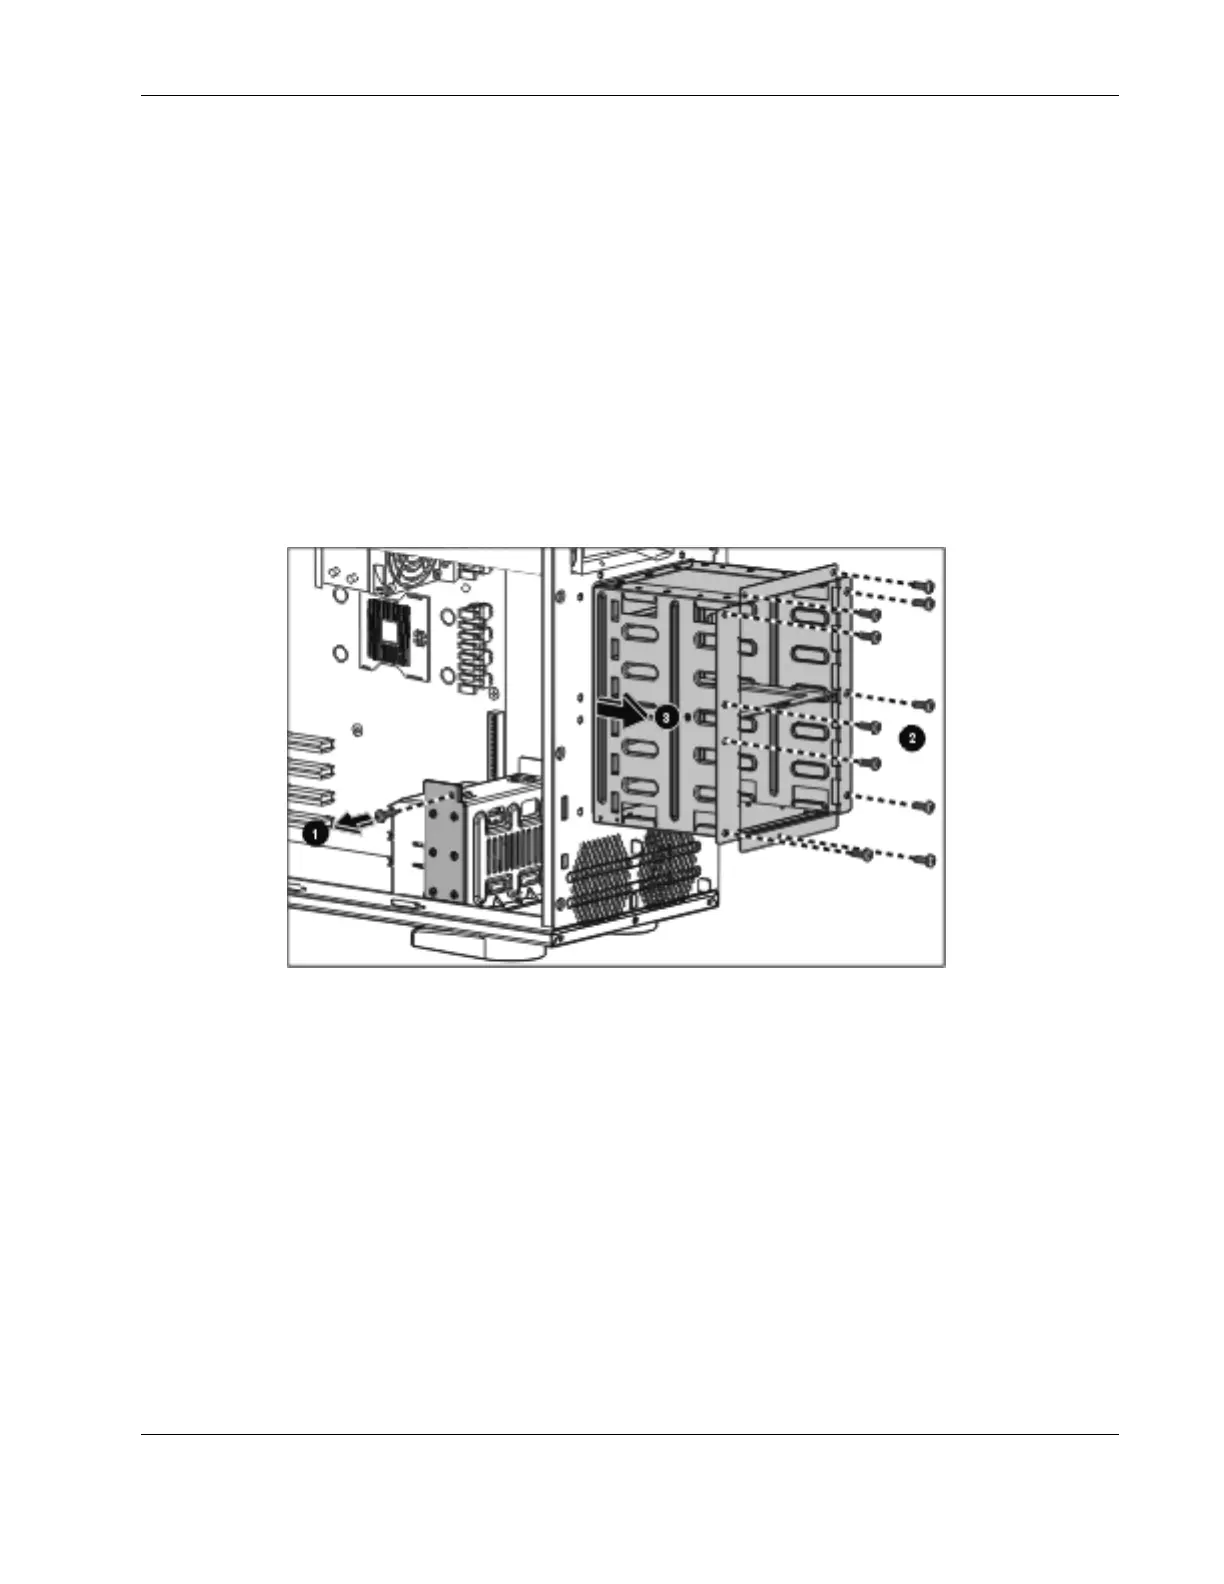
5. Remove the screw on the side (1) and 10 screws on the front (2) securing the SCSI non-
hot-plug hard drive cage to the chassis with a T-15 Torx screwdriver.
6. Pull the hard drive cage out from the chassis (3).
Figure 2-29: Removing the SCSI non-hot-plug hard drive cage
To replace the SCSI non-hot-plug hard drive cage, reverse steps 2 through 6.
When installing the hard drive cage in the chassis, be sure that the hard drive cage is seated
properly on the supporter.
 Loading...