36 - English
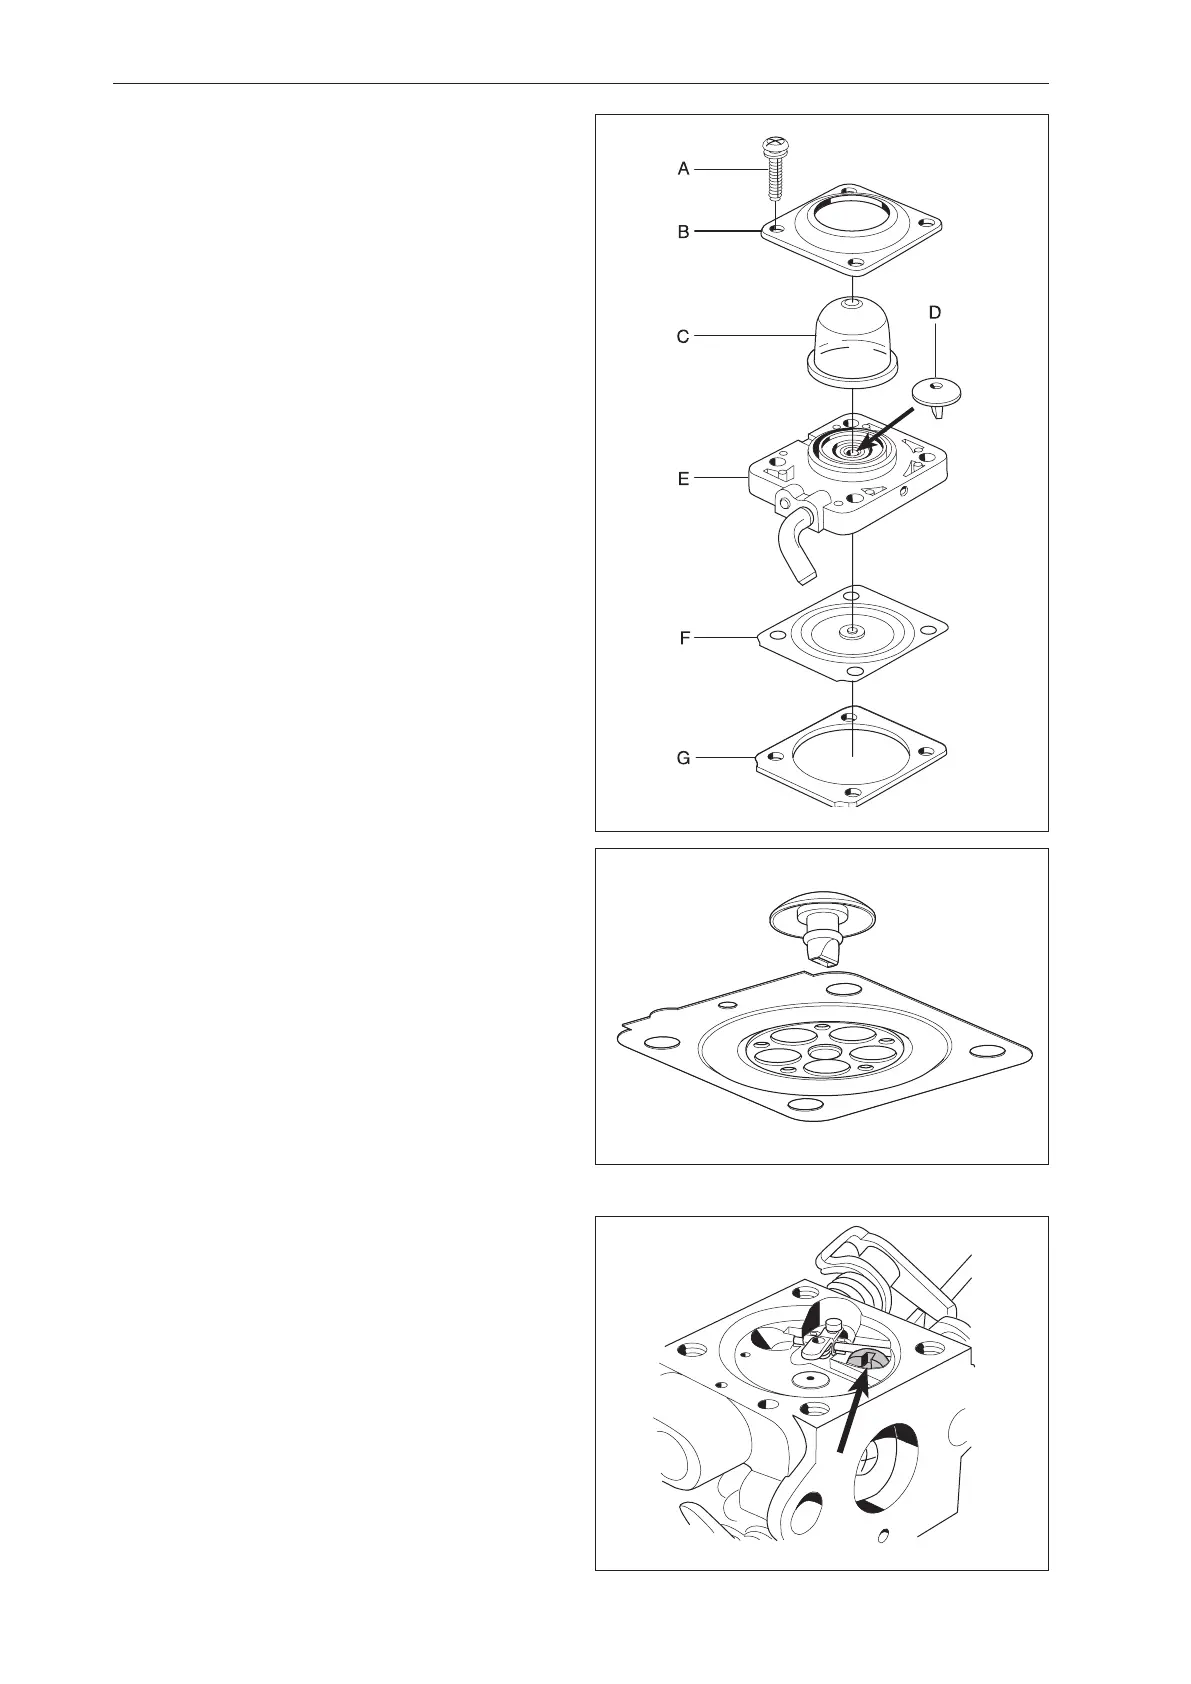
Fig 44
Fig 46
Fig 45
7.15 Dismantling the carburettor
The metering unit
1
Remove the 4 screws (A) and lift off the cover (B)
and the pump bellows (C).
2
Remove the non-return valve (D) using a small
screwdriver.
3
Lift off the diaphragm cover (E).
4
Carefully remove the control diaphragm (F) and
any gasket (G).
5
Check the non-return valve (D) to make sure the
gap (E) closes tightly. See figure 45.
If this is not the case the valve should be replaced
with a new one.
Check that the pin (F) on the control diaphragm
and contact surface on the needle valve is not
worn.
Also check the diaphragm by holding it up to a light
for instance to discover any holes in the material.
6
Remove the needle valve.
Loosen the bolt and remove the lever arm, axle,
needle valve and spring.
See figure 46.
Repair Instructions
 Loading...