The following illustration is for 5U server models with 3.5" hot swap hard
disk drives installed.
11. Lift the hot-swap backplane out of the lower lip on the drive cage and set it
aside.
12. If you are instructed to return the SAS/SATA hard disk drive backplane,
follow all packaging instructions, and use any packaging materials for
shipping that are supplied to you.
Replacing the hot-swap hard disk drive backplane
This procedure applies only to the 5U server model with hot-swap power supplies.
To install the hard disk drive backplane on the 5U server model with hot-swap
power supplies, complete the following steps.
1. Read the safety information in “Safety” on page vii and “Installation
guidelines” on page 35.
2. Place the bottom edge of the hot-swap hard disk drive backplane in the lower
lip of the drive cage.
3. Connect the power, signal and configuration cables to the hard disk drive
backplane.
Note: Make sure that Port 1 on the hardware ServeRAID is connected to Port
1 on the backplane. Likewise, Port 0 on the hardware ServeRAID should be
connected to Port 0 on the backplane.
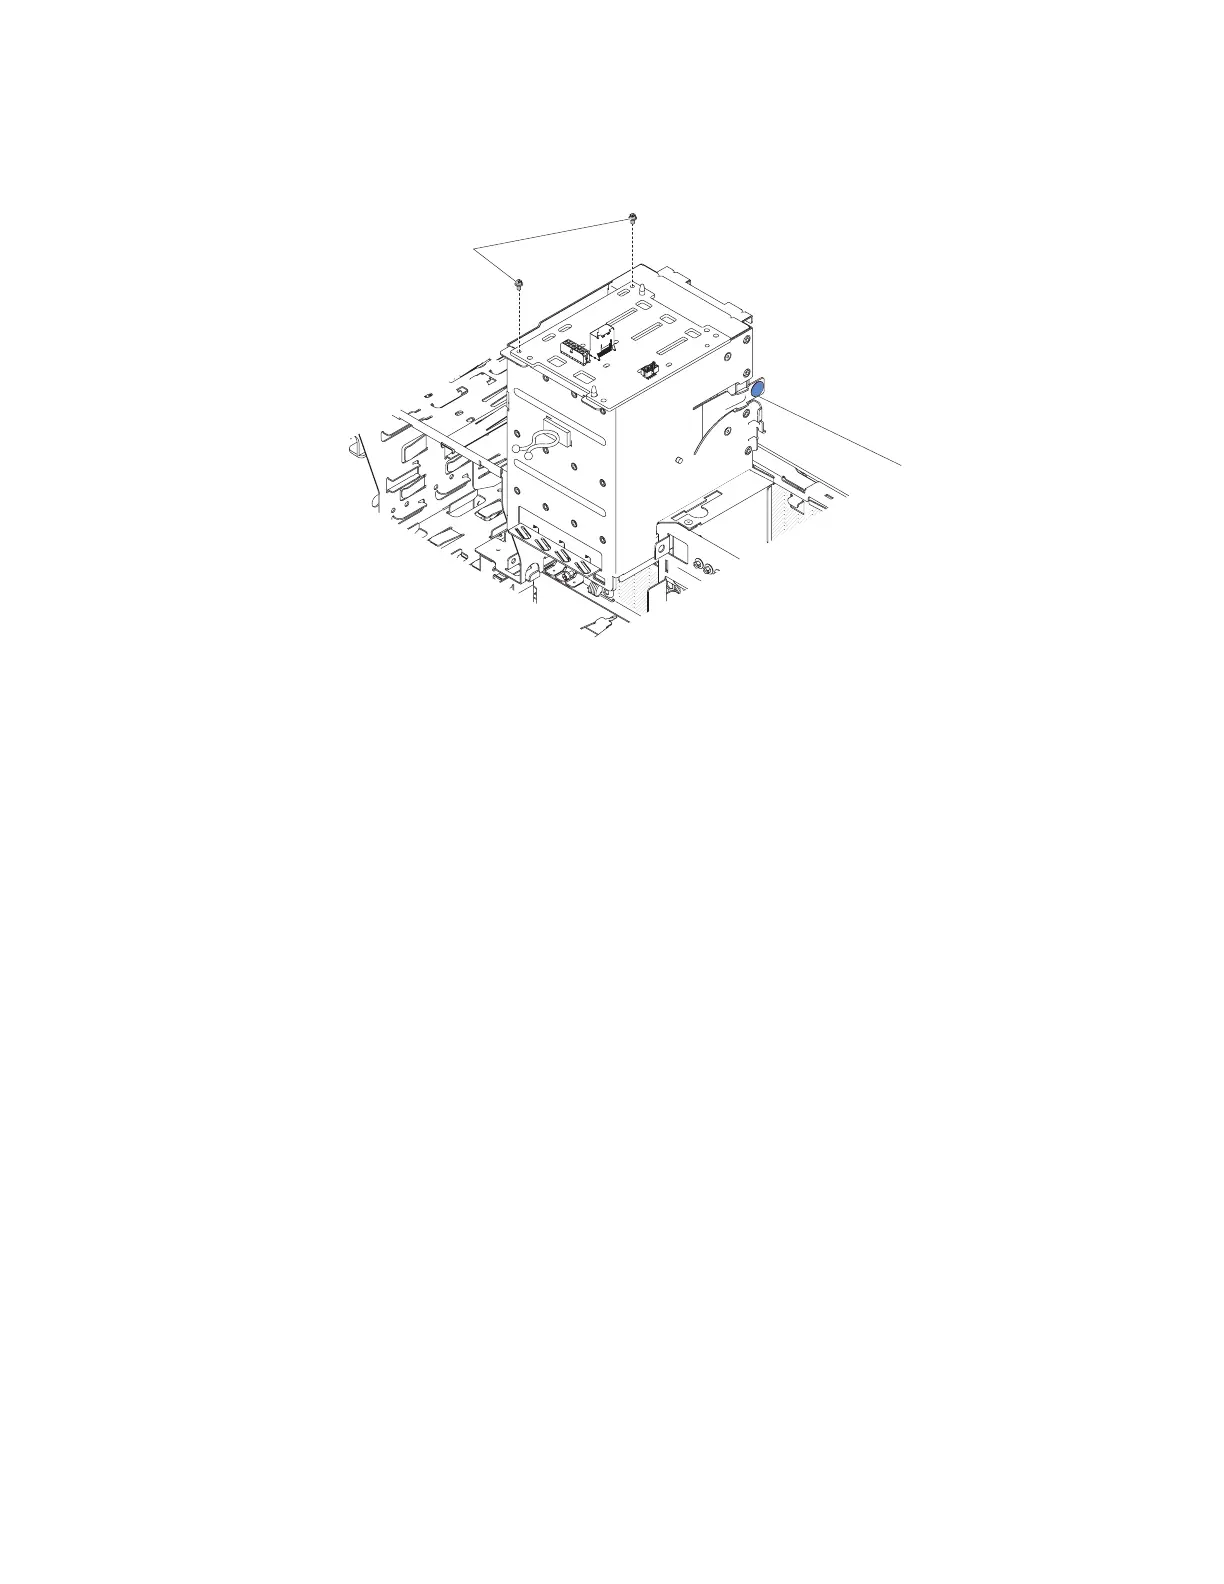
The following illustration is for 5U server models with 2.5" hot swap hard
disk drives installed.
Screws
Figure 153. 3.5" hot swap hard disk drive backplane screw removal for 5U server model with
hot-swap power supplies
Chapter 6. Removing and replacing components 243