155
13
OTHER FUNCTIONS
1
2
3
4
5
6
7
8
9
10
11
12
13
14
15
16
17
18
19
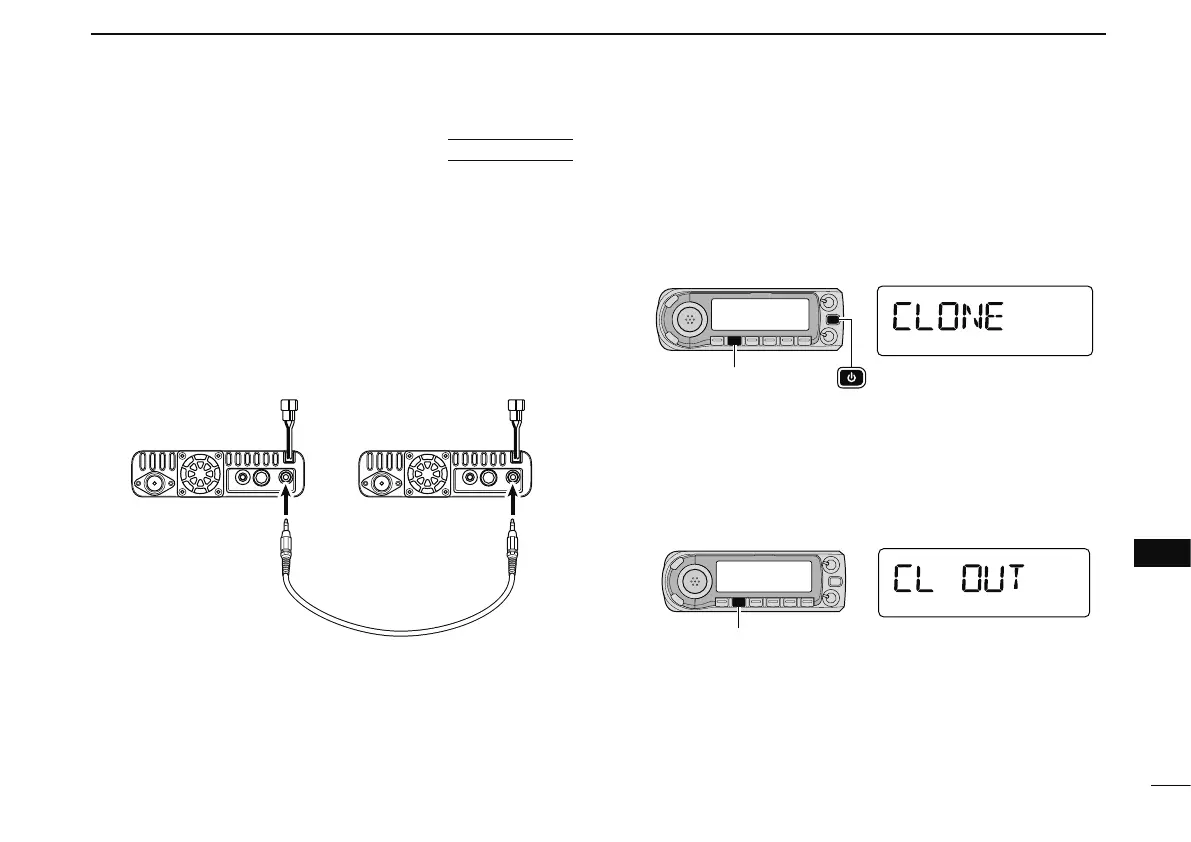
N Data cloning
AT POWER ON
D Cloning between transceivers
The ID-E880 has transceiver-to-transceiver data cloning ca-
pability. This function is useful when you want to copy all of
the programmed contents from one ID-E880 to another.
• A optional OPC-474
CLONING CABLE is required.
q Connect the optional OPC-474 cloning cable to the [SP]
jack of the master and sub-transceivers.
• The master transceiver is used to send data to the sub-trans-
ceiver.
to [SP]
jack
to [SP]
jack
Optional
OPC-474
w While pushing and holding [M/CALL], turn power ON to
enter cloning mode (master transceiver only— power on only
for sub-transceiver).
• “CLONE” appears and the transceivers enter the clone standby
condition.
e Push [M/CALL] on the master transceiver.
• “CL OUT” appears in the master transceiver’s display and the
bar meter shows that data is being transferred to the sub-trans-
ceiver.
• “CL IN” appears automatically in the sub-transceiver’s display
and the bar meter shows that data is being received from the
master transceiver.
r When cloning is finished, turn power OFF, then ON to exit
cloning mode.
• “CL END” appears automatically in the sub-transceiver’s display
after the cloning is completed.

 Loading...