12 - 10
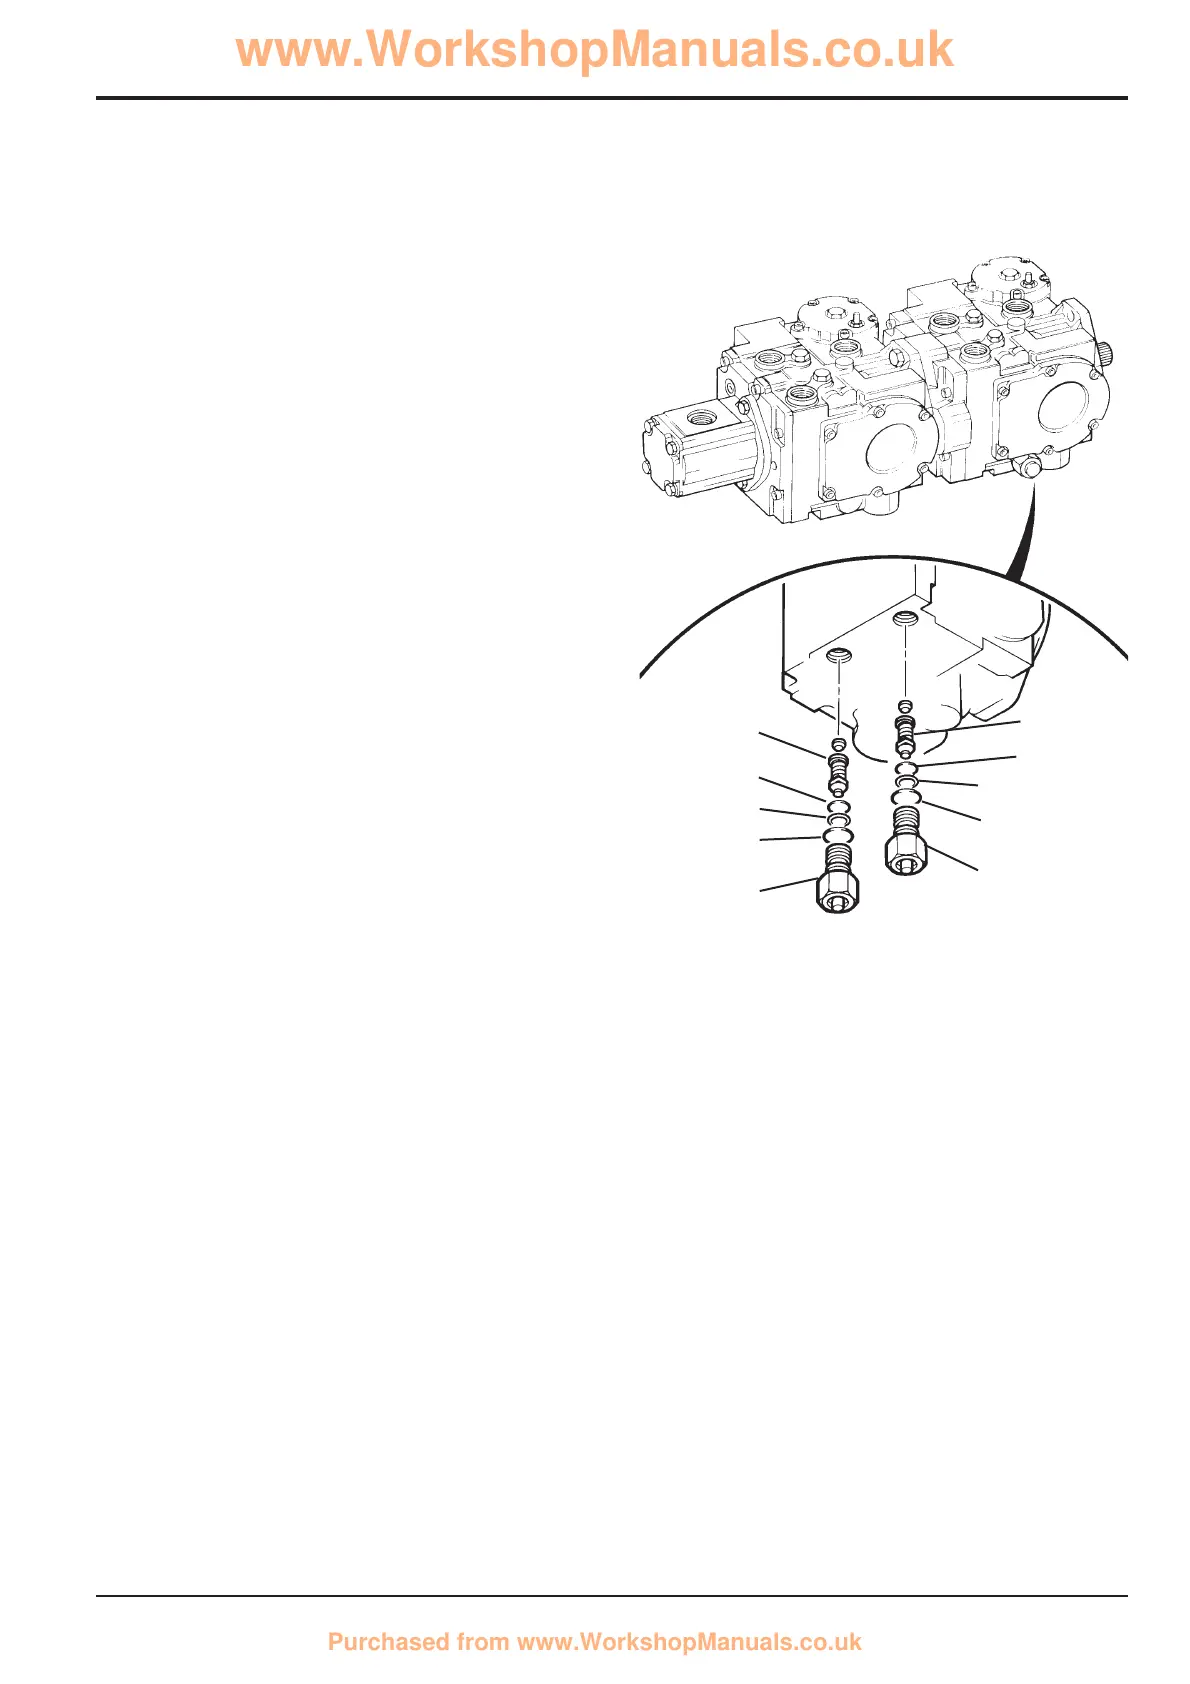
Hydrostatic Pump
from machine no. 751012
Charge Check and High Pressure Relief Valves
Dismantling and Assembly
The charge check and high pressure relief valves are
identical. The procedure for dismantling and assembly is,
therefore, the same for both valves.
1 Unscrew plug 1 from the pump body.
2 Remove the relief valve assembly 2 from the body. The
smaller end of the conical spring is crimped to retain it
on the relief valve.
Note: The High Pressure Relief Valve is factory set and
cannot be repaired.
3 Remove and discard O-rings 3 and 4, and back-up ring
5 from plug 1.
4 Inspect relief valve 2 and mating seat in plug 1 for
damage. Replace if necessary.
5 Install a new outer O-ring 3, new back-up ring 5 and
new inner O-ring 4 on plug 1.
6 Check that the conical spring is correctly retained on
relief valve and install the valve in the pump body.
Note: The conical spring must be correctly retained on
the relief valve to ensure satisfactory pump operation.
7 Refit plug 1 and torque tighten to 68 Nm (50 lbf ft).
Section E Hydraulics
9803/8550
Section E
12 - 10
Issue 1
Pumps
S244930
2
4
5
3
1
2
4
5
3
1

 Loading...