− 54 −
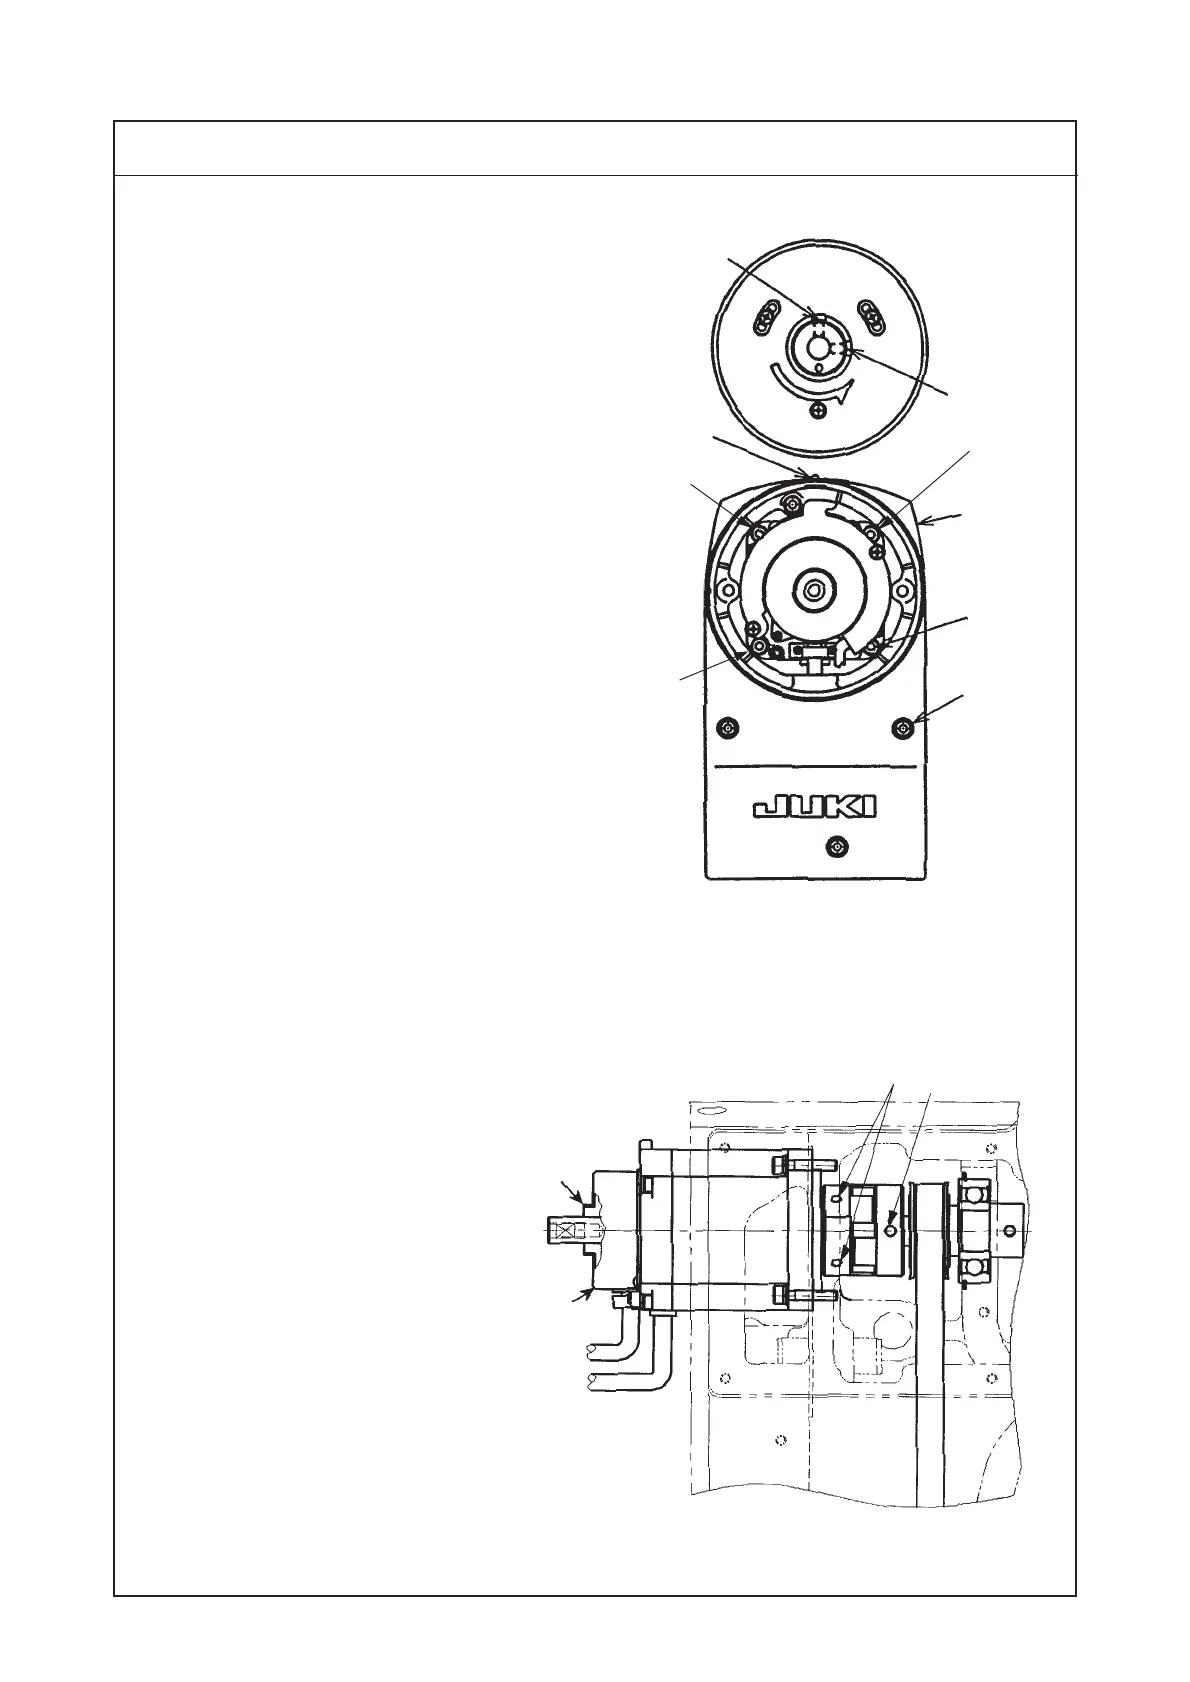
(2) Replacing the motor
1) Loosen the setscrews in the handwheel in
the order of screw No. 2 2 and screw No.
1. 1.
2) Remove four setscrews 4 in pulley cover
3 with the hexagon wrench key of 4 mm.
3) Remove the pulley cover 3 while paying
attention to LED 5 of the synchronizer.
4) Remove the window plate, and loosen
coupling setscrews 8 fixed on the motor
shaft in the order of screw No. 2 and screw
No. 1.
5) Remove four motor setscrews 7 with the
hexagon wrench key of 4 mm.
6) Quietly pull out the motor, loosen setscrews
6 in the coupling, and remove the coupling
from the motor.
7) Fit the coupling the hole diameter of which
is smaller to the new motor, adjust screw
No. 1 of setscrews 6 to the flat portion of
the motor and tighten it. At this time, set
the clearance between the motor and the
coupling to 0.5 mm.
8) Insert the motor into the machine arm,
adjust screw No. 1 of coupling setscrews
8 to the flap portion of main shaft and
tighten it.
9) After installing pulley cover 3, tighten the
setscrews in the order of screw No. 1 1
and screw No. 2 2 at the position where a
clearance of approximately 1 mm is
provided between the handwheel and
pulley cover 3.
Motor Part No. : KM000000460
A
B
Procedures of disassembling/assembling
1
2
3
4
5
6
7 (Short)
8
7
7
7
 Loading...


