– 23 –
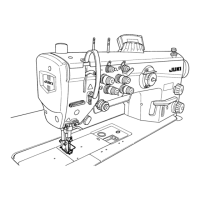
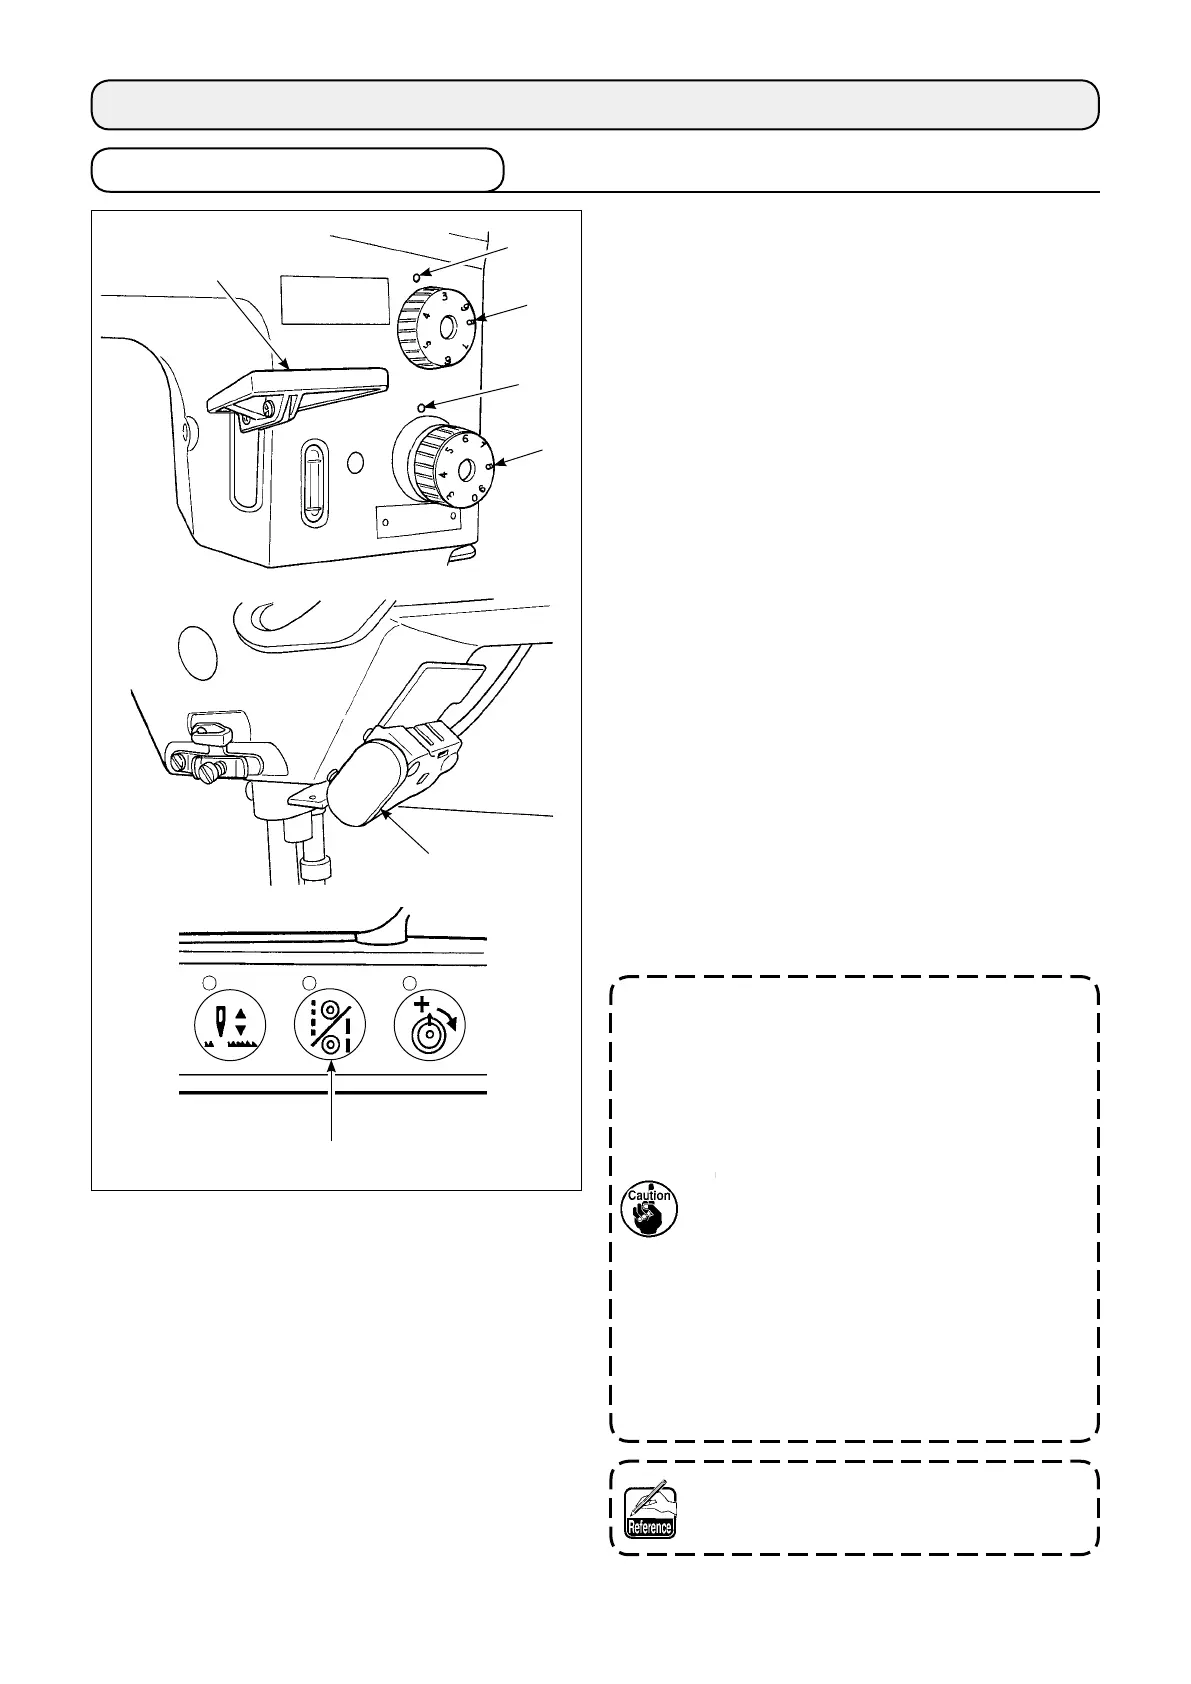
Turn standard feed adjusting dial
❶
and 2P feed ad-
justing dial
❷
to align the desired number with mark-
er dot
❸
on the machine dial.
(1) Reverse feed stitching
1) Press down reverse feed control lever
❹
.
2) Reverse feed stitches are made as long as you
keep pressing the lever down.
3) Release the lever, and the machine will run in
the normal feed direction.
(2) Manual one-touch reverse feed stitching
1) Press touch-back switch
❺
.
2) Reverse feed stitches are made as long as you
keep pressing the lever down.
3) Release the switch, and the machine will run in
the normal feed direction.
(3) Changing over the stitching pitch (LU-2810-7,
2860-7, 2818-7 and 2868-7)
1) Press stitching pitch changeover switch
❻
to
change over the stitch length to the one cor-
responding to the scale mark on the 2P feed ad-
justing dial. (The LED on the switch lights up.)
1. Set 2P feed adjusting dial
❷
at a value
smaller than the value set by standard
feed adjusting dial
❶
.
2. Adjust the 2P feed adjusting dial when
the stitching pitch changeover switch is
placed in OFF.
3. (LU-2810-7, LU-2860-7)
Scale mark on the 2P feed adjusting
dial smaller than 3 (at which the dial is
stopped by the dial stopper) is used for
the 0 (zero) alignment of the 2P dial. Scale
marks smaller than 3 cannot be used.
4. (LU-2818-7, LU-2868-7)
In the case standard stitch dial
❶
is set
at a small pitch value, move feed control
lever
❹
up and down several times before
starting sewing.
Refer to "5-7. Operation switches (LU-2810-
7, LU-2860-7, LU-2818-7, LU-2868-7)" p.39
for the details of the 2P device.
❸
❷
❶
❹
❺
❻
❸
4. ADJUSTING THE SEWING MACHINE
4-1. Adjusting the stitch length
 Loading...