– 21 –
2-16. Attaching the connecting rod
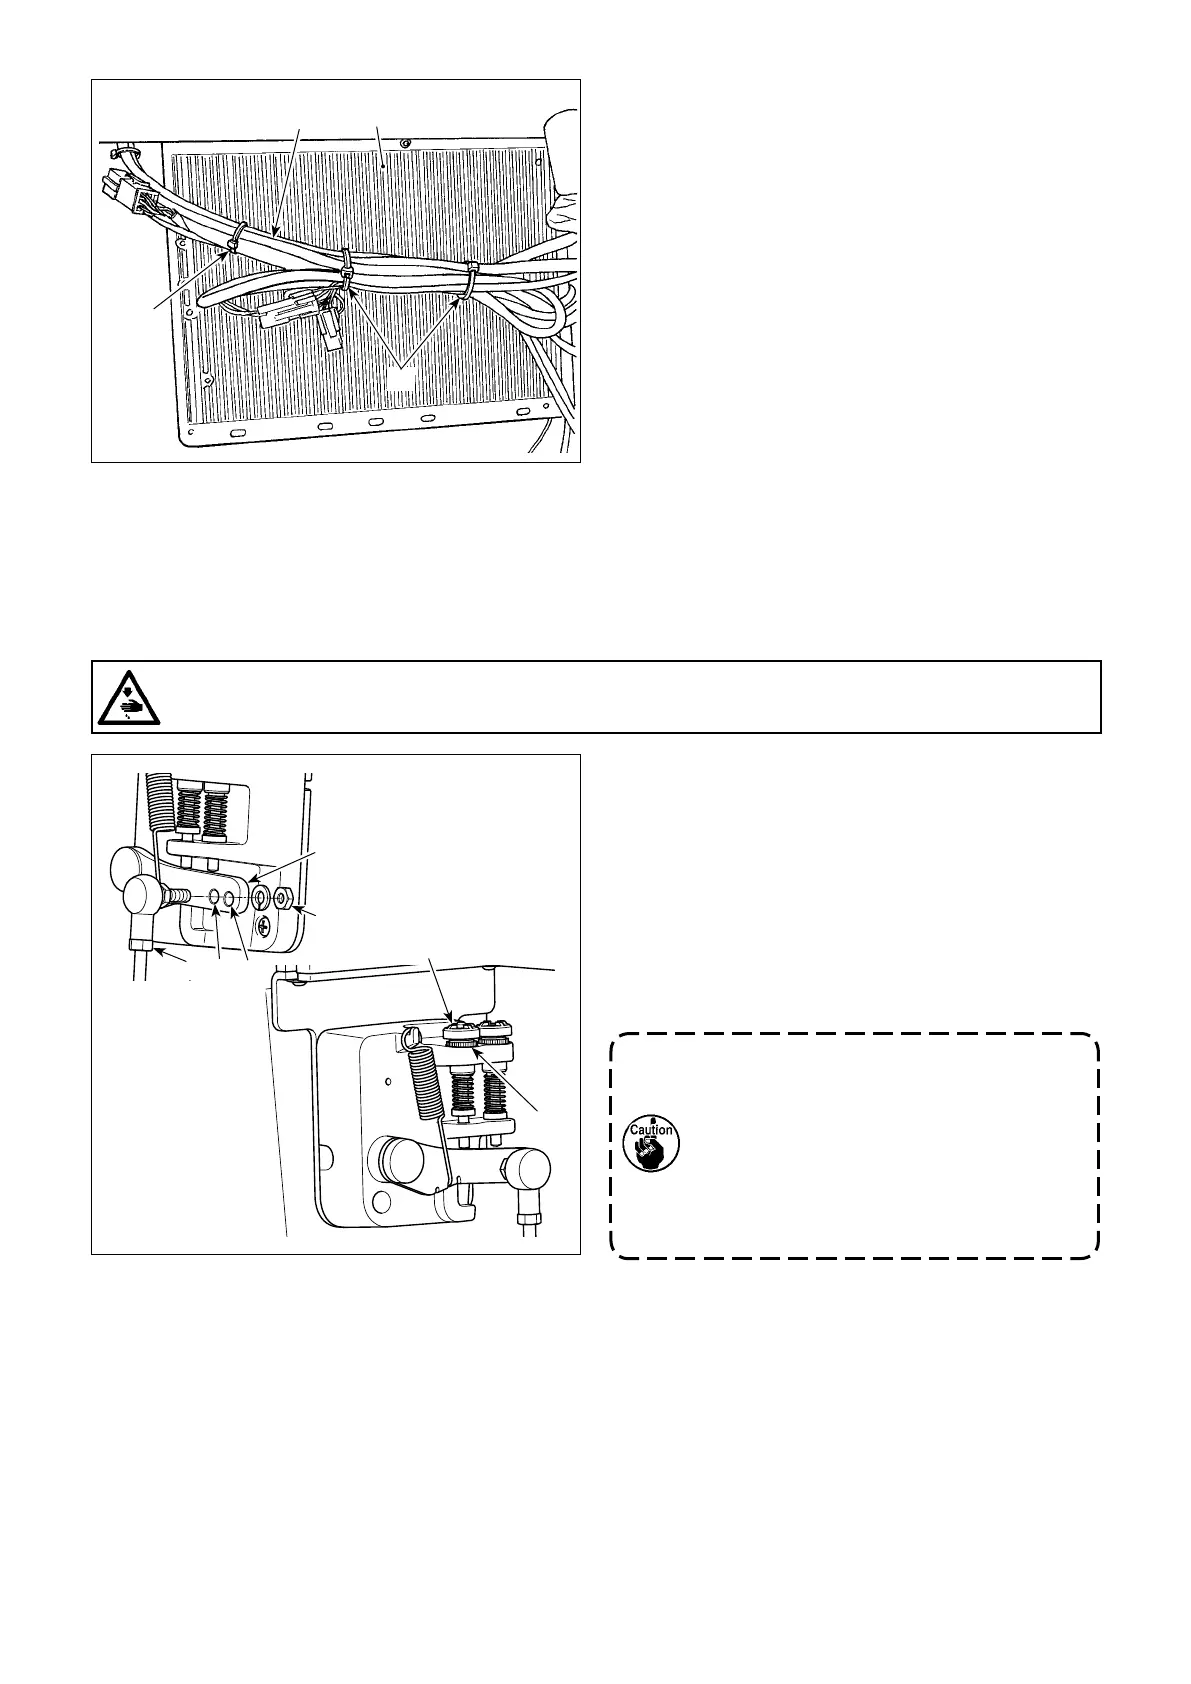
1. If the screw is excessively loosened, the
spring will come off. Loosen the screw to
such an extent that the top of the screw
can be observed from the case.
2. Whenever you have adjusted the screw,
be sure to secure the screw by tightening
metal nut
to prevent the screw from
loosening.
1) Fix connecting rod
to installing hole
of
pedal lever
with nut
.
2) Installing connecting rod
to installing hole
will lengthen the pedal depressing stroke, and
the pedal operation at a medium speed will be
easier.
3) The pressure increases as you turn reverse de-
pressing regulator screw
in, and decreases
as you turn the screw out.
WARNING :
To protect against possible personal injury due to abrupt start of the machine, be sure to start the
following work after turning the power off and a lapse of 5 minutes or more.
2) Bundle cord
coming from the control box for
stitch skipping detecting device and tube
coming from the solenoid valve on the under-
surface of electrical box
.
Fix the cord and tube which are bundled in the
above step 2) with accessory 10 mm long ca-
ble clip band
and two 15 mm long cable clip
bands
as illustrated in the gure.
At this time, fold the longer cord to an appropri-
ate length and bundle the folded cord so that it
does not sag.
 Loading...