Chapter 6---Miscellaneous Items
Model 250 Service Manual 6-1
6.0 Miscellaneous Items
Contents
6.1 Projector Covers...........................................................................................6-1
6.2 Electronics Module Tilt-up .......................................................................... 6-2
6.3 Ventilation.................................................................................................... 6-3
6.4 Air Filters .....................................................................................................6-4
6.5 IR Detectors.................................................................................................. 6-4
6.6 EMI Shield ................................................................................................... 6-4
6.7 Cleaning Lenses, ILA
®
Assemblies, and Mirrors........................................6-5
6.1 Projector Covers
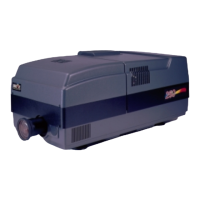
There are two projector covers, one that covers the front of the projector and one
that covers the rear. The are attached and hinged to the Cross-Member Assembly.
The covers can be tilted up (see CAUTION below) or removed from the projector
to perform service procedures. The projector covers provide a stylish, professional
appearance to the projector, however they also protect operators from exposure to
high voltages and very bright light. Review the Safety chapter and adhere to all
warnings and cautions.
CAUTION
!
Do not leave either cover in the tilted up
position! The covers can fall from this tilted up position and possibly
damage projector components. Remove the cover and set it aside when
servicing the projector.
Tools Needed
#1 Pozi-drive Phillips-head screwdriver
To remove the front or rear covers:
1. Disconnect the projector power plug.
2. Loosen the two Pozi-drive Phillips-head spring screws at the front of the
front cover or the rear of the rear cover.
3. Tilt up the front or rear cover.
4. Release the two Latch Levers on the Cross-member assembly that hold the
cover in place. Place the ends of the Latch Levers into the holding slots.
 Loading...