3
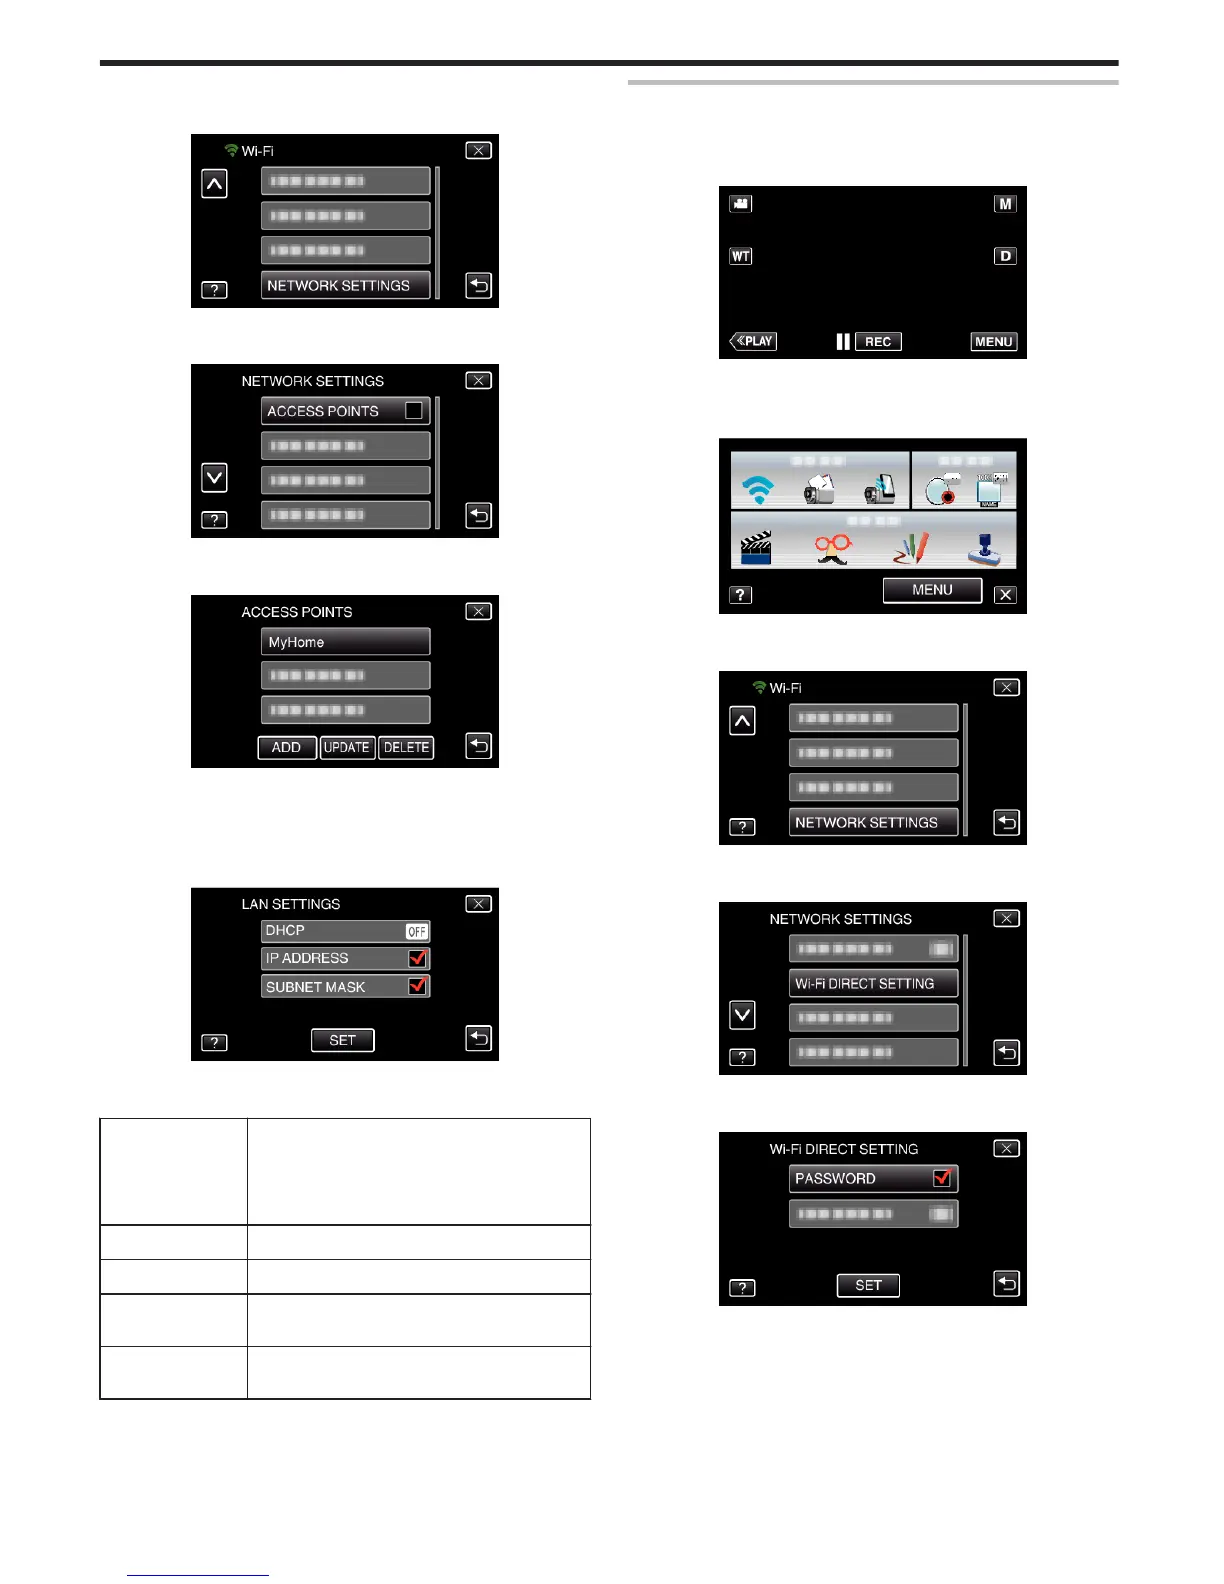
Tap “NETWORK SETTINGS”.
(Operation on this camera)
.
4
Tap “ACCESS POINTS”.
(Operation on this camera)
.
5
Tap “UPDATE”.
(Operation on this camera)
.
0
Tap 3 or 2 to select an item to edit or delete.
0
To change connection to another access point, tap on the desired
access point.
6
Perform the LAN settings. (when “DHCP” is set to “OFF”)
(Operation on this camera)
.
0
After setting, tap “SET”.
0
LAN settings comprise of the following items.
DHCP
ON: Obtains IP address from the DHCP server
automatically.
OFF: Settings of “IP ADDRESS”, “SUBNET
MASK”, “DEFAULT GATEWAY”, “PRIMARY
DNS”, and “SECONDARY DNS” are required.
IP ADDRESS Enter the IP address.
SUBNET MASK Enter the subnet mask.
DEFAULT
GATEWAY
Enter the default gateway.
PRIMARY DNS /
SECONDARY DNS
Enter the IP addresses of the primary and
secondary DNS servers.
Setting the Password (DIRECT MONITORING)
Sets the password for direct monitoring. (8 to 32 characters)
1
Tap “MENU”.
(Operation on this camera)
.
0
The shortcut menu appears.
2
Tap “Wi-Fi” (
Q
) in the shortcut menu.
(Operation on this camera)
.
3
Tap “NETWORK SETTINGS”.
(Operation on this camera)
.
4
Tap “Wi-Fi DIRECT SETTING”.
(Operation on this camera)
.
5
Tap “PASSWORD”.
(Operation on this camera)
.
Using Wi-Fi
40
 Loading...