SECTIONVll. NORMAL MAINTENANCE s
CAUTION:
• Unplug the machine.
• Do not dismantle the machine other than as explained
in this section.
• Do not store the machine in a high-humidity area, near
a heat radiator, or in direct sunlight.
• Clean the outside of the machine with a soft cloth and
mild soap.
The model 19010 is equipped with dual sewing lights. One
is located behind the face plate and the other is on the
underside of the sewing arm.
Replacing the Light Bulbs
CAUTION:
As the light bulb could be HOT, protect your fingers when
you handle it.
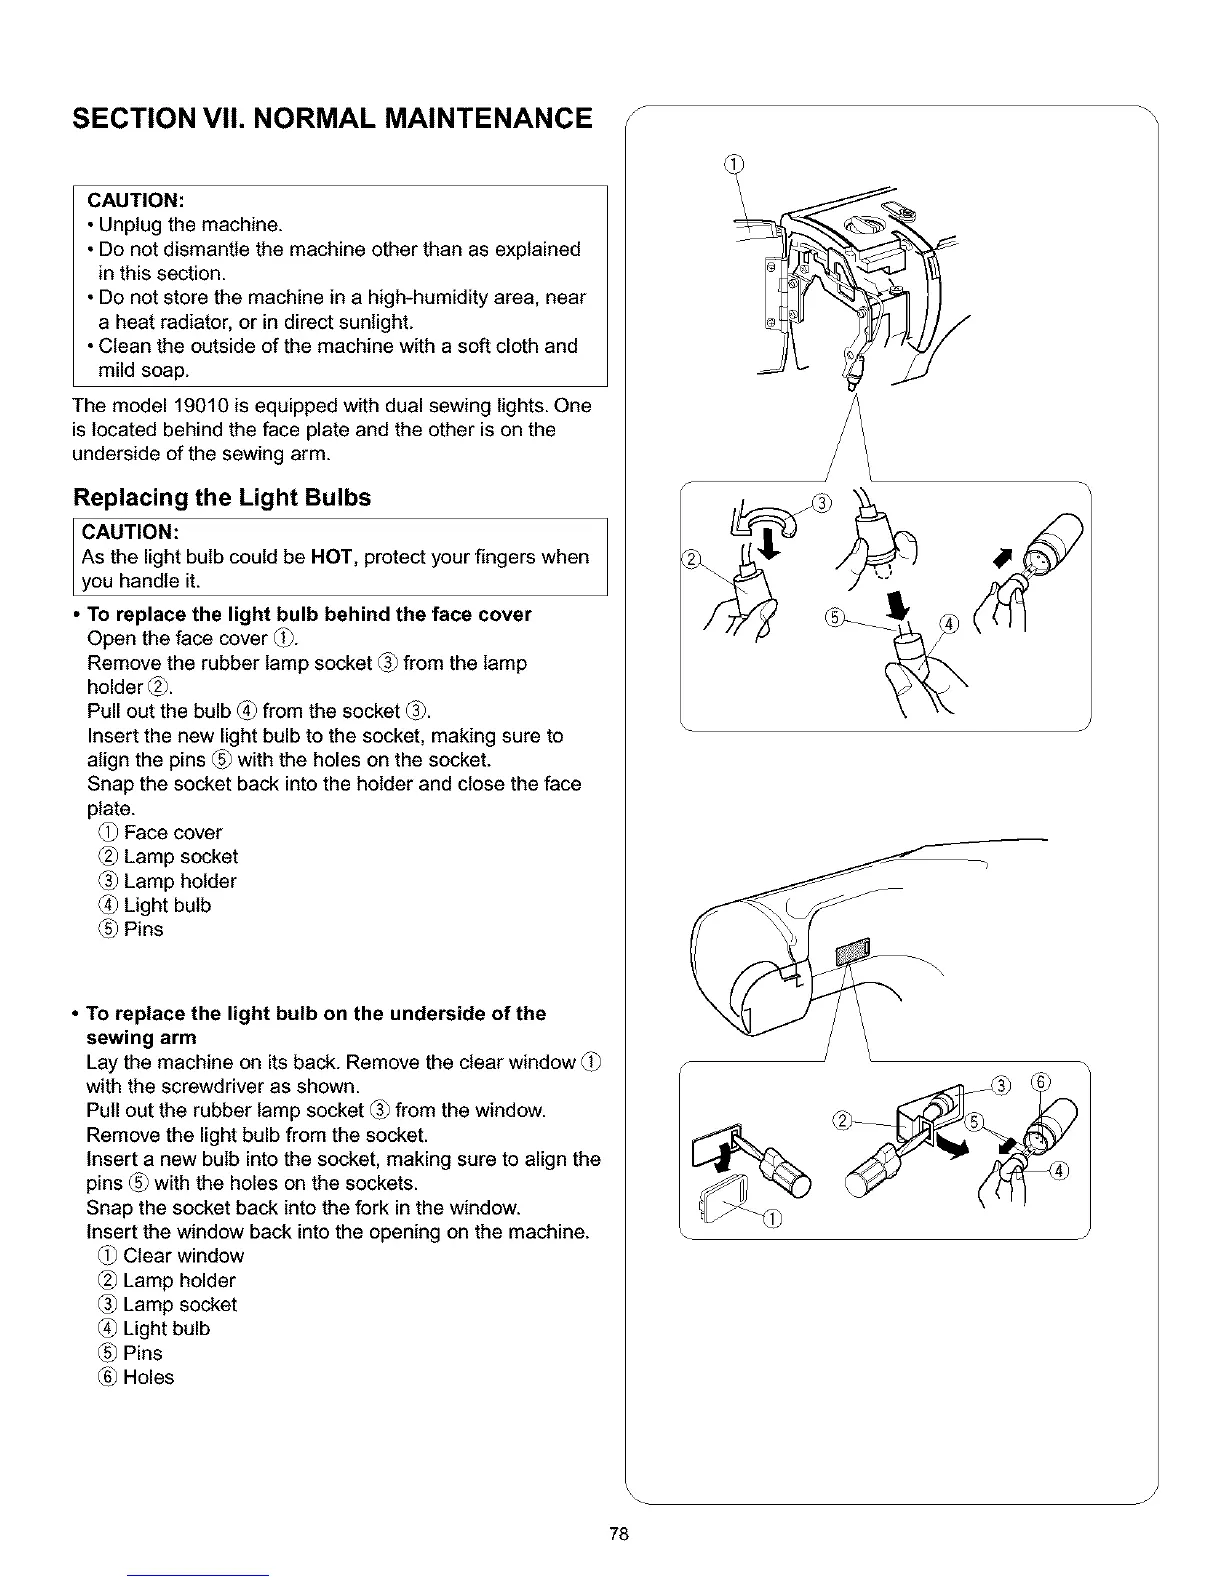
• To replace the light bulb behind the face cover
Open the face cover _.
Remove the rubber lamp socket _ from the lamp
holder _.
Pull out the bulb _ from the socket _.
Insert the new light bulb to the socket, making sure to
align the pins _ with the holes on the socket.
Snap the socket back into the holder and close the face
plate.
(_ Face cover
Lamp socket
Lamp holder
(_ Light bulb
Pins
• To replace the light bulb on the underside of the
sewing arm
Lay the machine on its back. Remove the clear window
with the screwdriver as shown.
Pull out the rubber lamp socket _ from the window.
Remove the light bulb from the socket.
Insert a new bulb into the socket, making sure to align the
pins _ with the holes on the sockets.
Snap the socket back into the fork in the window.
Insert the window back into the opening on the machine.
Clear window
Lamp holder
Lamp socket
(_ Light bulb
Pins
Holes
J
78
 Loading...