COMPONENT ACCESS
n
4-3
ϯ
Zz^d>ϱϬη/D,/EͲϮϬϭϯdZ/Ed,dZ/EZ
,KtdKZDKsZKWKtEKKZ
Ice Bin Components
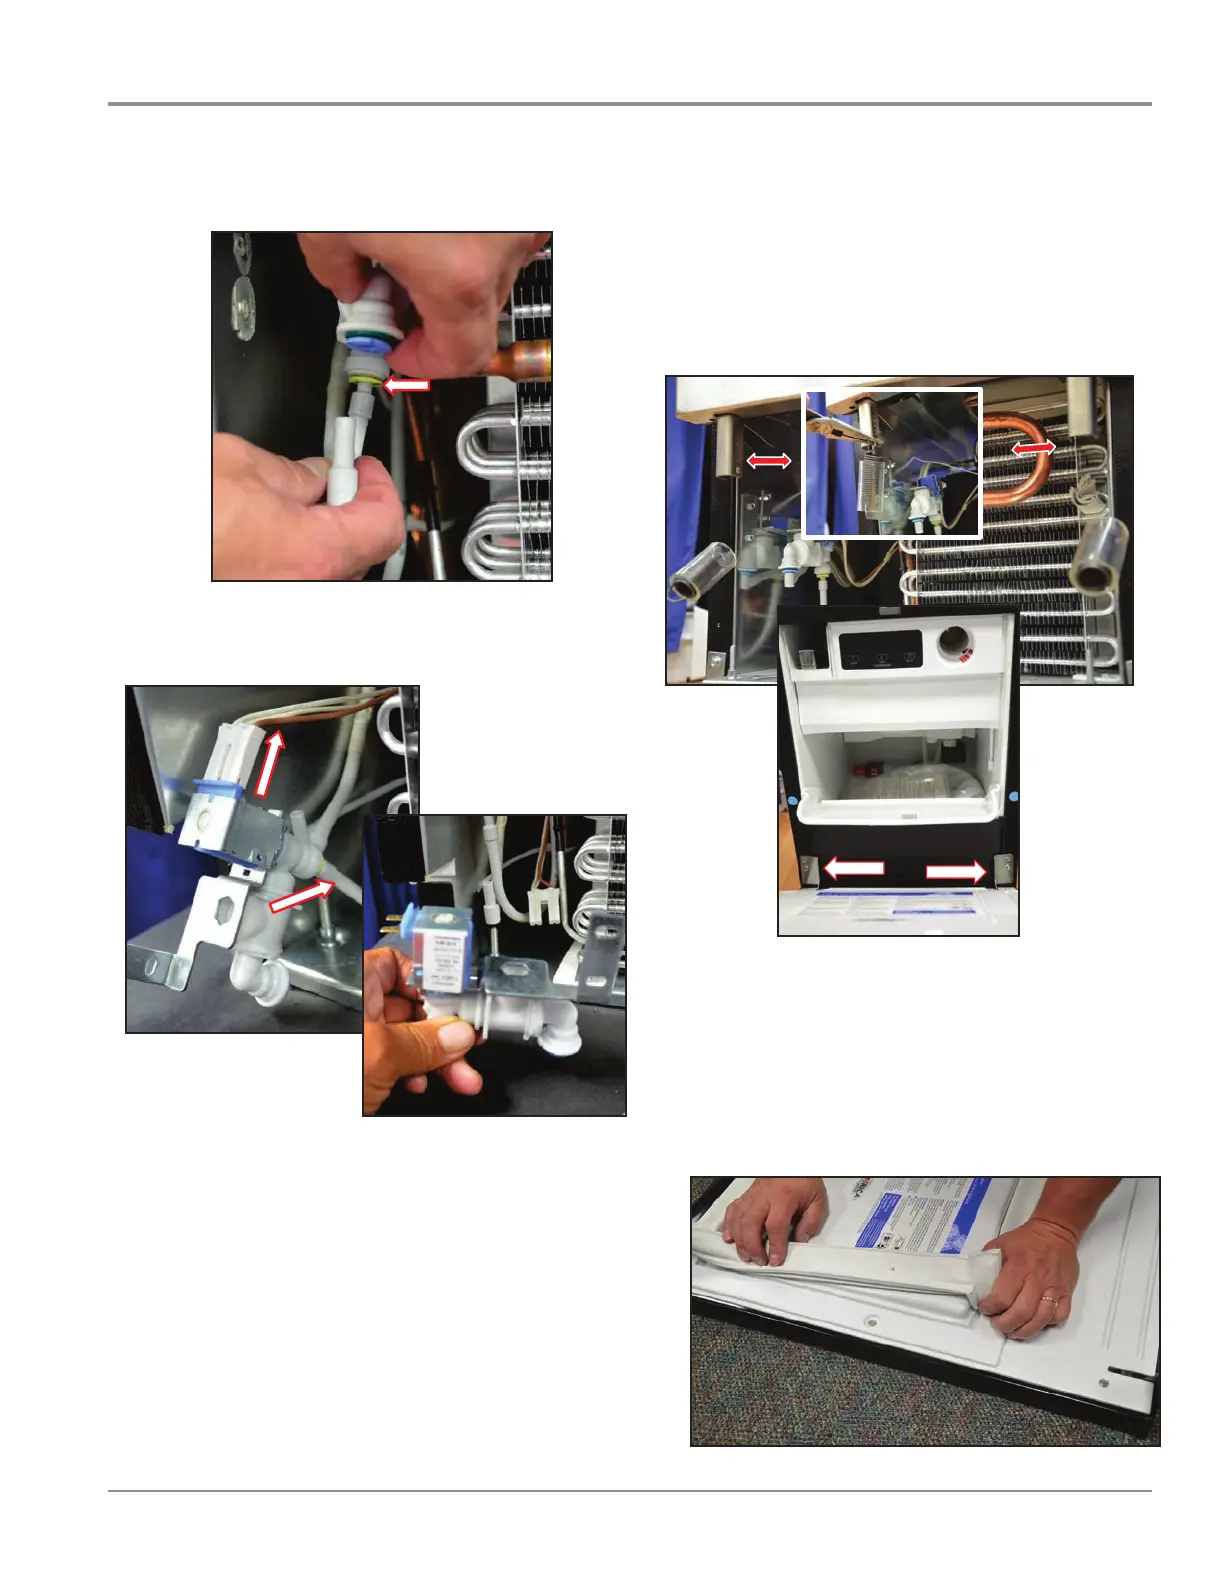
4. Release the quick connect and disconnect the water
tube. See Figure 4.
ICE BIN DOOR REMOVAL
1. Unplug ice maker or disconnect power.
2. Support the door so it doesn’t get damaged during
the removal process. Use pliers to remove the left
and right side door springs. Remove 2 screws on
the left and right side hinge plates and remove door.
See Figure 6.
DOOR GASKET SERVICE
3. The door gasket can replaced on any style and size
ice maker by simply pulling off the old gasket and
inserting the new one in it’s place.
NOTE: The door does not need to be removed from the
product to accomplish this. See Figure 7.
5. Pull out the water valve and disconnect the rear water
tube and electrical connection. See Figure 5.
FIGURE 7
FIGURE 4
FIGURE 5
FIGURE 6
ϰ
Zz^d>ϱϬη/D,/EͲϮϬϭϯdZ/Ed,dZ/EZ
,KtdKZDKsZKWKtEKKZϭϴ
ϱ
Zz^d>ϱϬη/D,/EͲϮϬϭϯdZ/Ed,dZ/EZ
KKZ'^<d^Zs/
DOOR REMOVAL/REVERSAL - SIDE SWING ONLY
1. See Installation Instructions on Page 2-9.
 Loading...