UMX-OPT-TX150R
User’s Manual
Section 7. Service menu Page 51 / 107
7.2. The service menu in case of UMX-OPT-TX150R
7.2.1. The device specific structure of the service menu
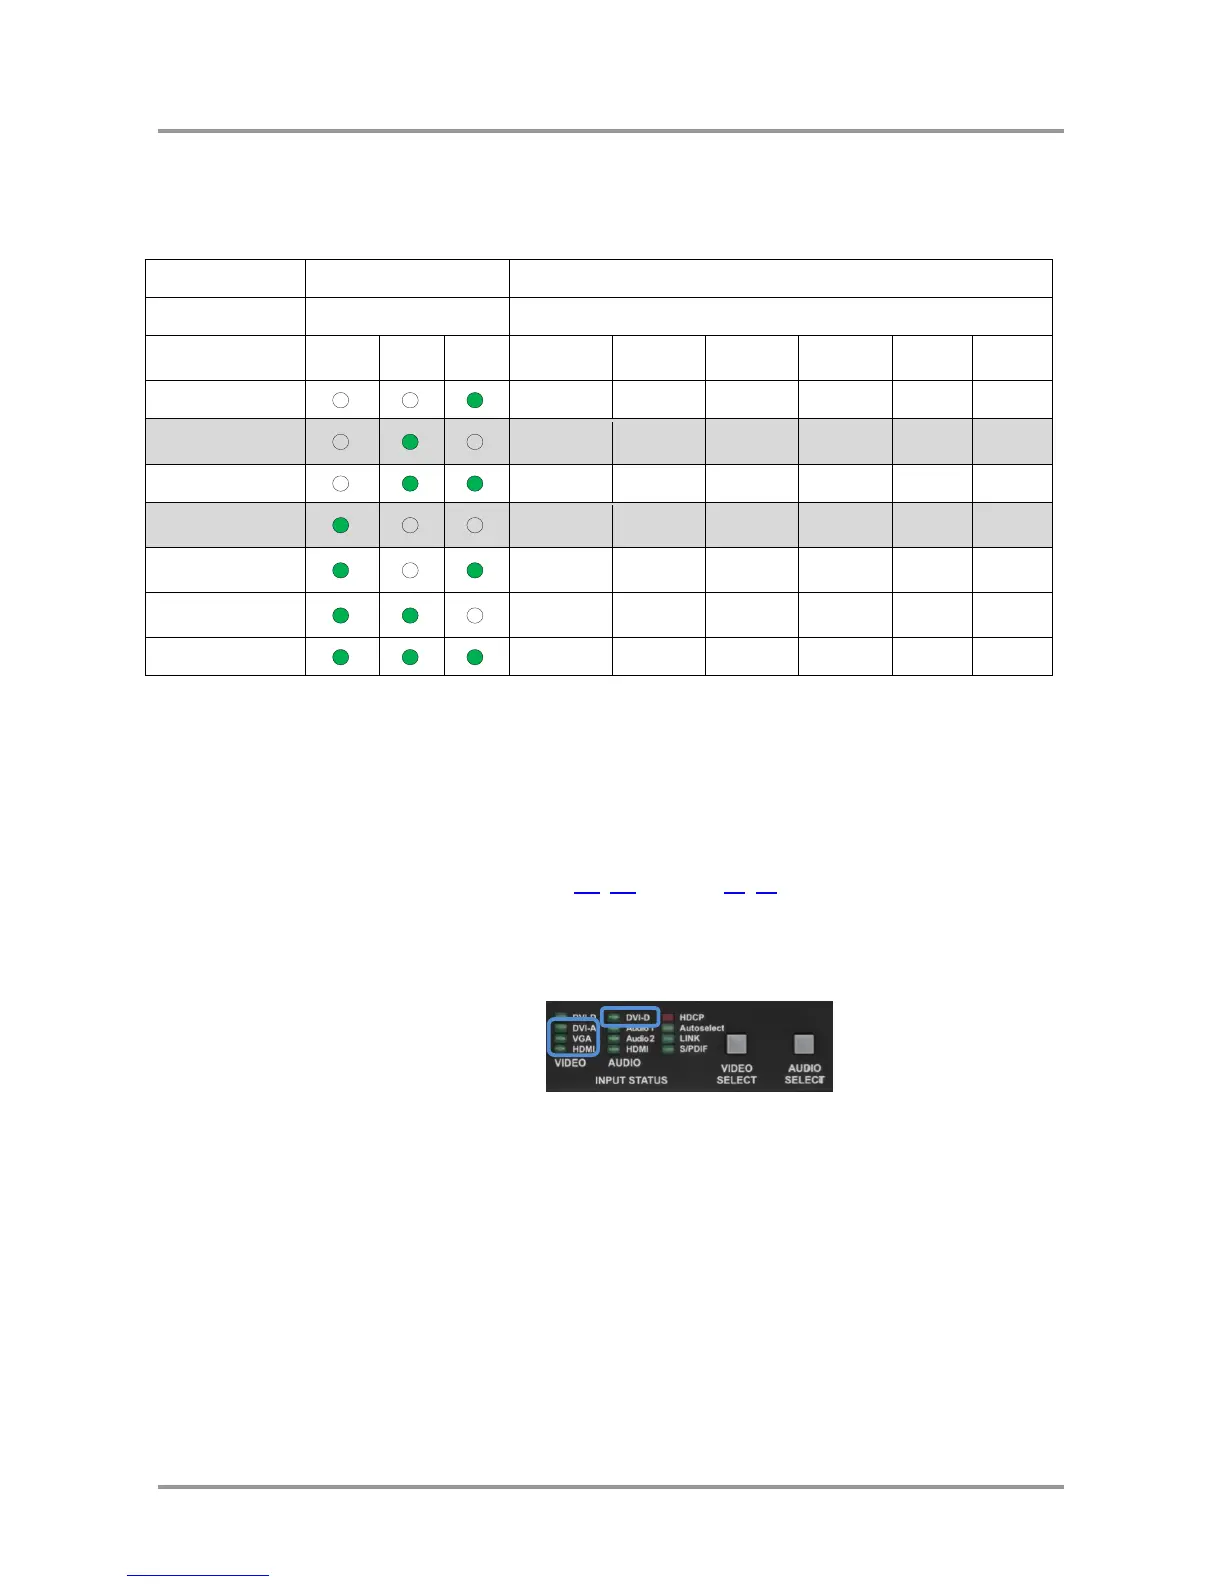
Warning! The values (enable / disable) of the HDCP input mode and the NoSyncScreen functions
(in the highlighted rows) can be set for every input port separately during the normal
operation. The service mode set the value FOR ALL THE INPUT PORTS. The value
feedback LED shows enable value if the NoSnycScreen or the HDCP is enabled on ANY
input port.
Info: The audio priority modes use the following abbreviations: E - Embedded, S – S/PDIF,
A1 – Analog 1, A2 – Aalog 2 audio input port. For the detaiteld explanation of the
Autoselect mode see sections 6.6, 6.7 on pages 31, 35.
7.2.2. The device specific service menu display
The menu feedback LEDs are the DVI-A, VGA and HDMI VIDEO LEDs and the DVI-D
AUDIO LED is the value feedback LED in case of the UMX-OPT-TX150R.
7.2.3. Enter the service menu of UMX-OPT-TX150R
Step 1. Supply the unit with +5V DC
Step 2. Press and hold the RESET button.
Step 3. While pressing and holding the RESET button press and hold the VIDEO
SELECT button.
Step 4. Release the RESET button.
Step 5. Release the VIDEO SELECT button.
Info: Don’t need to unplug video or fiber cables to enter the service menu.
 Loading...