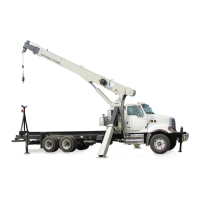
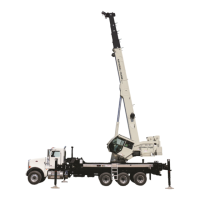
REPAIR 800D
6-6
Published 5-27-2018 Control # 039-06
THREE SECTION BOOM SERVICE
Boom Removal
Boom Length Boom Weight CG from pivot point
69 ft 7050 lb (3198 kg) 146 in (3.71 m)
1. Extend and set machine outriggers. Boom must be
completely retracted and stowed in the boom rest.
2. If equipped, remove swing around jib according to
procedures outlined in the “Safety & Operation” section.
3. Remove hook block or downhaul weight, wind up rope
on hoist drum and stow wedge socket on pegs provided
on 1 st section. Shut down truck engine.
4. Attach a lifting device to rod end of lift cylinder, remove
boom lift cylinder pin keeper and pin from bottom of the 1
st section boom. Lower lift cylinder to a suitable support.
5. Tag and disconnect telescope cylinder lines and hoist
hydraulic lines. Cap all open lines and ports.
6. Attach a lifting device to provide even weight distribution
and raise the boom until weight is removed from the
boom pivot pin. Remove boom pivot pin keeper and
boom pivot pin. Lift boom free of turret.
Boom Disassembly
The 800D boom can be disassembled by using two different
methods. Alternative #1 disassembles the boom in the
conventional manner. Alternative #2 removes the telescope
cylinder from the rear of the boom, after removal of the hoist.
This feature facilitates cylinder service without complete
boom teardown.
For reference, the front of the boom refers to the sheave
case end, the rear of the boom is the hoist mount end. Left
and right are viewed from front to rear.
If the boom is to be unpinned from the turret of the crane
structure, please refer to the “Boom Removal Procedure”
section in this book. If the required service procedure is to be
performed on the boom while still pinned to the turret, please
follow these directions.
Do not, under any circumstances, work at an elevated
height without using proper fall protection as required
by local, state or federal regulations.
1. Extend and set the outriggers.
2. Fully retract the boom and place in a horizontal position.
3. Hoist removal optional.
Boom Disassembly Alternative #1
1. Gaining access through rear of boom, loosen capscrews
retaining the keeper plates holding the extend cable
anchor and retract cables in the rear of the 3rd section,
remove keeper plates. Loosen capscrew on the anti-
two-block wire clamp on the anchor assembly.
2. Extend boom 24 in (61 cm). Loosen and remove the
nuts which secure the extend cables to the cable anchor
plate. Remove nut from anti- two-block spade bolt. Tag
and disconnect hydraulic lines to the telescope cylinder.
3. Drape extend cables and anti-two-block cable inside
boom, and slide cable anchor plate out of the side of the
hoist mount if hoist has been removed from boom.
4. Loosen and remove two capscrews, lockwashers and
spacers which anchor the telescope cylinder rod butt
plate to the rear of the 1st section.
5. Loosen and remove two capscrews and lockwashers
securing spacer bar to the inside top of the front of the
1st section. Remove spacer bar.
6. Loosen and remove four capscrews securing wear pads
to the bottom of the 1st section. Removal of side wear
pads is optional. Adequate clearance exists between
adjoining section side pads for boom disassembly. If
side pad removal is required, tag all pads, shims, and
corresponding locations for proper reassembly.
7. Support 2nd-3rd assembly at the front with an
appropriate lifting method. Raise the 2nd-3rd assembly
inside the 1st section to allow for front bottom pad
removal. Remove bottom wear pads.
8. With the 2nd-3rd assembly supported, slide assembly
out of the 1st. Relocation of the sling point on the 2nd-
3rd assembly will be necessary for proper balancing of
the assembly as it slides out of the 1st section. Keep
tension on retract cables as the assembly is pulled out of
the 1st, to minimize the chance of retract cable damage.
9. Place 2nd-3rd assembly on a suitable horizontal
surface. Take care not to pinch or crush retract cables
while lifting or supporting assembly.
10. Remove top rear wear pads on the 2nd section. They
will lift off the cam plate easily. Do not remove or loosen
the capscrews holding the cam plate to the section. This
will affect side clearance during re-assembly.
11. Loosen and remove four capscrews securing the rear
bottom wear pads on the 2nd section. This pad serves
as a bottom and side pad as well as the retract cable
keeper under the retract sheaves. Removal of this pad
will allow the retract cables to uncoil off the retract
sheaves. Place retract cable ends in a location to
minimize the possibility of damage.
12. Loosen and remove six capscrews securing retract
sheave pin and retract sheaves to 2nd section. Remove
sheaves and pins.
13. Loosen and remove two capscrews functioning as upper
retract cable keepers. Remove retract cables.
14. Loosen and remove two capscrews securing lock bar to
the telescope cylinder collar. This bar constrains the
Fo
r
Reference
Only

 Loading...


