EasyManua.ls Logo

Maxtor OneTouch III User Manual

Default Icon
41 pages
To Next Page IconTo Next Page
To Previous Page IconTo Previous Page
Page #40 background imageLoading...
Page #40 background image
PAGE 38
CHAPTER 3 USING THE ONETOUCH III
Storing Audio
Using your computer as an audio jukebox is a very popular
application. This allows you to store and play thousands of
your favorite songs. You can also create and manage an audio
library from your Maxtor OneTouch III.
Playing Games
CD-ROM-based games typically run faster when they are on a
hard drive rather than running from the CD. You can use your
Maxtor OneTouch III to store and play CD-ROM games.
Connecting and Disconnecting the OneTouch III
The USB interface allow you to hot swap your Maxtor
OneTouch III; that is, connect and disconnect the drive while
the computer and your drive are turned on.
To connect the OneTouch III to your computer
1. Make sure your Maxtor OneTouch III is turned on and the
light is illuminated. Connecting your computer to a drive
that is not powered on can cause your computer to behave
erratically or freeze.
2. Plug the FireWire or USB cable into your Maxtor
OneTouch III and your computer.
To disconnect the OneTouch III from your computer
1. Double-click the Windows Unplug or Eject Hardware icon
in your system icon tray. A list of device choices appears.
2. Select your Maxtor OneTouch III and
follow the on-screen directions to
eject the drive. The system will
display a
message saying that you
can safely remove the drive.
3. Disconnect your Maxtor OneTouch III from your computer.
Your system may not allow you to disconnect the drive. In
this case, you may need to close all open applications and
documents or shut down your system completely to
disconnect the drive safely.
WARNING: Removing the Maxtor OneTouch III from your
computer without disconnecting it properly through the
operating system can result in lost or damaged files.
Naming Your OneTouch III
Your untitled Maxtor OneTouch III drive appears in the same
way as your other drives, with a new drive letter assigned by
the operating system. The assigned letter will vary depending
upon the number of other drives connected to your computer.
Make a note of this drive letter. Its a good idea to name your
new drive so it’s easy to identify later when you use it for
backing up your files.
1. Open the My Computer icon.
2. Right-click your Maxtor OneTouch III icon and select
Properties. The Properties window will open.
3. In the Label section at the top of the window, enter a
name. For example: “Maxtor.”
Security Lock
Your new Maxtor OneTouch III includes a security locking slot
on the back of the drive. The slot is compatible with most
security locking cables.
Security Lock
Question and Answer IconNeed help?

Do you have a question about the Maxtor OneTouch III and is the answer not in the manual?

Maxtor OneTouch III Specifications

General IconGeneral
BrandMaxtor
ModelOneTouch III
CategoryStorage
LanguageEnglish

Summary

Chapter 1 Introduction

About this Guide

Explains guide symbols, conventions, and provides helpful information about topics.

Components

Details the physical parts of the Maxtor OneTouch III, including a diagram of the solution features.

System Requirements

Lists the necessary hardware and software specifications for operating the Maxtor OneTouch III.

Interface Requirements

Specifies the required USB port type and cable for proper connection of the drive.

Handling Precautions

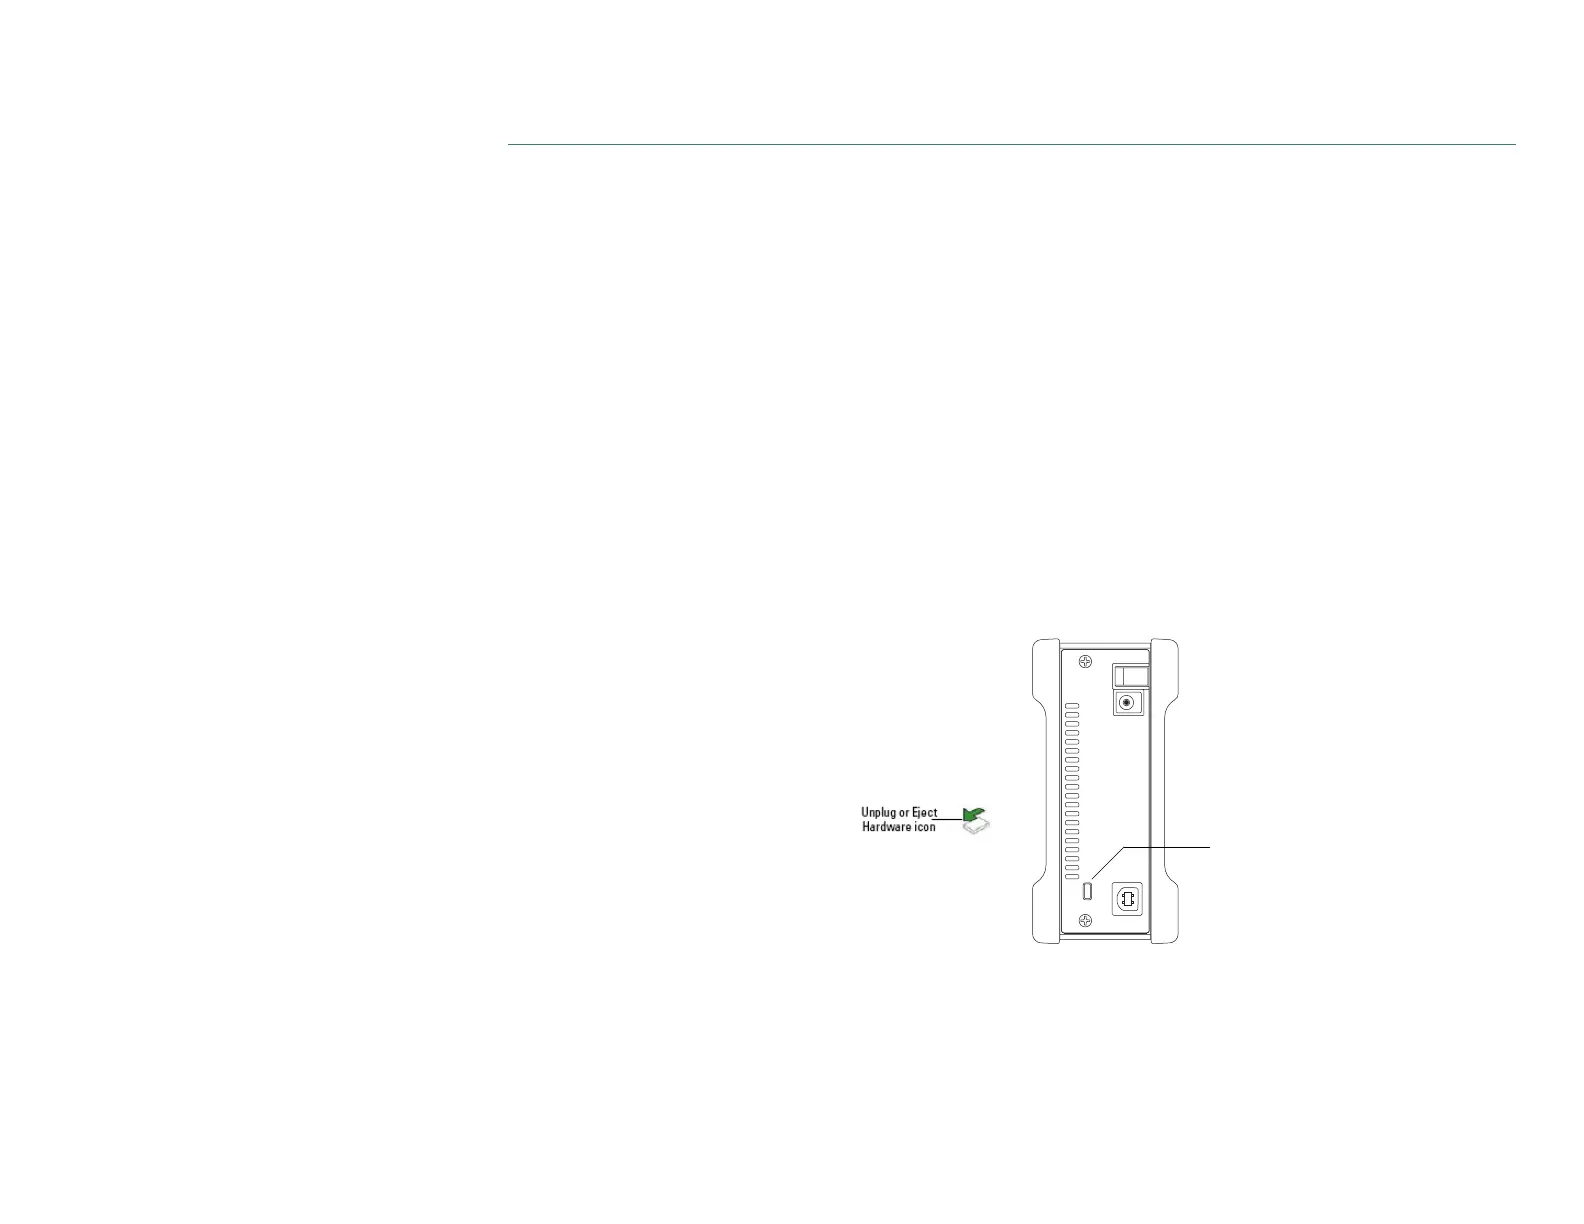
Provides critical instructions to prevent damage to the drive and avoid data loss, ensuring safe usage.

Maxtor Product Support

Guides users to Maxtor's website for support, FAQs, software downloads, and troubleshooting resources.

Chapter 2 Installing the One Touch III

Install the Software

Step-by-step instructions for installing the Maxtor OneTouch III software, including privilege checks.

Connect the Drive

Guides on connecting the Maxtor OneTouch III drive to the computer via USB and power adapter.

Setup the Drive

Details the initial configuration of the Maxtor OneTouch III drive, including setting up backup preferences.

Chapter 3 Using the One Touch III

Maxtor OneTouch Manager Overview

Introduces the Maxtor OneTouch Manager interface and its core functionalities for managing the drive.

Adjust Power Setting

Configures the drive's power-saving mode, allowing adjustment of spin-down times for periods of inactivity.

Customize OneTouch Button

Enables users to change the default function of the One Touch button to launch specific applications or tasks.

Adjusting Performance Settings

Allows users to select performance modes for the drive, balancing speed and quieter operation.

Security Settings and Operations

Covers protecting the drive with passwords, changing them, disabling security, unlocking, and erasing data.

Backup Operations

Explains how to configure, manage, and perform file backups using the Maxtor Backup Utility, including scheduling.

Restore Operations

Details how to restore files and folders from backups, including previous versions or most recent files.

Sync Operations

Describes how to synchronize files between the computer and the Maxtor OneTouch III, supporting multiple PCs.

Rollback Operations

Explains how to create system restore points and roll back the computer to a previous state for recovery.

Related product manuals