#
Press charging interruption button 2.
The c
harging process is ended. The % indi-
cator lamp 1 lights up white. The vehicle
socket is unlocked.
#
Remove the charging cable connector from
t
he vehicle socket.
%
If you cannot remove the charging cable con-
nect
or, unlock the vehicle and repeat the pro-
cedure. If the charging cable connector is still
locked, contact a qualied specialist work-
shop.
#
Close the socket cover and the socket ap.
%
Aer t
he charging cable connector has been
disconnected, the le % indicator lamp 1
on the vehicle socket remains lit for some
time before switching o.
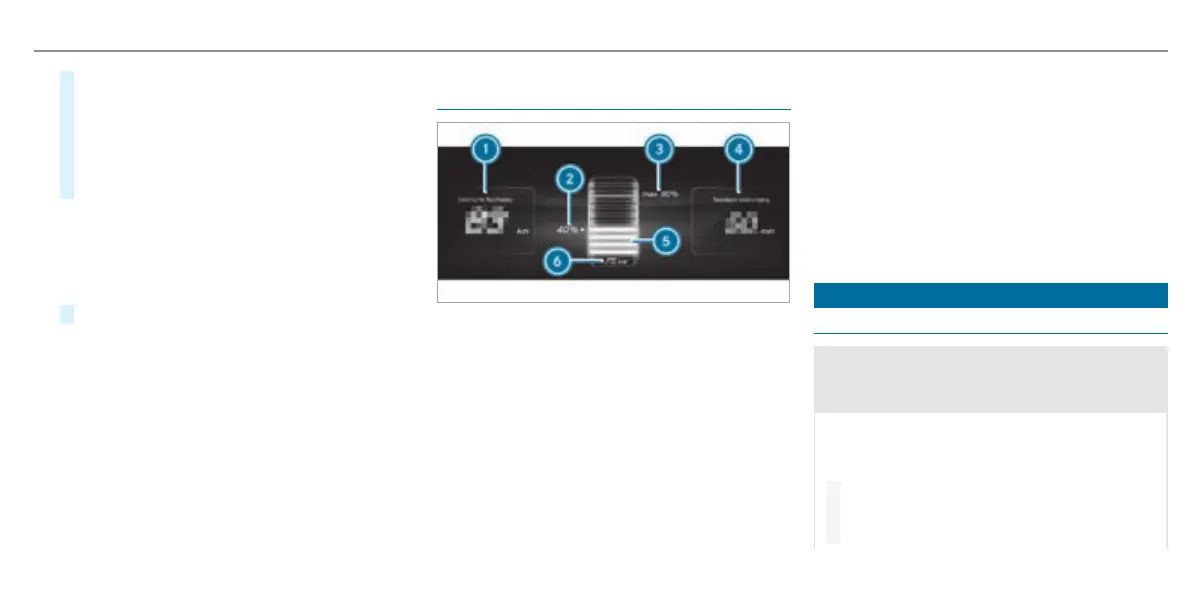
Function of the charge level display in the driver's
displa
y
1
Range at current charge level
2
Current state of charge of the high-voltage
batt
ery
3
Maximum state of charge (depending on the
setting)
4
Time remaining until completely charged (until
the selected maximum charge level is
reached)
5
Dynamic charge level display
6
Current charging capacity
%
Specied r
emaining range 1 may vary due to
dierent factors, e.g. driving style or topogra-
phy.
When the vehicle is connected to the mains sup-
pl
y and is switched o, the driver's display shows
the charge level display for approximately two
minutes.
%
The value of current charging capacity 6 can
dier fr
om the display on the charging station.
Parking
Parking the vehicle
&
WARNING Risk of accident and injur
y
caused by an insuciently secured vehi-
cle rolling away
If the vehicle is not securely parked su-
cientl
y, it can roll away in an uncontrolled way
even at a slight downhill gradient.
#
On uphill or downhill gradients, turn the
fr
ont wheels so that the vehicle rolls
towards the kerb if it starts moving.
Driving and parking
257

 Loading...