Section 2 - System Startup
90-8M0074777 eng MAY 2013 Page 13
IMPORTANT: Do not rush VesselView by pressing buttons while the system is booting up to acquire vessel and engine
data. When VesselView is initially started or after a factory reset, the system will take a few seconds to complete the boot
up process.
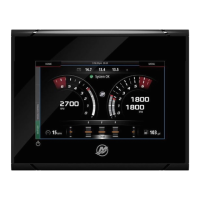
WELCOME
This is the first time VesselView has
been started and you will be guided
through configuring this device for
your vessel.
We recommend that you key on all
engines to ensure proper feature
configuration.
Next
52633
2. Press the rotary knob to continue.
Import Configuration
IMPORTANT: The import configuration option should only be used by an authorized OEM or dealership. It is used to import
configuration settings that were saved to a micro SD card. A micro SD card may contain several data files.
1. Insert the card into the card port.
2. Use the rotary knob to highlight the file on the screen and press the knob to start the upload.
IMPORTANT: Do not remove the card or turn the system off while the import is in process. Damage to the unit may result.
3. Remove the micro SD card after the configuration upload is complete.
4. If there is no configuration file or card in the port, highlight Next and press enter.
NOTE: If the imported configuration settings are correct for your power package, the setup process is complete.
Engine Setup
1. Use the rotary knob to highlight Engine Type and press the knob to enter.
2. Select the type of engine and press the knob to accept.
Available Types of Engines
None 2‑Stroke Gas Outboard 4‑Stroke Gas Outboard
Gas Sterndrive No Troll Gas Inboard No Troll Gas Jet Drive
Gas Sterndrive Gas Inboard Gas Verado
Diesel Sterndrive No Troll Diesel Inboard No Troll Diesel Inboard
3. Use the rotary knob to turn the malfunction indicator lamp on or off, and select the number of engines.
4. Use the rotary knob to highlight Previous or Next and press the knob to accept.
Display Setup
1. Use the rotary knob to select and change which engine to show on the display.
2. Use the rotary knob to highlight Previous or Next and press the knob to accept.
Unique VesselView ID
The unique VesselView ID differentiates each VesselView unit from all other installed SmartCraft devices. You must assign a
unique identifier to each VesselView unit and to designate whether the VesselView is installed at the primary (helm ID 1) or
secondary helm.
Use the rotary knob to highlight and accept changes.
IMPORTANT: Do not choose the same unique VesselView ID for multiple VesselView installations.
NOTE: Select the ID by the position of the installed VesselView (lowest to highest helm is recommended).
 Loading...