19
ENGLISH
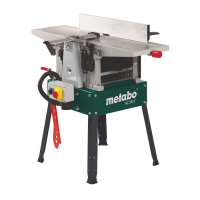
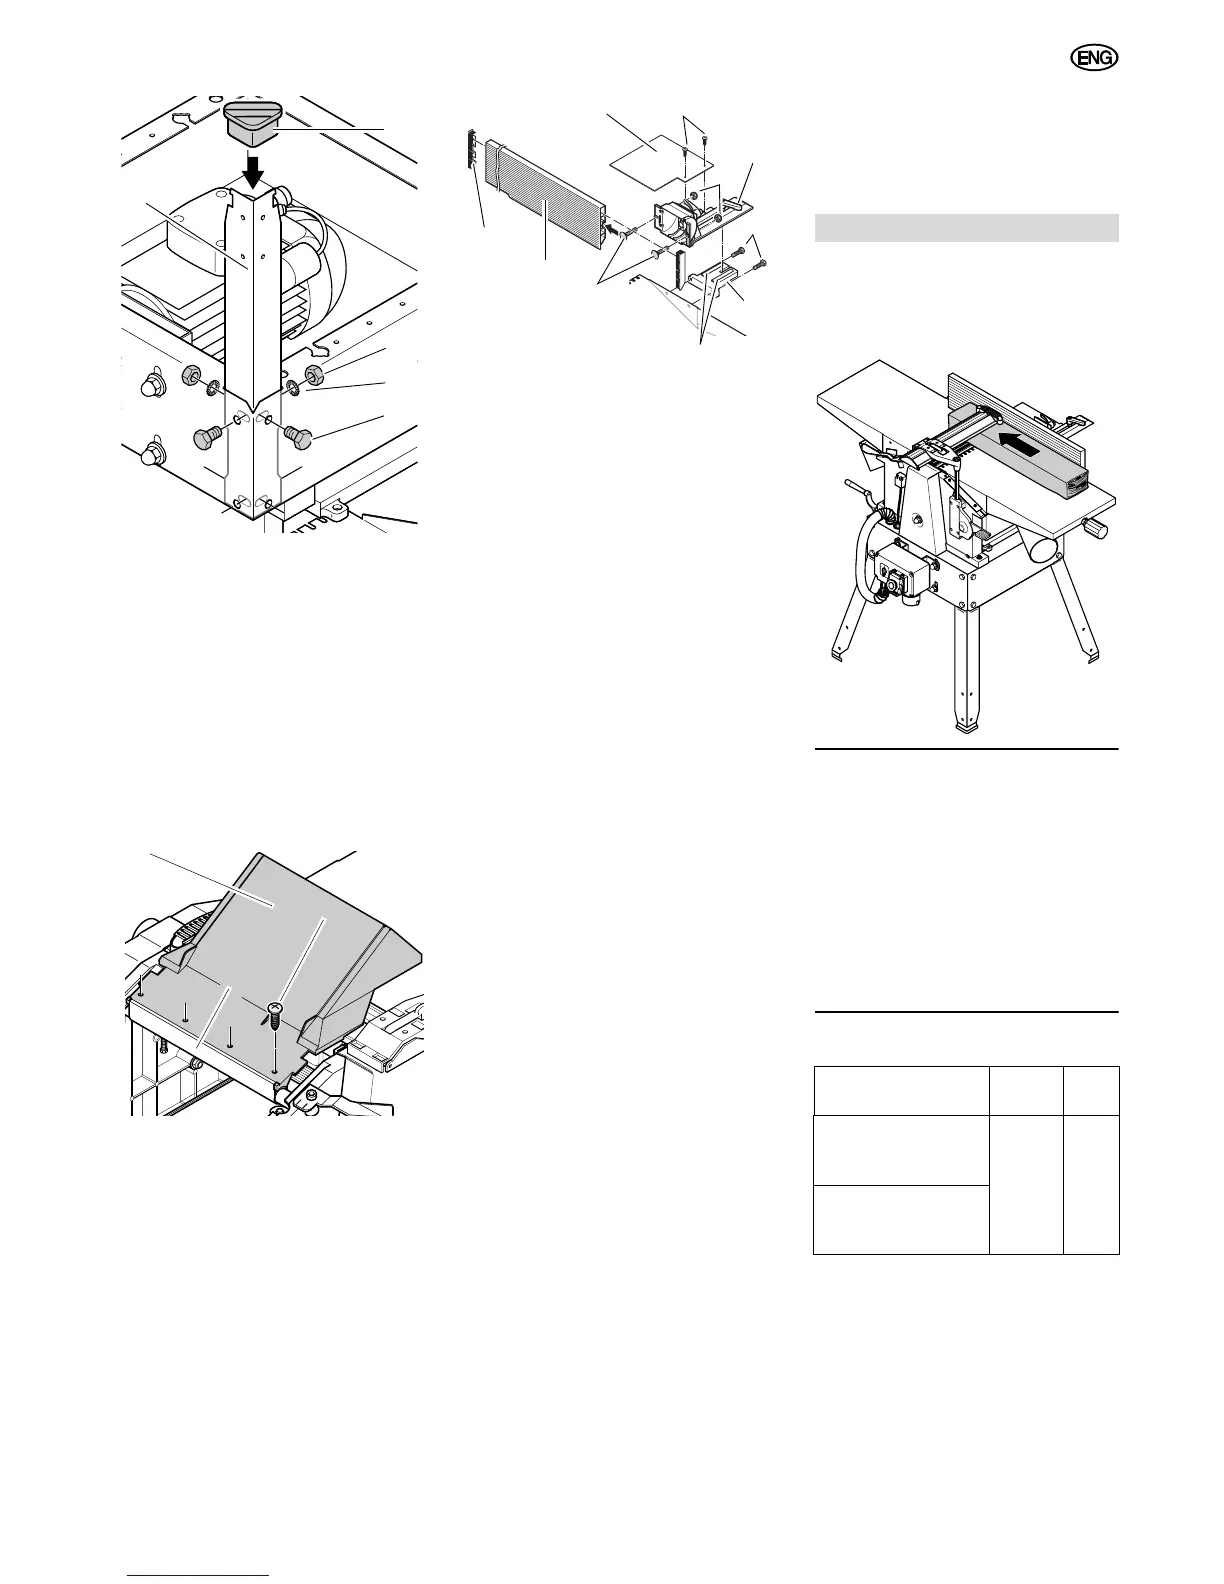
2. Fasten the four legs (36) to the
inside of all corners of the machine:
− Fit hexagon head screws (40)
into holes from the outside;
− place washers (39) and
− hexagon nuts (38) on screws and
tighten.
3. Slide rubber feet (37) on legs.
5.3 Chip chute installation
• Attach chip chute (41) with four
sheet metal screws (42) to the chip
chute extrusion (43).
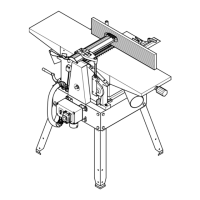
5.4 Jointer fence installation
1. Remove fence carrier support
bracket(49) from fence carrier (46).
Take care not to loose the two guide
pins (50) in the fence carrier support
bracket.
2. Fasten fence carrier support bracket
(49) with two hexagon head screws
(48) to infeed table.
3. Attach fence carrier to fence carrier
support bracket again.
4. Slide two carriage bolts (51) into the
fence extrusion (52) and attach to
fence carrier with two self-locking
hexagon nuts (47).
5. Fit extrusion end caps (53) to both
ends of the fence extrusion.
6. Screw cover plate (44) with two
cross-recessed head screws (45) to
fence carrier.
7. Adjust the two set screws so that the
positive stops are set exactly to 45°
and 90° (use try and mitre square).
5.5 Connection to AC Power
B
Danger! Electrical Hazard.
Operate in dry environment only.
Operate machine only on a power
source matching the following
requirements (see also "Technical
Specications"):
− Fuse protection by a residual cur-
rent operated device (RCD) of
30 mA sensitivity;
− Outlets properly earthed;
− 5-wire three-phase outlets with
neutral lead.
− When a dust collector is used it
must also be properly earthed.
Position power supply cable so it
does not interfere with the work and
is not damaged.
Protect power supply cable from heat,
aggressive liquids and sharp edges.
Use only extension cables with a suf-
ficient lead cross section.
Do not pull on power supply cable to
unplug.
B
Check direction of rotation!
(machines with 3-phase motor only):
Depending onthe phase sequence
the cutterblock may turn in the wrong
direction. This can cause damage to
the machine and work piece. It is
therefore necessary to check the
direction of rotation after initial com-
missioning and every time the
machine is connected to a different
outlet.
With incorrect direction of rotation
the phases need to be exchanged in
the machine's plug or the power out-
let by a qualified electrician.
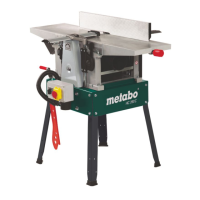
The planer/thicknesser HC 260 can
either be operated as surface planer or
thickness planer:
6.1 Surface planer mode
3
Note:
Surface planing is used to level
an uneven surface (= jointing), for exam-
ple the edges of a plank.
− The work piece rests on top of the
infeed table.
− The work piece is cut on the under-
side.
− The feed direction for the work piece
is exactly opposite than that for
thickness planing.
Work piece dimensions
Preparation
A
Danger!
Always unplug before servicing!
1. Swing chip chute down.
2. Turn both left and right lock lever
outwards.
3. Place outfeed table (54) on machine
– both pins on the machine housing
must engage in the lower slots of
the outfeed table guide.
40
38
39
36
37
41
42
43
44
45
46
47
48
49
50
51
53
52
6. Operation
Length Width Heigh
t
use push block (feed-
ing aid) if less than
250 mm
260 mm
max.
5 mm
min.
use extra work piece
supports or helper if
over 1500 mm
 Loading...