24
ENGLISH
− thicknesser bed spindles;
− height-setting mechanism of cut-
terblock guard extrusion.
4. Apply a light coat of anti-seize com-
pound to infeed table, outfeed table
and thicknesser bed.
7.5 Transporting the Machine
A
Caution!
To carry the machine two persons are
required.
Do not carry the machine holding it at
the infeed and outfeed tables, these
are not designed to bear the weight of
the machine.
1. Remove jointer fence.
2. Remove outfeed table.
3. Lower cutterblock guard extrusion
fully and push extrusion all the way
in.
4. Set thicknesser bed to about half the
thicknessing height.
5. Put two roofing battens or 2 x 4's
through the machine and lift it with
the battens.
7.6 Machine Storage
A
Danger!
Store machine in such manner that
− it cannot be used or tampered
with by unauthorized persons,
and
− that nobody can get hurt while
the machine is turned off.
A
Caution!
Do not store machine unprotected
outdoors or in damp environment.
7.7 Maintenance
The checks and procedures described in
this section are an aid to safety! Should
there be faults evident on any of the
mentioned components, the machine
must not be used until these faults have
been remedied in a workmanlike man-
ner.
A
Danger!
Repairs to electric tools must be car-
ried out by qualified electricians only!
Electric tools in need of repair can be
sent to the service centre of your coun-
try. Refer to spare parts list for address.
Please attach a description of the fault to
the electric tool.
The machine's packaging materials are
100 % recyclable.
Worn out machines and accessories
contain considerable amounts of valua-
ble raw and plastic materials, which can
be recycled.
These instructions are printed on paper
produced with elemental chlorine-free
bleaching process.
A
Danger!
Prior to any servicing:
− Switch Off.
− Unplug power cable.
− Wait for cutterblock to come to a
complete stop.
Check to see that all safety devices are
operational after any servicing.
Motor does not run
• Undervoltage relay tripped by tem-
porary voltage failure.
− Start again.
• No supply voltage
− Check cables, plug, outlet and
mains fuse.
• Motor has overheated, e.g. due to
blunt planer knives, overloading or
chip buildup.
− Remove cause for overheating
and allow to cool down for
approx. 10 minutes, then start
again.
• Contact pins of outfeed table or dust
chute have not engaged in the limit
switch.
− Correctly install outfeed table or
dust chute, respectively. If neces-
sary, adjust contact pins.
Performance lessens
• Planer knives blunt
− Install sharp knives.
• Drive belt slips
− Re-tension drive belt
Planed surface not smooth
• Planer knives blunt
− Install sharp knives.
• Planer knives blocked by chips
− Remove chips.
• Moisture contents of work piece too
high
− Dry work piece.
Planed surface cracked
• Planer knives blunt
− Install sharp knives.
• Planer knives blocked by chips
− Remove chips.
• Work piece was planed against the
grain
− Plane work piece in opposite
direction
• Too much material removed in one
pass
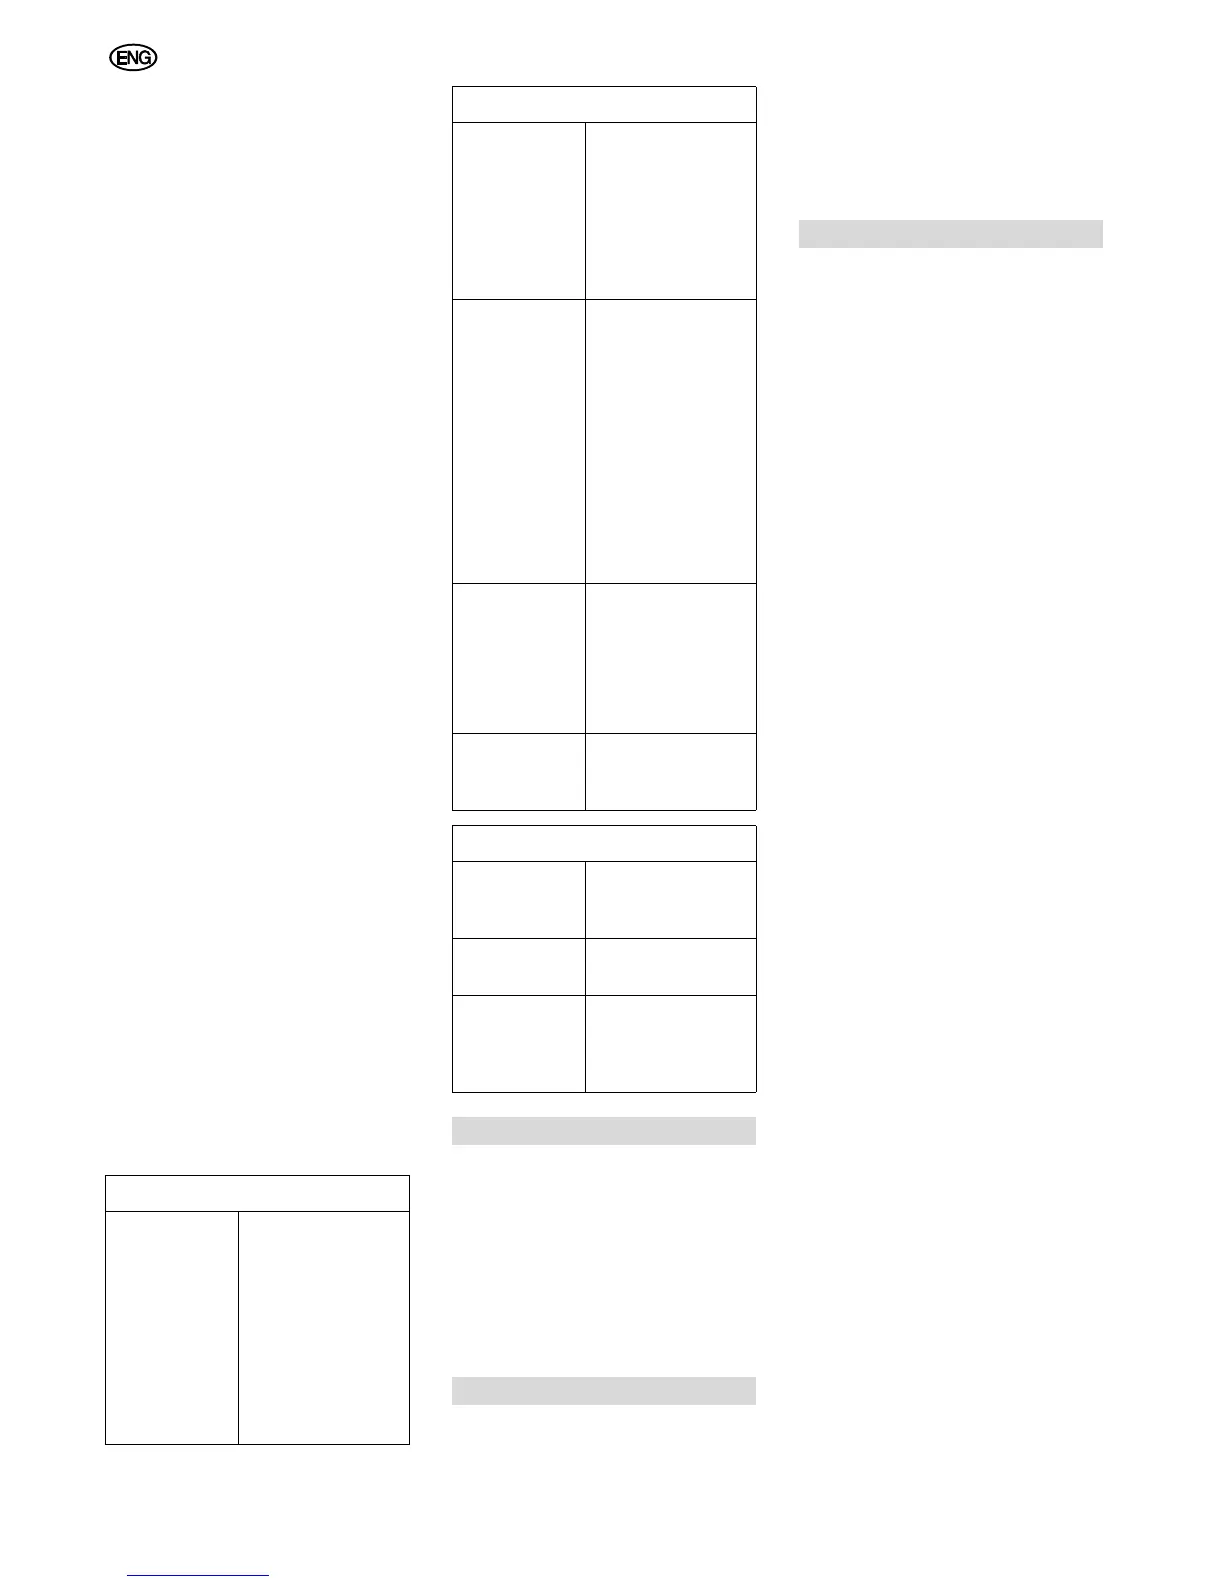
Prior to operation
Anti-kickback
lock
Check:
− mobility of anti-
kickback fin-
gers (must fall
down by their
own weight)
− points of anti-
kickback fin-
gers
(not rounded)
Planer knives Check:
− tight seat
− sharpness
− general condi-
tion
(no notches,
etc.)
Inside of
machine
Threaded rods
(height adjust-
ment)
Dust spout
(when work-
ing without
dust collec-
tion)
Remove:
− chips
− sawdust
Outfeed roller Check:
− coating undam-
aged?
− is stock prop-
erly trans-
ported?
Infeed and
outfeed table
− apply light coat
of anti-seize
compound
Monthly (if used daily)
Threaded rods
(height adjust-
ment)
Apply a light coat of
care and mainte-
nance spray
Infeed and
outfeed table
Check alignment,
correct if necessary
Power supply
cable
Check for damage,
if necessary have
replaced by a quali-
fied electrician.
8. Repairs
9. Environmental Protection
Prior to operation
10. Trouble Shooting
 Loading...