120
Pellerin Milnor Corporation
BNWUUM02 / 2020084
BNWUUM02 0000277470 2/19/20 8:47 AM Released
Servicing Air Cylinders
BNWUUM02.T01 0000277469 A.3 A.2 2/18/20 3:01 PM Released
This is the general procedure for rebuilding an air cylinder using a Milnor
®
furnished repair kit,
once the air cylinder has been removed from the machine. See the specific air cylinder and major
assembly parts drawing(s) for component identification and removal/replacement information.
Maintenance procedures require:
• Two threaded rods and nuts, twice the length of the tie bolts.
• The appropriate repair kit.
CAUTION: EXPLOSION HAZARD — Spring tension can cause air cylinder to burst
apart with great force during dissassembly. You can be struck by air cylin-
der parts.
� Follow maintenance instructions carefully.
� Wear eye protection.
NOTE: Use a new locknut when re-assembling air cylinder (see the appropriate parts
drawing).
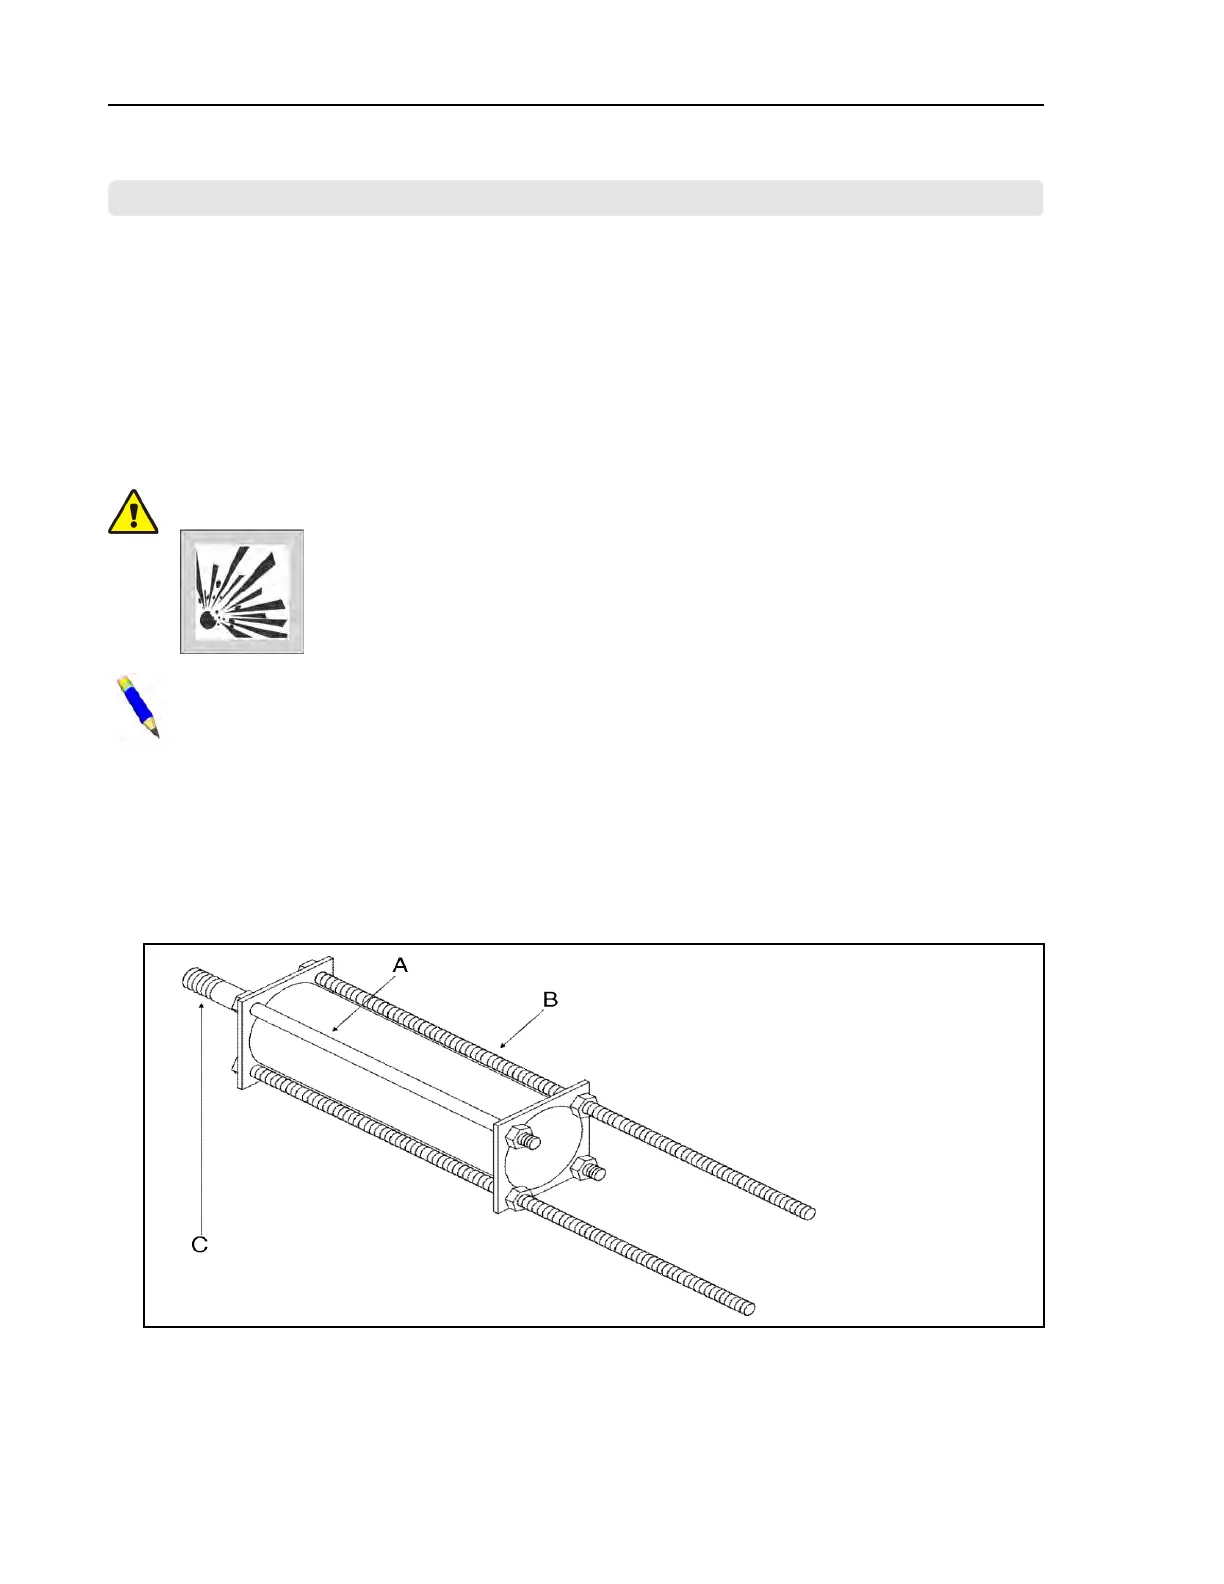
1. Replace two diagonally opposite tie bolts with threaded rods and nuts as shown in Figure 34:
Using Threaded Rods, page 120 .
2. Tighten nuts on the threaded rods until they contact the air cylinder.
3. Remove the other two tie bolts and the nuts, washers, clips, and actuators from the external
end of piston stem.
Figure 34. Using Threaded Rods
Legend
A...Tie bolt
B...Threaded rod
C...Piston stem
4. Loosen nuts on threaded rods evenly, permitting cylinder heads to separate. Use only a few
turns on one nut before moving to the other one. Continue until springs have no tension.
Water and Steam Piping and Assemblies
 Loading...