64
Pellerin Milnor Corporation
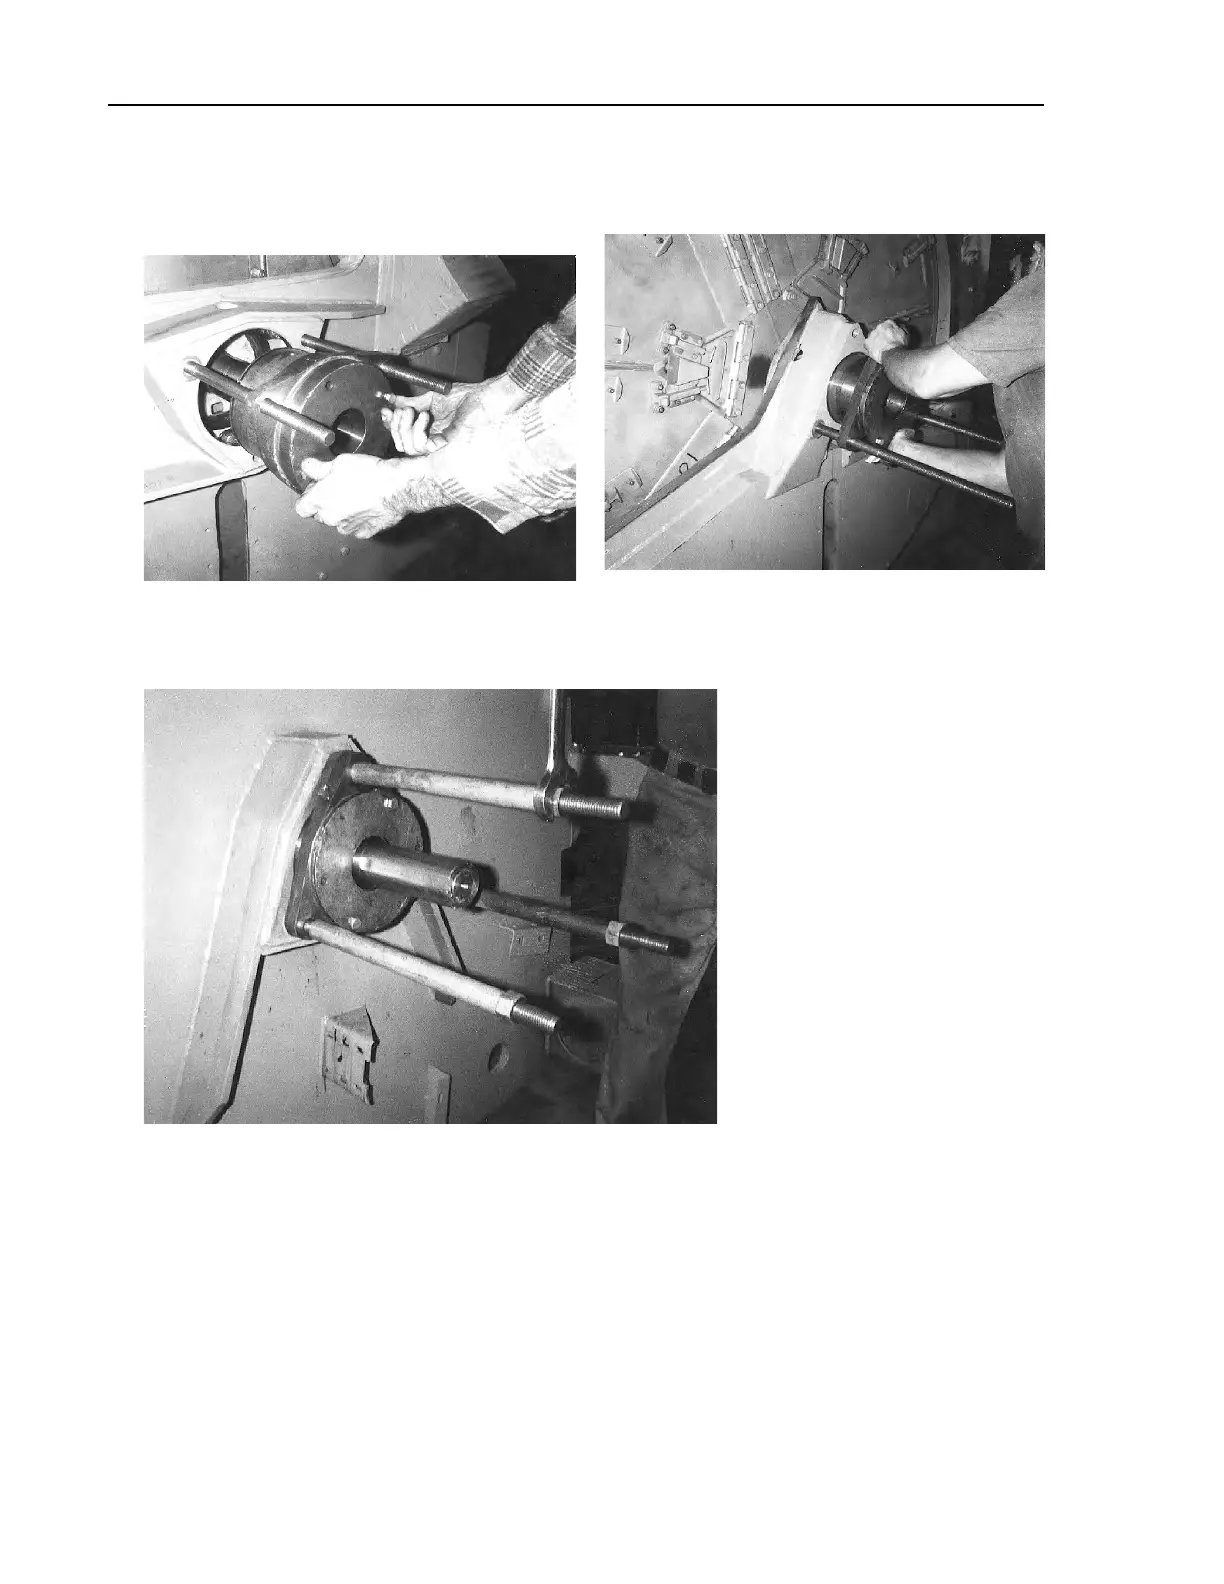
Figure 24. Installing the Bearing Housing
Setting Fixture onto Housing (42" machine
shown)
Figure 25. Pushing the Bearing Housing into
the Shell (60" Rapid-load machine shown)
8. Install the third guide rod, spacers if required, and hex nuts, using these to seat the housing
fully, as shown in Figure 26 . Remove the seal sleeve setting fixture.
Figure 26. Tightening the Bearing Housing into the Shell (42" machine shown)
9. Remove the guide rods and install the bearing housing cap bolts. See “Bolt Torque Require-
ments” elsewhere, for proper torques.
10. With the grease gun, pump grease into the inner portion of the bearing cavity, such that when
the bearing is installed, the space between the bearing and the seals will be approximately 1/3
full of grease.
11. Proceed to : Measuring Unmounted Clearance and Setting Bearing (Front or Rear), page 65 ,
even if both the front and rear bearings are being replaced. Once the rear bearing is installed,
the bearing housing replacement procedures may then be repeated for the front (soil side)
bearing housing.
Bearing Assemblies
 Loading...