8-12
Keypad 1. Referring to the Disassembly/Reassembly Procedures, remove the
housing assembly from the radio.
2. Remove and discard the keypad.
3. Inspect the housing seal surface for debris or damage. Remove any
debris and replace housing if damaged.
4. Install new keypad.
5. Install a new main seal o-ring around the casting assembly.
6. Reassemble the housing assembly to the radio.
7. Inspect the main seal for proper seating. Observe carefully to
ensure that the main seal o-ring is not pinched between the
housing and the casting.
Vacuum Port Seal 1. Remove the vacuum port plug (see Section 13, page 13-94, item
62), using a 7/64” hex
torque bit; remove the o-ring; item 63.
2. Inspect the casting seal surface for debris or damage. Remove any
debris and replace the casting if damaged.
3. Install a new o-ring and reinstall the vacuum port plug to the
correct torque as specified in Table 8-2.
Vent Port Seal 1. Remove the seal label (66) that covers the vent port seal (65).
2. Remove the vent port seal.
3. Ensure that the casting’s surfaces are clean and free from any
adhesive or other foreign materials.
4. Install the appropriate vent port seal (65), covering the vent port
holes located in the small recessed area on the front of the casting
assembly (54). Ensure that no oily substances come in contact
with the seal.
Depending on the ruggedized casting (54) configuration
(two or four hole vent port), use the appropriate vent port
seal (65) as indicated in the parts list located in the back of
this manual.
5. Install a new seal label over the vent port seal in the larger
recessed area in the casting. Press down evenly over the label’s
surface to ensure good adhesion.
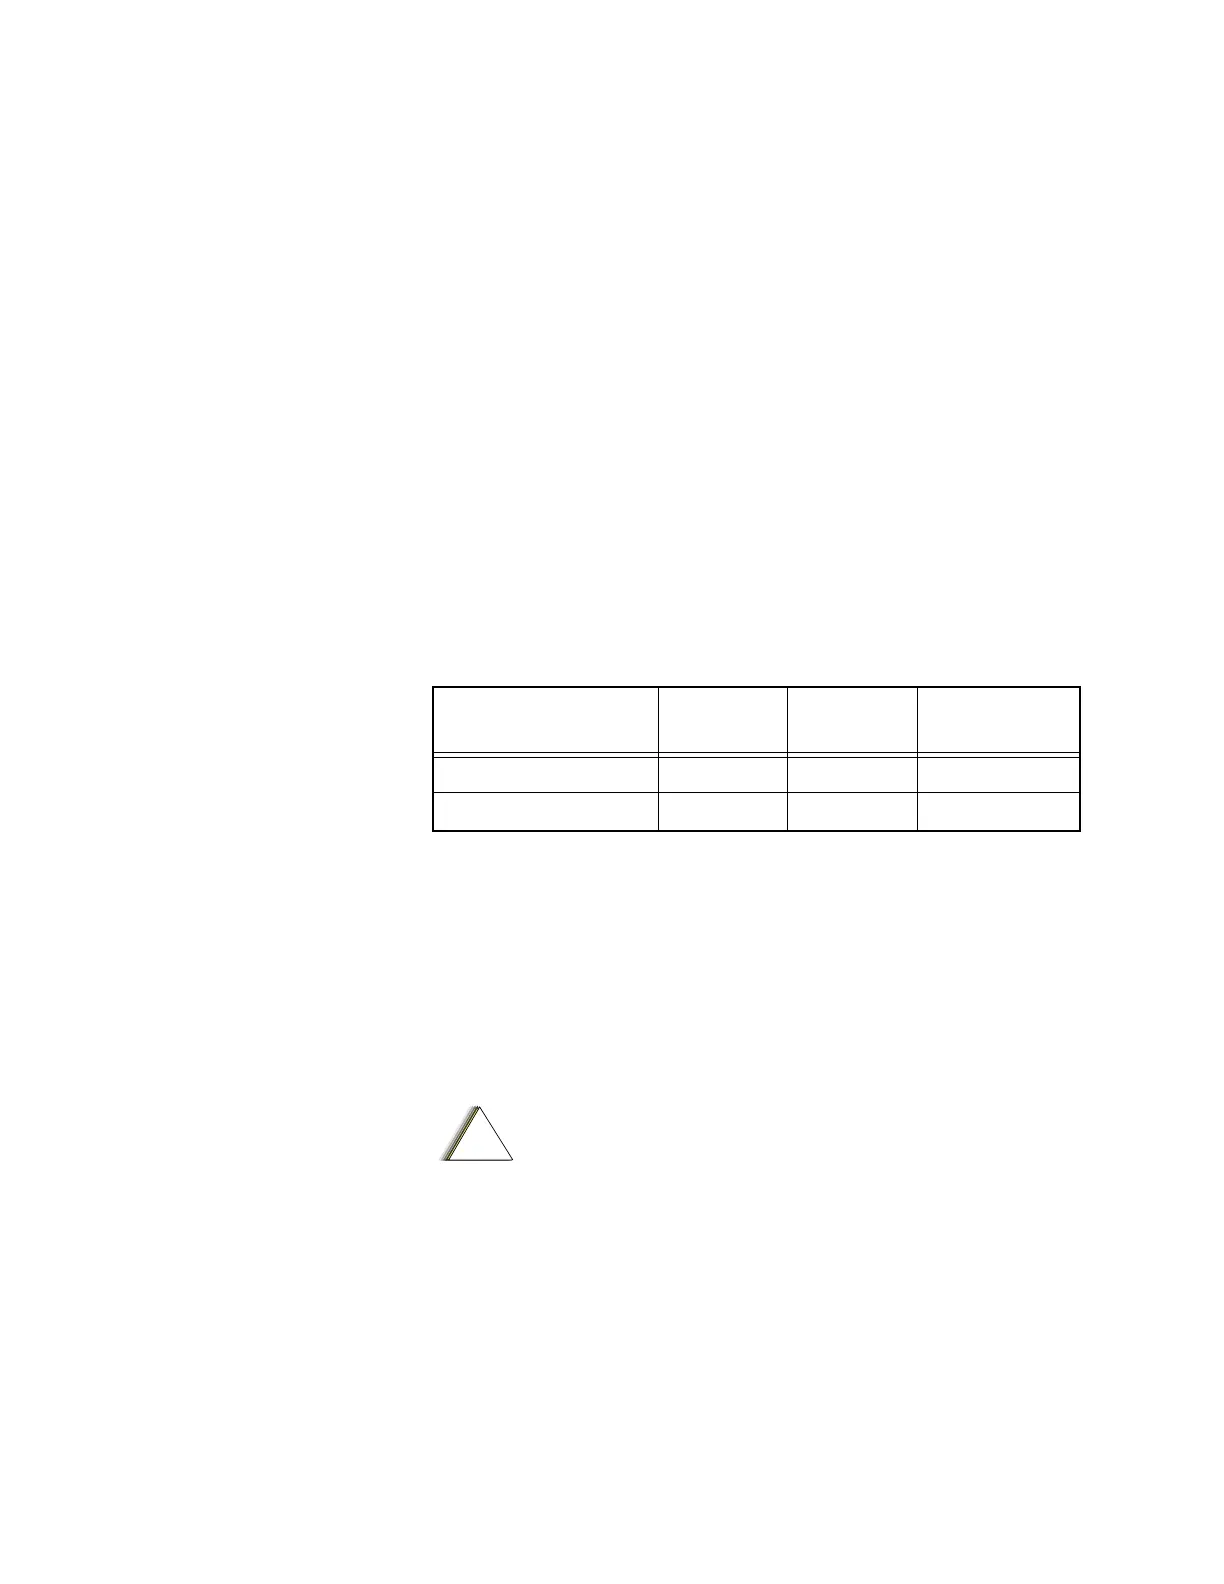
Table 8-2 Submersible Radio Torque Specifications
Application
Torque
(in.-lbs)
Torque
(N•m)
Torque Bit Part
No.
Speaker Bracket Screw 2 0.23 66-80321B79
Vacuum Port Plug 6 0.68 66-80357B82
 Loading...