IIPoint-and-Shoot
li
Photography
(W
(Auto) Mode)
This
section
uses
shooting
in
A~
(auto) mode
to
explain basic procedures.
A~
(auto) mode
is
an
automatic "point-and-shoot" mode in which the majority
of
settings
are controlled by the camera in response
to
shooting conditions.
Step 1 Turn the Camera
On
and Select Shooting Mode
28
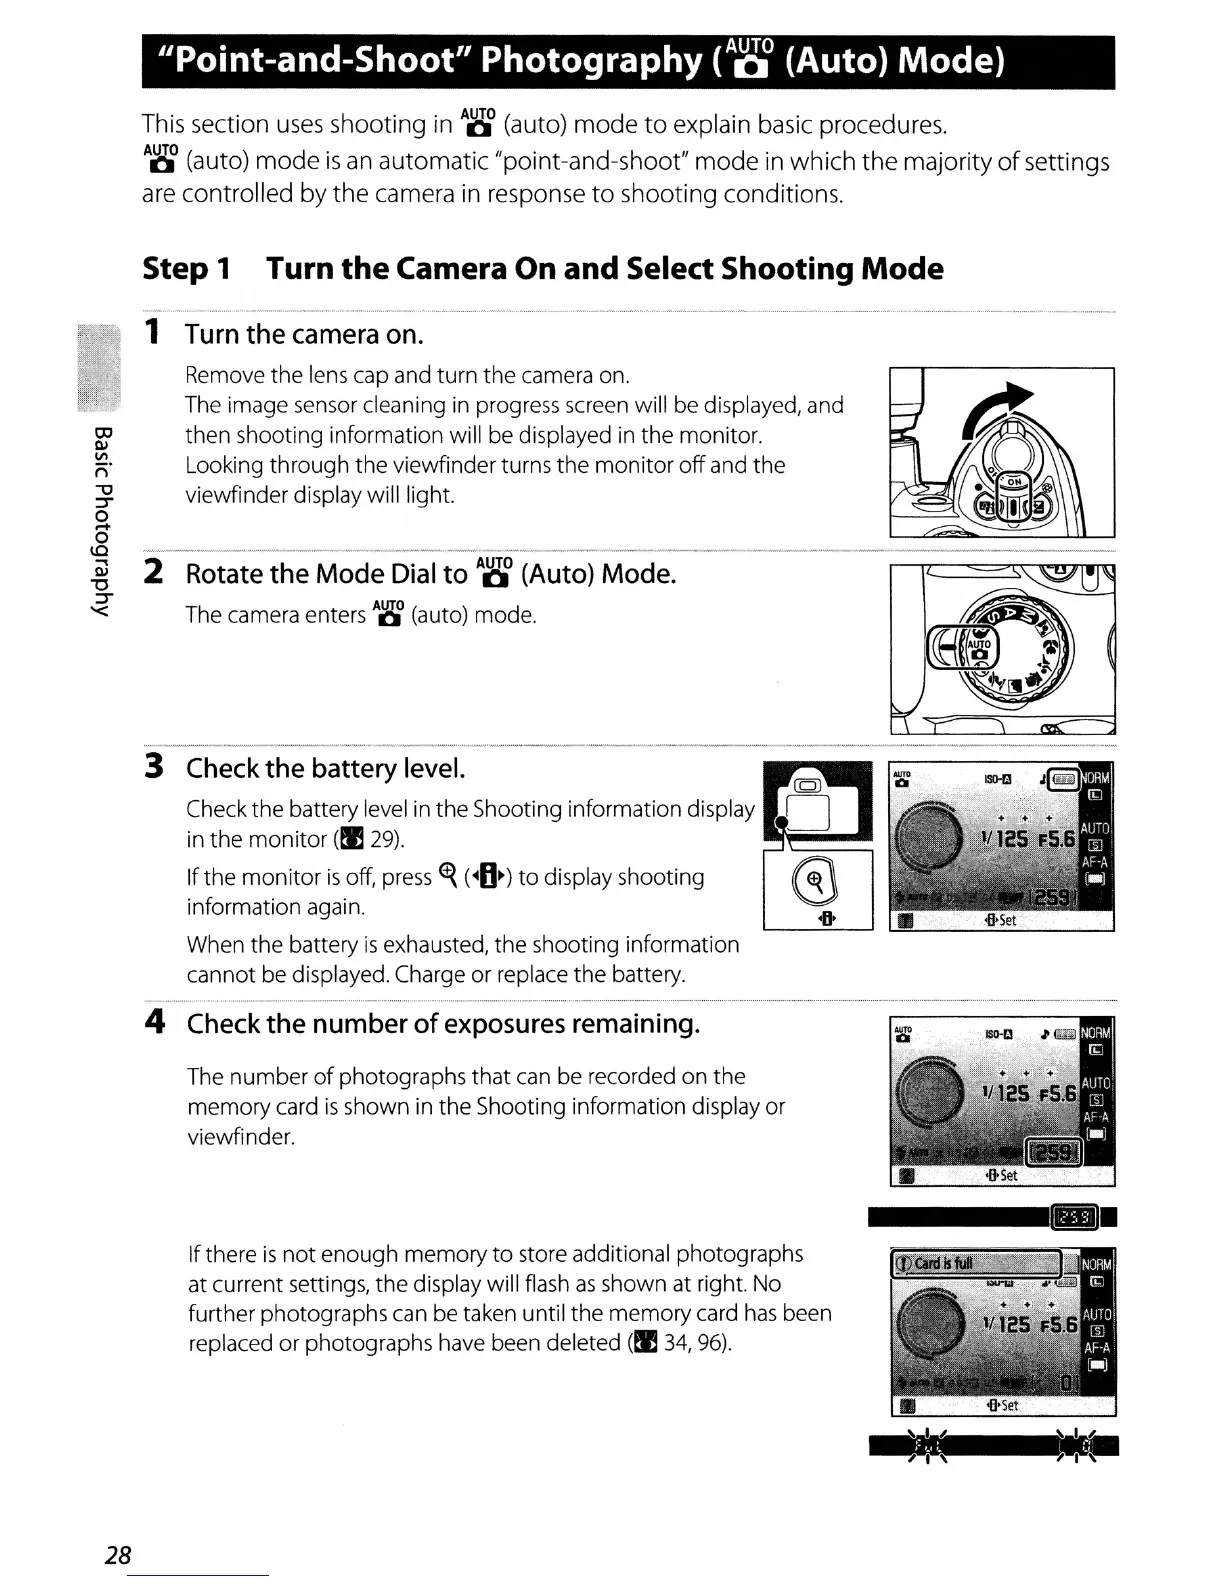
1
Turn
the camera
on.
Remove the lens cap and turn the camera on.
The image sensor cleaning in progress screen will be displayed, and
then shooting information will be displayed in the monitor.
Looking through the viewfinder turns the
monitor
off
and
the
viewfinder display will light.
2
Rotate
the Mode
Dial
to
Ag
(Auto)
Mode.
The camera enters
A~
(auto) mode.
3
Check
the battery
level.
Check the battery level in the Shooting information display
in the
monitor
(!I
29).
If the
monitor
is
off,
press
~
(40.)
to
display shooting
information again.
When the battery
is
exhausted, the shooting information
cannot be displayed. Charge or replace the battery.
..............................
4
Check
the number of
exposures
remaining.
The
number
of
photographs
that
can be recorded on the
memory card
is
shown in the Shooting information display
or
viewfinder.
Ifthere
is
not
enough memory
to
store additional photographs
at current settings, the display will flash
as
shown at right. No
further photographs can be taken until the memory card
has
been
replaced or photographs have been deleted
(!I
34,
96).
 Loading...