•
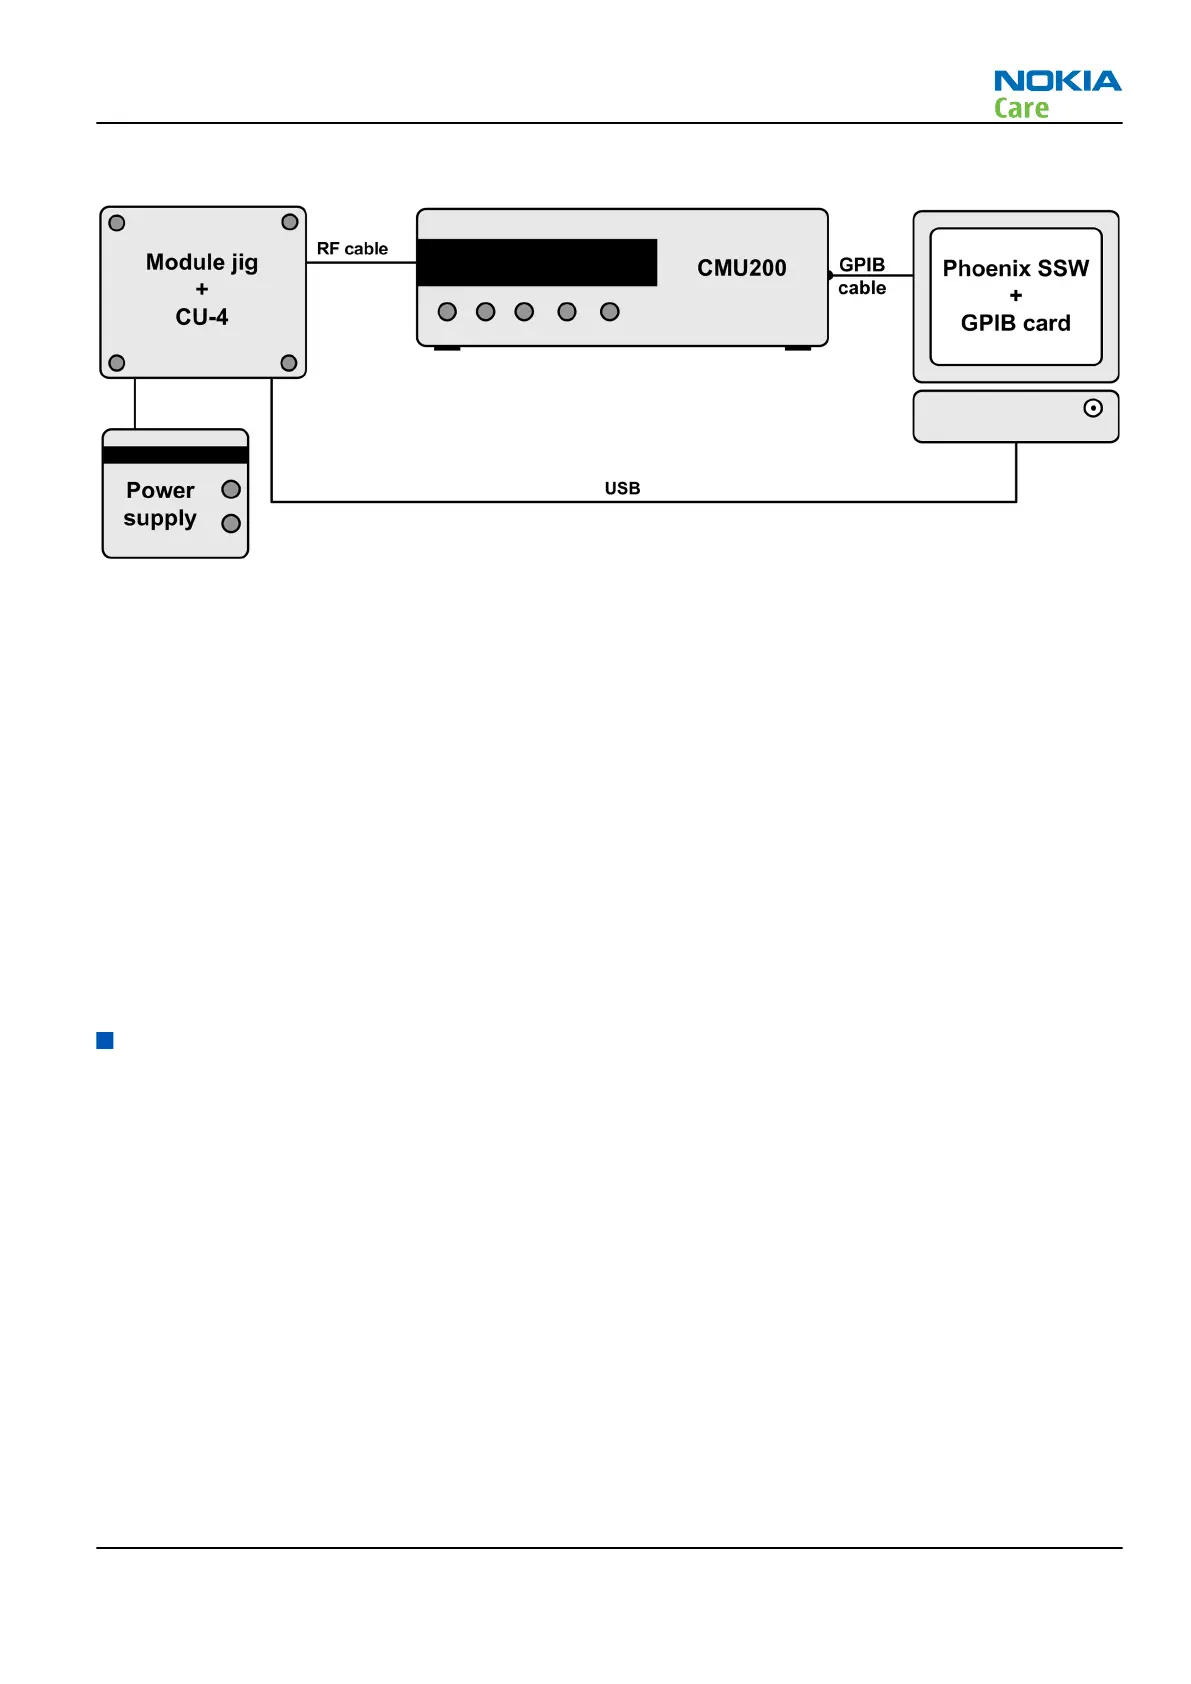
Signal analyser (TX), signal generator (RX) and RF-splitter or one device including all.
Figure 18 Auto tuning concept with CMU200
Auto tuning procedure
Prerequisites
Install the phone-specific data package, e.g.
Nokia_firmware_RM-509_DP20_3.471__sw-ce3.37.exe
.
The data package defines the phone-specific settings.
Steps
1. Make sure the phone (in the jig) is connected to the equipment. Else, some menus will not be shown in
Phoenix.
2. Go to loss settings by selecting Tuning (Alt_U)→SET LOSS from the menu.
3. Set the loss between CMU200 and the phone. (Total loss = cable + jig)
4. Go to auto tuning by selecting Tuning (Alt_U)→Auto-tune (Alt_A) from the menu.
5. Start auto tuning by clicking the Tune button.
Self test troubleshooting
Phoenix self test troubleshooting
Context
Always start the troubleshooting procedure by running the Phoenix self tests. If a test fails, please follow the
diagram below.
If the phone is dead and you cannot perform the self tests, go to Dead or jammed device troubleshooting
(page 4–7) in chapter 3, Baseband troubleshooting and manual tuning guide.
Note: Self tests are recommended to be made when phone is in jig and a 50Ω load connected to
the RF connector. Otherwise power tests may fail depending on antenna load
RM-509; RM-510; RM-511
RF Troubleshooting
Issue 2 COMPANY CONFIDENTIAL Page 4 –7
Copyright © 2009 Nokia. All rights reserved.
 Loading...